How to Crochet Backpack
Crocheting a backpack not only allows you to showcase your creativity but also results in a functional and stylish accessory. Whether you’re a seasoned crocheter or a beginner looking to hone your skills, this guide will walk you through how to crochet backpack. From selecting the right yarn and tools to mastering the essential stitches, you’ll learn how to craft a unique item that reflects your personal style and meets your needs. Join us on this crafty journey to transform yarn into a practical piece of art!
Benefits of Crocheting Your Own Backpack
Crocheting your own backpack offers a multitude of benefits that go beyond mere aesthetics. Firstly, it allows for complete customization; you can choose the colors, patterns, and size that suit your personal style and needs. This means you can create a one-of-a-kind accessory that reflects your individuality.
Additionally, the process of crocheting can be incredibly therapeutic, providing a sense of accomplishment and reducing stress as you immerse yourself in a creative outlet. Moreover, making your own backpack can be more economical compared to purchasing retail options, especially if you have leftover yarn from past projects. Lastly, the satisfaction derived from crafting something with your own hands is unparalleled, making it not just a functional item, but a cherished piece of art.
Materials and Tools Needed
To get started on your crocheted backpack, you’ll need to gather some essential materials and tools. Here’s a list to help you prepare:
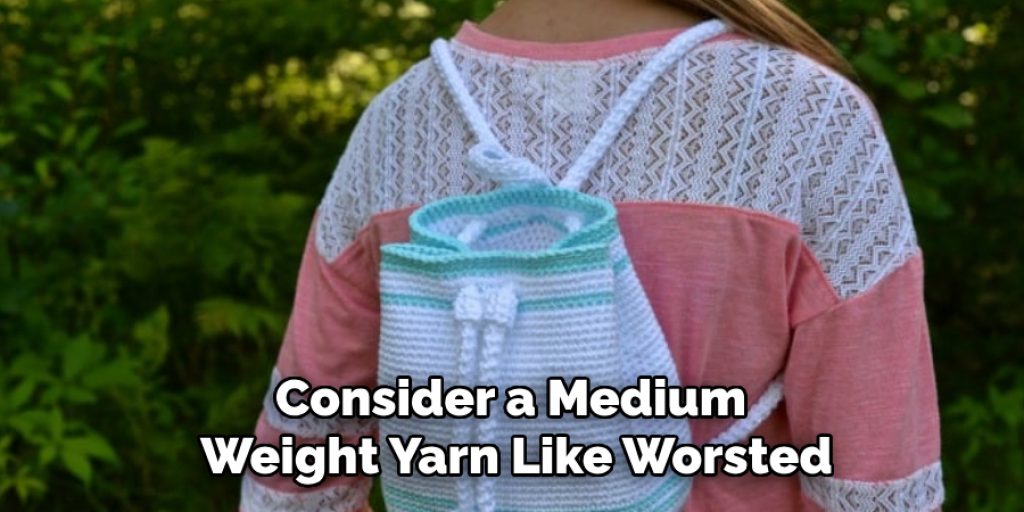
- Yarn: Choose a medium weight yarn (such as worsted weight) for durability and ease of handling. Consider selecting multiple colors to create a unique design.
- Crochet Hook: Depending on the yarn you select, a size H (5.0 mm) or I (5.5 mm) crochet hook is typically suitable. Check your yarn label for recommendations.
- Scissors: A good pair of scissors will help you cut the yarn cleanly as you work.
- Tapestry Needle: This is necessary for weaving in loose ends and sewing seams together once your backpack is complete.
- Measuring Tape: Use this to ensure your project meets the desired dimensions.
- Stitch Markers: These can help you keep track of your stitches or note specific sections of your work as you crochet.
- Pattern or Guide: If you’re following a specific design, have your pattern handy. Alternatively, you can create your own design by sketching it out.
10 Methods How to Crochet Backpack
1. Choosing the Right Yarn and Hook
The first step in crocheting a backpack is selecting the appropriate yarn and hook. For a durable and functional backpack, choose a yarn that is sturdy and resilient, such as cotton, acrylic, or a blend that provides both strength and flexibility. The weight of the yarn will affect the overall size and texture of the backpack, so consider a medium-weight yarn like worsted or DK for a balanced result. Pair the yarn with a crochet hook that matches its thickness—typically, a hook size recommended on the yarn label will ensure proper gauge and stitch definition. Proper selection of yarn and hook is crucial for achieving a sturdy and well-constructed backpack that will hold up to daily use.
2. Creating a Swatch to Determine Gauge
Before starting your backpack, it’s essential to create a swatch to determine your gauge. A gauge swatch allows you to ensure that your crocheted fabric will match the dimensions and fit of your intended design. To create a swatch, crochet a small square or rectangle in the pattern or stitch you plan to use for your backpack, following the yarn and hook size you selected. Measure the swatch to determine how many stitches and rows fit within a given area, usually 4 inches square. Adjust your hook size or yarn weight as needed to match the gauge required by your pattern or to achieve the desired size and fit for your backpack.
3. Choosing a Pattern and Design
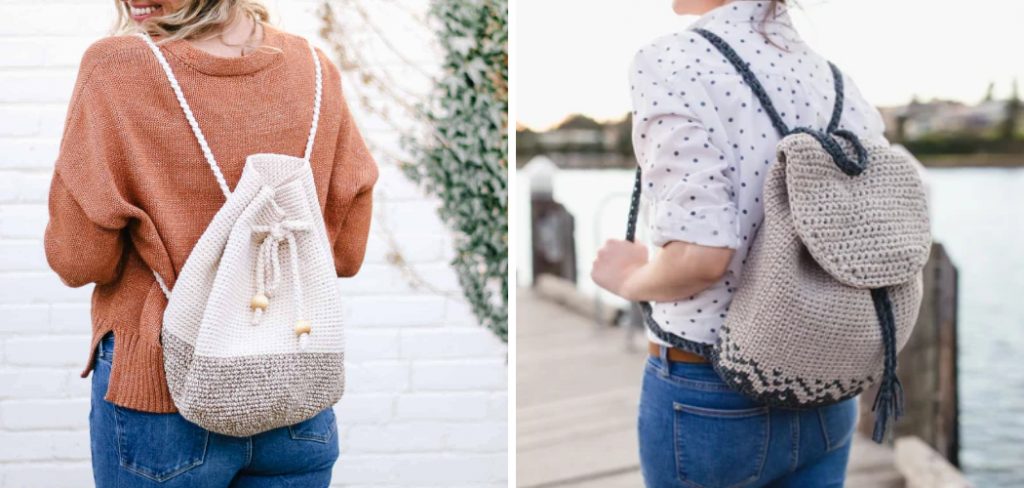
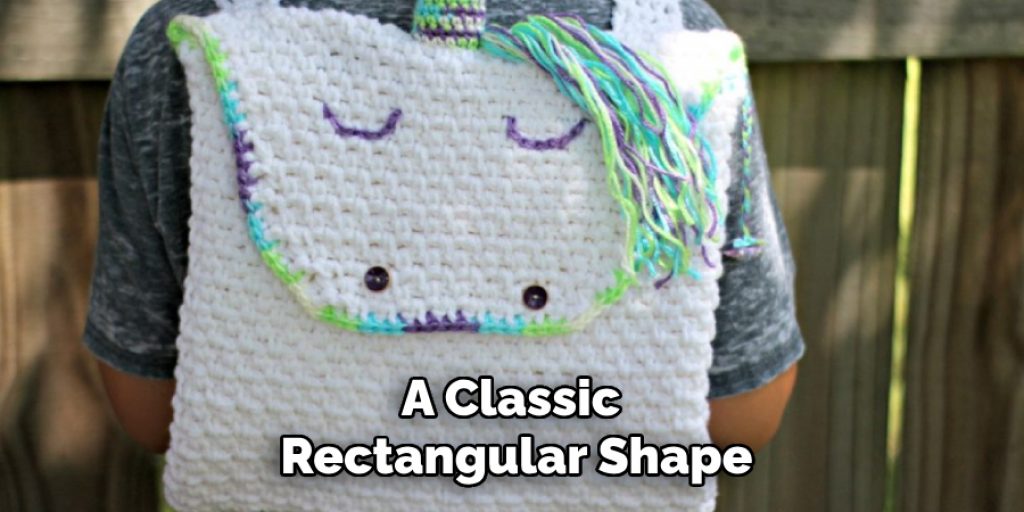
Selecting a pattern and design for your crochet backpack is a crucial step that determines the overall look and functionality of the finished project. Patterns can range from simple, minimalist designs to more intricate and detailed styles. Decide whether you want a classic rectangular shape, a round or bucket-style bag, or a more unique and customizable design. Many crochet patterns are available online, in books, or through pattern designers, offering a variety of styles and levels of complexity. Consider factors such as the size of the backpack, the type of closure (e.g., drawstring, flap, or zipper), and any additional features like pockets or embellishments when choosing your pattern.
4. Crocheting the Main Body of the Backpack
To begin crocheting the main body of your backpack, follow the pattern instructions to create the foundational shape. This typically involves crocheting a series of rows or rounds to form the body of the bag. For a rectangular backpack, you’ll work back and forth in rows, while a circular or bucket-style bag will be crocheted in rounds. Pay attention to the increases and decreases specified in the pattern to shape the backpack as needed. Make sure to keep your stitches consistent and your tension even to ensure a uniform and well-structured bag.
5. Adding and Crocheting the Straps
Once the main body of the backpack is complete, you’ll need to add and crochet the straps. Straps can be worked separately and then attached to the main body, or they can be crocheted directly onto the bag. For a simple strap, crochet a long, narrow strip that is wide enough to be comfortable and strong. You may choose to add additional reinforcement or padding to the straps for extra comfort. Attach the straps to the backpack by sewing them securely to the top edges or by using a slip stitch to join them if crocheting directly onto the body. Ensure that the straps are evenly spaced and securely attached to support the weight of the backpack.
6. Incorporating Pockets and Additional Features
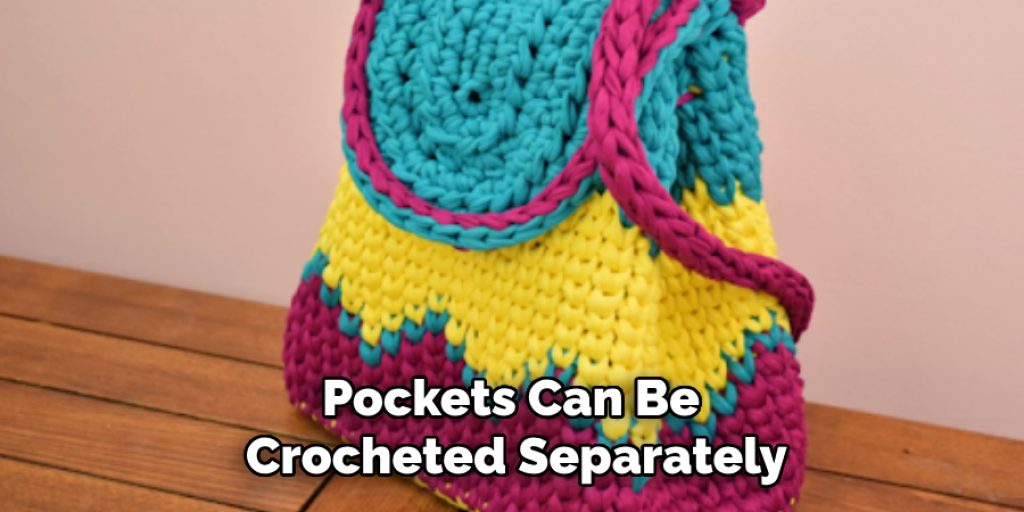
Adding pockets and other features to your crochet backpack can enhance its functionality and style. Pockets can be crocheted separately and sewn onto the bag, or they can be integrated into the design as you work. Consider adding an interior pocket for small items, an exterior pocket for easy access, or even decorative elements such as appliqués or fringe. Follow the pattern instructions or your design plan to incorporate these features, and make sure to securely attach them to avoid any issues with durability. Customizing your backpack with additional features allows you to create a personalized and practical accessory that meets your specific needs.
7. Finishing Edges and Seams
To give your crochet backpack a polished and professional appearance, finish the edges and seams carefully. This can involve adding a border or trim around the edges of the bag to create a clean, defined look. If the pattern includes instructions for a decorative edge, follow those guidelines to enhance the visual appeal of the backpack. For any seams where pieces were joined, use a slip stitch or whip stitch to ensure that they are securely connected and that there are no gaps or loose ends.
8. Adding Closures and Fastenings
To ensure that your crochet backpack is functional and secure, you’ll need to add closures and fastenings. Depending on the design of your backpack, this could involve adding a zipper, button, snap, or drawstring. For a zipper, sew or crochet it into the opening of the backpack, ensuring that it is properly aligned and securely attached. For a drawstring closure, crochet or sew a casing around the top of the bag and thread a cord or ribbon through it. Ensure that the closure is easy to use and effective at keeping the contents of the backpack secure.
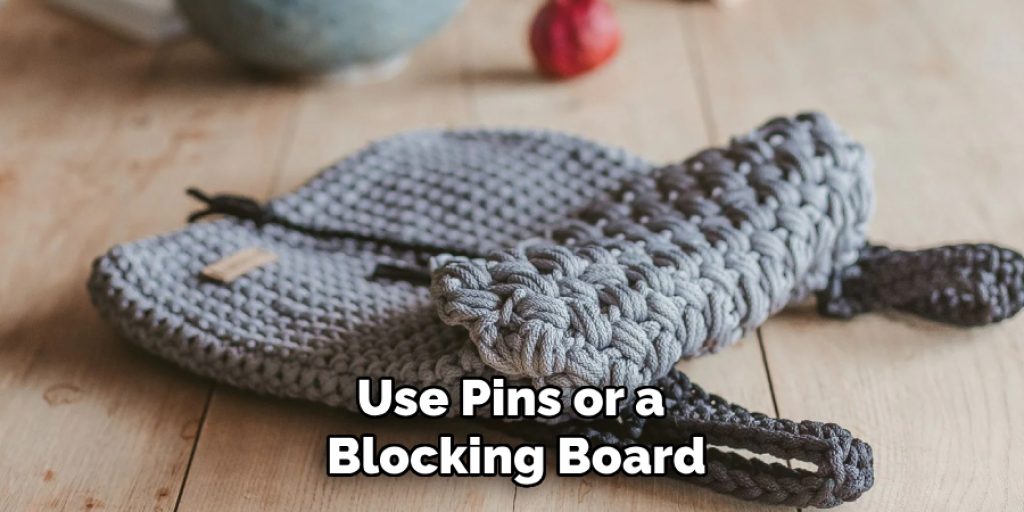
9. Blocking and Shaping the Finished Backpack
Once your crochet backpack is complete, it’s important to block and shape it to ensure that it holds its form and has a polished appearance. Blocking involves wetting the finished backpack and shaping it to the correct dimensions, then allowing it to dry completely. This process helps to set the stitches and eliminate any unevenness or curling. Use pins or a blocking board to shape the backpack as desired, paying attention to the overall size and shape. Once the backpack is dry, check for any areas that need additional adjustments or finishing.
10. Adding Final Touches and Personalizing
To complete your crochet backpack, add any final touches and personalizations that reflect your style and preferences. This could include adding decorative elements such as tassels, embroidery, or patches. You might also consider adding a lining to the interior of the backpack for added durability and a finished look. Personalizing your backpack allows you to make it uniquely yours and enhances its functionality and aesthetic appeal.
Conclusion
Crocheting a backpack involves a series of steps that combine creativity, technique, and attention to detail. From selecting the right yarn and hook to crocheting the main body, adding straps, and incorporating closures, each step contributes to the final product. By following these methods and techniques, you can create a functional and stylish crochet backpack that reflects your personal taste and meets your practical needs. Thanks for reading, and we hope this has given you some inspiration on how to crochet backpack!
Elizabeth Davis
Elizabeth is a creative writer and digital editor based in the United States. She has a passion for the arts and crafts, which she developed from a young age. Elizabeth has always loved experimenting with new mediums and sharing her work with others. When she started blogging, she knew that DIYquickly would be the perfect platform to share her tutorials and tips. She's been writing for the blog from the beginning, and her readers love her helpful advice and easy-to-follow instructions. When she's not writing or editing, Elizabeth enjoys spending time with her family and friends.