
How to Crochet Loop Stitch
Knowing to crochet loop stitch is essential for the intermediate crocheter. It’s a great way to add texture and interest to your work. Plus, it’s straightforward. All you need is some yarn, a crochet hook of the appropriate size, and some patience! Loop stitch creates an interesting ripple pattern that can be used on many projects, from hats to scarves to blankets.
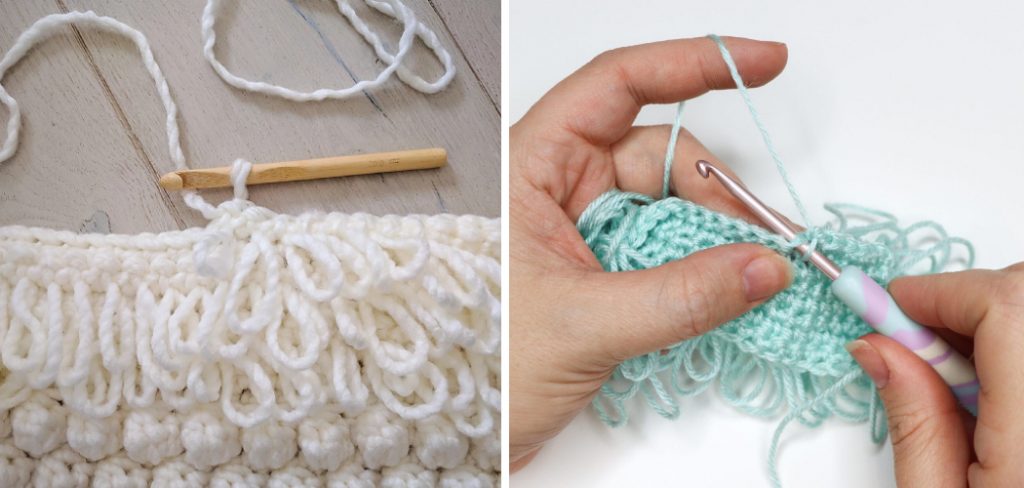
The loop stitch is a great way to add texture and detail to a crochet project. It can be used to create interesting designs or simply as an accent stitch for color. This technique is also very effective when crocheting with multiple colors, allowing you to combine two (or more!) colors in one loop stitch. The loops created by the stitch also have a unique, decorative look. In this blog post, You will learn how to crochet loop stitch.
Materials You Will Need
- Crochet hook
- Yarn
- Scissors
- Tape measure
- Safety pin or stitch marker
- Needle
- Blocking board/blocking wires (optional)
- Blocking pins (optional)
Step-by-Step Processes for How to Crochet Loop Stitch
Step 1: Inspect Your Hook
Before you start crocheting loop stitch, make sure that your crochet hook is in good condition. Check for any dullness or sharp edges that could snag the yarn. Decide which type of yarn you want to use and make sure it’s compatible with the size of the hook you have. For standard loop stitch, you want to use a DK or worsted weight yarn.
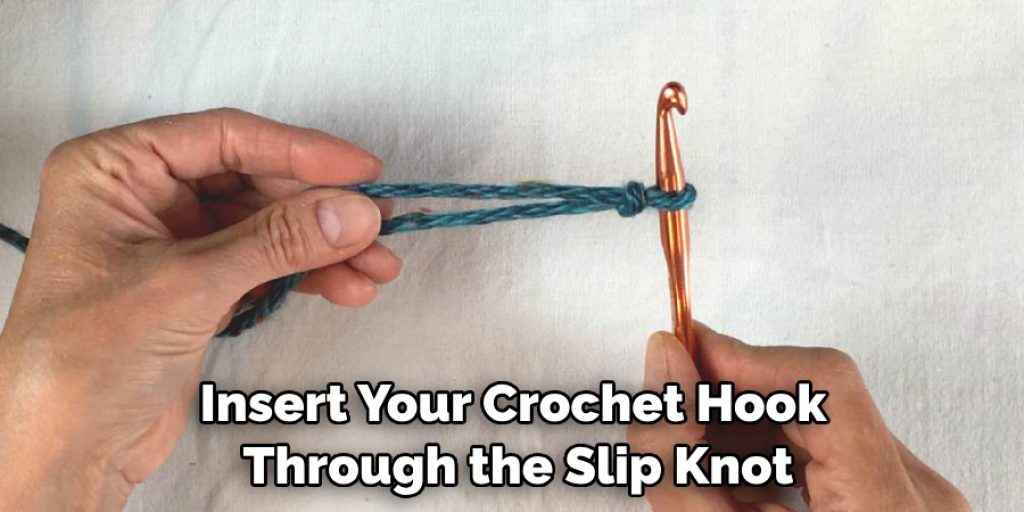
Step 2: Make a Slip Knot
To begin, make a slip knot by looping the end of the yarn around your index finger twice then pulling through the center. Pull the tail end tight to secure it. Next, insert your crochet hook through the slip knot on your hook and pull it back through the loop. You should now have two loops on your hook.
Step 3: Yarn Over Hook
After you’ve made sure you have two loops on your hook, yarn over the hook (i.e., wrap the yarn around the shaft of your crochet hook). Now draw the yarn through the first loop on your hook. You should now have two loops remaining on your crochet hook.
Step 4: Yarn Over Hook Again
Yarn over the hook again to complete the crochet loop stitch. This will create a third loop on your hook. Now, draw the yarn through both of the loops on your hook. This will create a new loop on your hook.
Step 5: Pull Yarn Tail Tightly
Pull the tail (the yarn not connected to the ball) tightly so that you have a nice, even loop stitch. Once you have completed the loop stitch, you can continue with your pattern or move on to the next stitch.
You’ve just learned how to crochet a loop stitch. With practice, this stitch will become second nature, and you’ll be able to create amazing projects with it in no time.
Precautions for How to Crochet Loop Stitch
- Ensure that the crochet hook has a sharp tip to reduce snagging of yarn and finished stitches.
- Take care when crocheting the loop stitch to avoid any loose ends coming out from the fabric.
- If you’re looking for a consistent pattern, ensure all the loops are at the same height before finishing each row.
- Always cut the yarn at least three inches away from the last loop when you have finished your work to avoid an unfinished look.
- Before trying out a new stitch, practice on a swatch of fabric or even a scrap piece of paper to get accustomed to how it works before actually working on your project.
- Ensure you have the right crochet hook size for your yarn weight.
- When working with multiple colors, make sure to finish off each color before moving on to the next one. This will help keep your work neat and organized.
- Always read through the pattern instructions thoroughly before starting so that you can understand how to perform the stitch properly and complete the entire project.

Following these precautions when crocheting the loop stitch will help ensure that your projects look professional and beautiful.
What Kinds of Projects and Items Can You Create Using the Loop Stitch?
The loop stitch can be used to create various projects and items. Scarves, cowls, shawls, hats, bags, blankets, and much more are all possible with this fun stitch. You can use the stitch to make items that have a unique texture or just as a way to add some extra flair to your projects. It is also a great stitch to use if you’re looking for a way to add some extra warmth to your creations. No matter what kind of project you are working on, the loop stitch will surely be a welcome addition.
The loop stitch can also be used in combination with other stitches and techniques. If you want to create an interesting color pattern or texture in your projects, the loop stitch is great. No matter what kind of project you’re working on, the loop stitch will surely bring something special. From scarves and blankets to hats and bags – this fun technique will help you create amazing items you can be proud of.
What Are Some Common Mistakes to Avoid When Making a Loop Stitch?
When crocheting a loop stitch, it’s important to make sure you’re following the instructions correctly. Here are some common mistakes to avoid when making a loop stitch:
- Not inserting the hook through the yarn over Make sure your crochet hook goes through both loops of the yarn over for each stitch. If you don’t get both loops, your stitches won’t look as neat and uniform.
- Not keeping tension: Too much or too little tension when crocheting can cause your loop stitch to be too loose or tight. Ensure you have the right amount of tension while stitching so that your work looks professional and not sloppy.
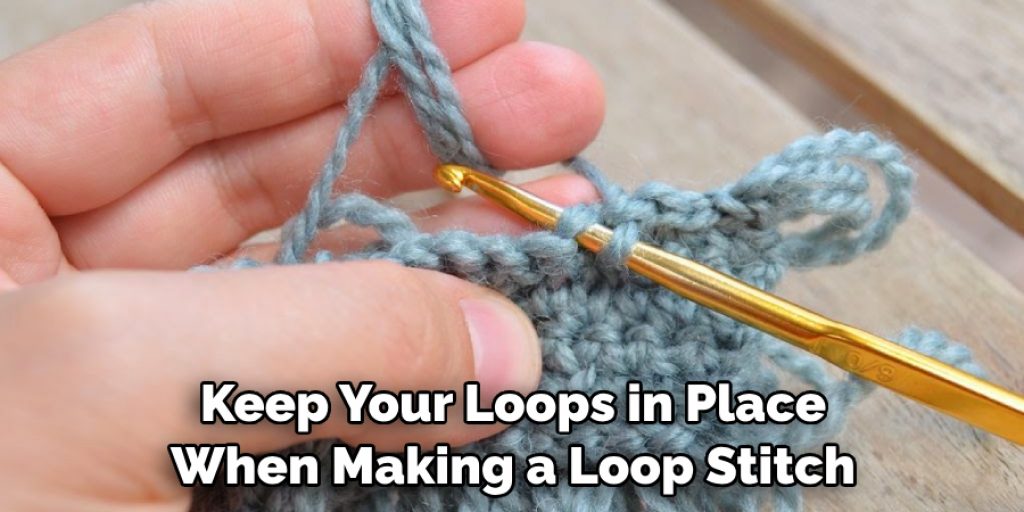
- Slipping out of the loops: Make sure you keep your loops in place when making a loop stitch. Slipping out of the loops can cause stitches to unravel and look messy.
- Not counting the stitches: Keeping track of your stitches is essential when crocheting, especially with a loop stitch. Counting each stitch will help you make tight and even loops that look uniform and professional.
By avoiding these common mistakes, you’ll be able to make beautiful loop stitches with ease. With practice and patience, you can master crocheting a loop stitch in no time.
What Kind of Maintenance Do You Need to Do to Keep Your Loop Stitches Looking Good?
The loop stitch, while one of the simplest crochet stitches, still requires some maintenance to keep it looking its best. First and foremost, you must ensure you are using the correct hook size for your yarn weight. If the hook is too large for the yarn, the loops will be too loose and if it’s too small, they will be too tight.
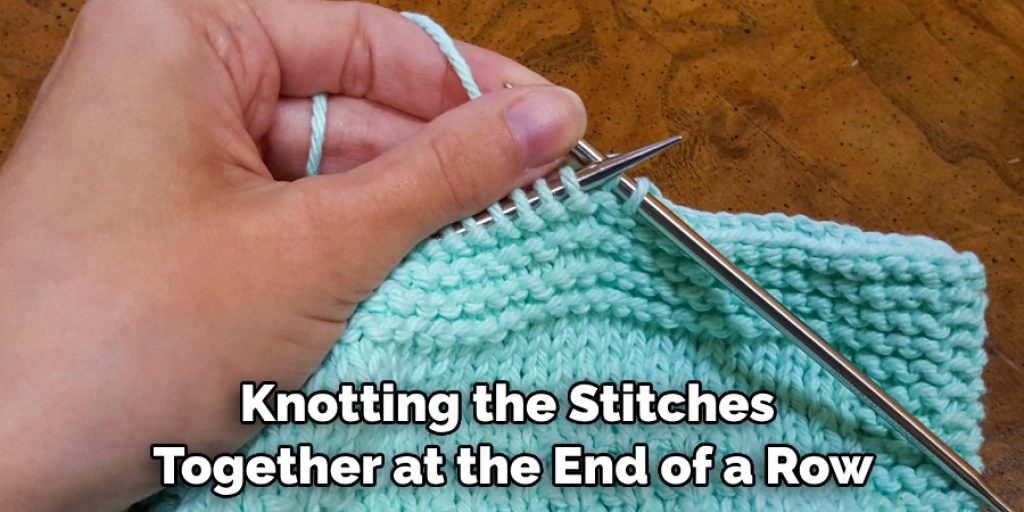
Secondly, when knotting the stitches together at the end of a row, pull them tightly so that your loops keep their shape. Finally, when working in rounds, it’s important to work multiple stitches into one loop as you go around in order to avoid creating any gaps along the way. With proper maintenance and care of your crochet loop stitch, you can ensure that your project will look great for years.
How Can You Add Additional Details and Embellishments to Your Loop Stitches?
Once you’ve mastered to crochet loop stitch, there are a few creative ways you can add some extra pizazz. Adding details and embellishments is a great way to make your project unique. Here are some ideas for adding additional details and embellishments:
- Use multiple colors of yarn when making the loops. You can alternate colors or use a single color throughout the project. Alternate loop heights to give your project more texture and interest.
- Add beads, buttons, or sequins to the loops. This is an easy way to add sparkle and glamour to your stitching.
- Try creating different shapes like stars, hearts, circles, and squares by varying the size and shape of the loops.
- Experiment with different yarns and textures to create a more unique look. You can also mix it up using different loop stitch techniques, like combining puff stitches with treble crochet stitches or alternating between single and double crochets.
- Create multiple layers of your stitching for a 3D effect. You can also use different felting techniques to add texture and detail.
These are just a few ideas for adding details and embellishments to your loop stitches. With a bit of creativity, you can create wonderful pieces that are unique and beautiful.
Conclusion
The main disadvantage of the loop stitch is that it can be difficult to keep track of how many loops you have created when making a pattern. If you lose count, it can be hard to unravel the stitches and start again without making noticeable mistakes in the fabric.
In conclusion, the crochet loop stitch is one of the most versatile crochet stitches. It can create anything from toys, accessories, and garments to intricate home decor items. It looks great when crocheted with various yarns and fibers, allowing you to create unique pieces each time you use it. I hope this article has been beneficial for learning how to crochet loop stitch. Make Sure the preventive measures are followed chronologically.
Nancy Behan
Nancy is an embroidery artist, fashion blogger and a full time editor at DIY quickly. Nancy edits the fashion section on DIY quickly, focusing on the embroidery and cross stitch articles, alongside with fabric and other costume design elements. She graduated from the University of Michigan with a Bachelor of Arts in Art History. She loves to work on her own projects, read books and watch romantic movies in her spare time.


