
How to Crochet the Cable Stitch
Crocheting the cable stitch adds a touch of elegance and sophistication to any project. With its intricate design that resembles twisted cables, this stitch creates beautiful texture and depth in your crochet work. Whether you’re a beginner or an experienced crocheter looking to expand your skills, mastering the cable stitch opens up a world of creative possibilities.
In this article, we will delve into the art of crocheting the cable stitch, providing you with step-by-step instructions on how to crochet the cable stitch and tips to help you achieve stunning cable patterns. From understanding the anatomy of the cable stitch to learning the techniques required, we will guide you through the process, empowering you to incorporate this eye-catching stitch into your future crochet projects. So grab your crochet hook and yarn, and let’s unravel the secrets of the cable stitch together.
Introducing the Cable Stitch in Crochet
The cable stitch is an advanced crochet technique that creates a three-dimensional texture. It’s often used in sweaters, afghans and other garment projects. The cable stitch requires multiple loops of yarn to be crossed over each other, creating a unique-looking chain of stitches. To create the cable pattern in crochet, you will need to know how to work post stitches and the special cable stitch.
To begin, you need to work post stitches in your project. Post stitches are stitches that are worked around the post of a previously made stitch rather than into the top loops of the previous row. To make a post stitch, insert your hook under the back loop or front loop of two stitches and wrap it with yarn. You will then draw up a loop and pull through two loops on your hook before completing as a regular single crochet stitch. This process is repeated for each post stitch needed for your project.
Once you’ve worked several rows using post stitches, you can begin making cables in your project. To start, you will need to have four or more loops created from the post stitches on your hook. When you make the cables, you will be crossing one loop over another before finishing off with a single crochet. This creates the cable pattern in your project.
The cable stitch is a great way to add more texture and interest to your crochet projects. With some practice and patience, it can become one of your favorite techniques! Once you’ve mastered this technique, don’t forget to put it into practice when creating sweaters and other garments!
Exploring the Textured and Intricate Appearance of the Cable Stitch
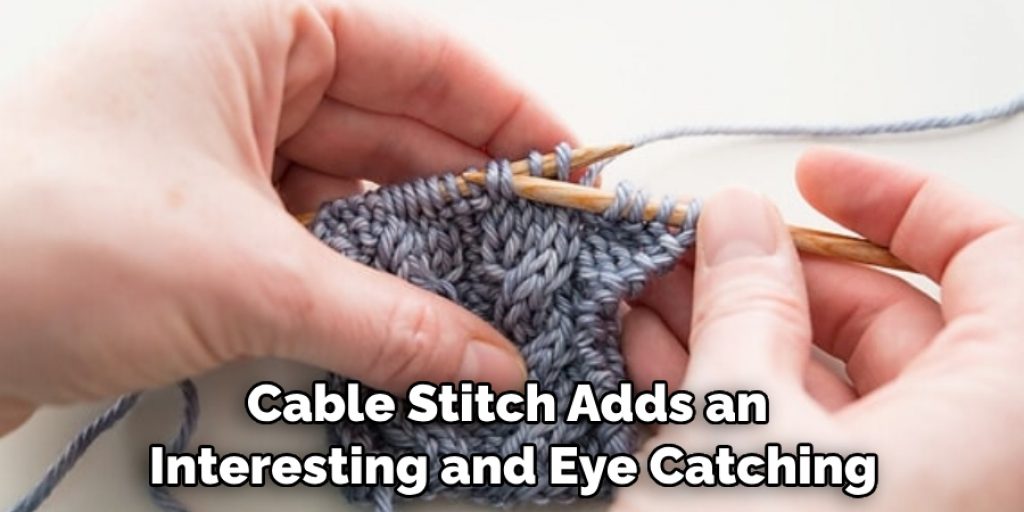
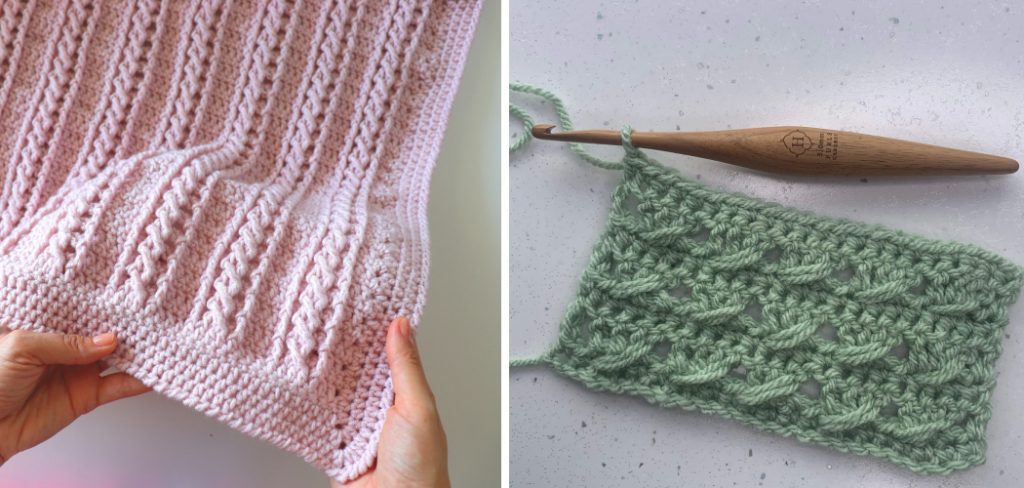
The cable stitch is one of the most popular crochet stitches due to its intricate and textured look. This unique stitch creates a raised, three-dimensional pattern that can be used for a variety of projects. From sweaters to blankets, cowls to shawls, the cable stitch adds an interesting and eye catching element to your work.
Getting started with the cable stitch can seem intimidating at first but once you get the hang of it you’ll find it quite simple! To begin, start with any even number foundation chain rows. Then make two stitches in each loop along the chain row. After this, skip two loops and repeat until you reach the end of the row. The next row should begin by inserting your hook back into the second skipped stitch from the previous row. You will make two stitches in each loop as you continue to work down the row. For more complex patterns, increase or decrease the number of skipped loops accordingly.
It’s important to remember when working with the cable stitch that every odd-numbered row is a reverse of the even-numbered rows for this particular pattern. This means that if you complete an even number row and then move to an odd number row, you will need to mirror what you did on the even-numbered rows by reversing it. To do this, start at the end of the chain and work backward so that your stitches are made in opposite directions on either side of your original starting point.
10 Steps How to Crochet the Cable Stitch
Step 1: Gather Your Materials
Before diving into the cable stitch, gather all the necessary materials. You will need a crochet hook, preferably one with a comfortable grip and a yarn suitable for the desired project. It’s recommended to choose a smooth yarn that allows the stitches to glide easily.
Step 2: Understand Cable Stitch Anatomy
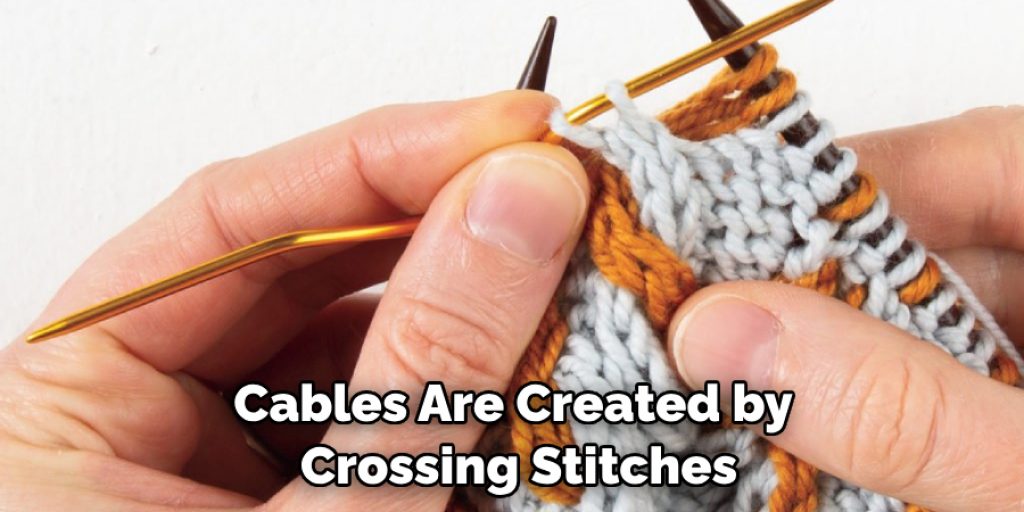
To successfully crochet cables, it’s essential to understand the anatomy of the stitch. Cables are created by crossing stitches over each other, forming a distinctive interwoven pattern. Each cable consists of front and back post stitches, which are worked around the previous row’s stitches.
Step 3: Create a Foundation Row
Begin by creating a foundation row of stitches. The number of stitches required will depend on the cable pattern you wish to create. Remember to work loosely to ensure flexibility in the subsequent steps.
Step 4: Identify the Cable Stitches
Once you’ve established the foundation row, it’s time to identify the stitches that will form the cable. Determine the desired placement and count the appropriate number of stitches to be crossed. Mark these stitches to keep track of their location.
Step 5: Prepare for Cable Stitching
To prepare for the cable stitch, work the required number of regular stitches as indicated by the pattern. This ensures that the cable stitches have a solid foundation to rest upon. Take care to count accurately and maintain an even tension throughout.
Step 6: Begin Crossing the Stitches
Now it’s time to cross the stitches to create the cable effect. To do this, work the designated number of front post stitches, inserting the hook from the front to the back around the corresponding stitch in the previous row. Leave these front post stitches on a separate stitch holder or cable needle.
Step 7: Work the Remaining Stitches
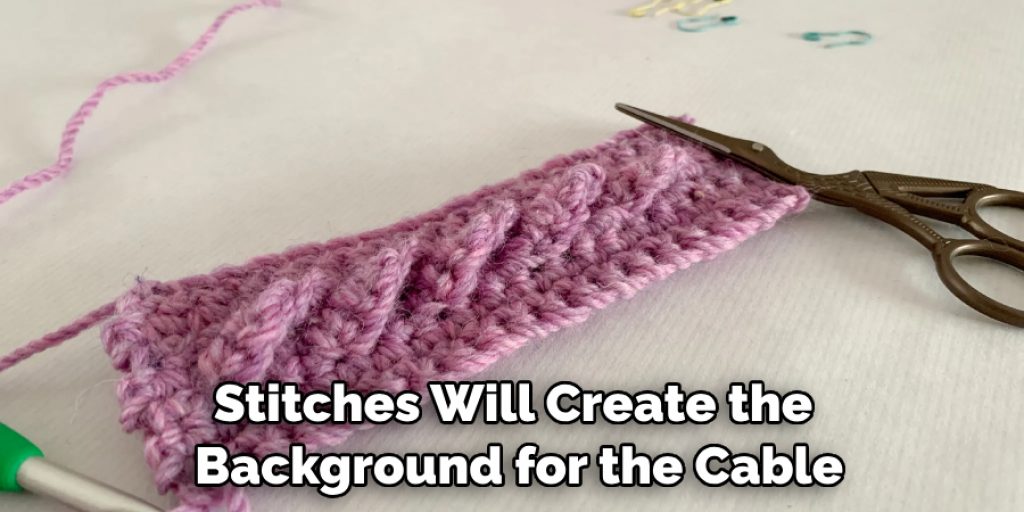
With the cable stitches held aside, continue working the remaining stitches in the pattern as instructed. These stitches will create the background for the cable and provide structure to the overall design.
Step 8: Complete the Cable Cross
Return to the cable stitches held on the separate stitch holder or cable needle. Carefully work the front post stitches, crossing them over the background stitches to create the cable effect. Follow the pattern’s instructions to ensure the correct crossing direction and stitch placement.
Step 9: Continue with the Pattern
Once the cable cross is complete, resume working the pattern as directed. This may involve a combination of regular stitches, background stitches, and additional cable crosses if desired. Maintain consistency in tension and stitch size throughout your work.
Step 10: Finishing Touches and Blocking
Once you’ve completed the cable stitch section of your project, finish off your work according to the pattern’s instructions. This may include bordering, edging, or other finishing touches. Consider blocking your project to even out the stitches and enhance the cable stitch’s definition and overall appearance.
Identifying the Stitches that Will Form the Cable
The cable stitch consists of three parts: two stitches that form the main body and a third stitch known as the turning chain. The first two stitches, usually referred to as the “cable loops” or simply the “loops”, are created by making a series of double crochets starting in one stitch and continuing for four to five more before ending in the same original stitch. This forms an elongated loop, with each double crochet representing one ‘twist’ in the cable.
The turning chain is made by skipping over one or more stitches—it’s important to note that this number will vary depending on how long you want your cables to be!—and then working one single crochet into the next stitch. If you’re using the cable stitch to form a border or edging, it’s important to remember that the turning chain should always be worked into an even number of stitches, so make sure to count them carefully as you go!
Once you’ve identified and made all three components of the cable, it’s time to move onto actually crocheting it! Start by working two single crochets into each of the loops from your first row—this will create a ribbed look on one side of your project. Flip your work over and crochet two more single crochets in each loop again—these two rows will form the main body of your cables.

Conclusion
To summarize, the cable stitch is a beautiful and intricate crochet stitch that anyone can learn with enough practice. It requires you to tension the yarn correctly, create the cable loop, and alternate between stitches in various rows. Understanding these basic principles can take your crochet skills to a new level and create a beautiful texture for many of your projects.
Now that you know how to crochet the cable stitch, why not give it a try? With some practice, you will be able to make this bold traditional knit-like pattern look like a piece of art! So don’t wait any longer—give it a go and see what incredible things you can create with the cable stitch. As always, have fun and enjoy making something unique each time!
Nancy Behan
Nancy is an embroidery artist, fashion blogger and a full time editor at DIY quickly. Nancy edits the fashion section on DIY quickly, focusing on the embroidery and cross stitch articles, alongside with fabric and other costume design elements. She graduated from the University of Michigan with a Bachelor of Arts in Art History. She loves to work on her own projects, read books and watch romantic movies in her spare time.


