
How to Decorate Car Freshies
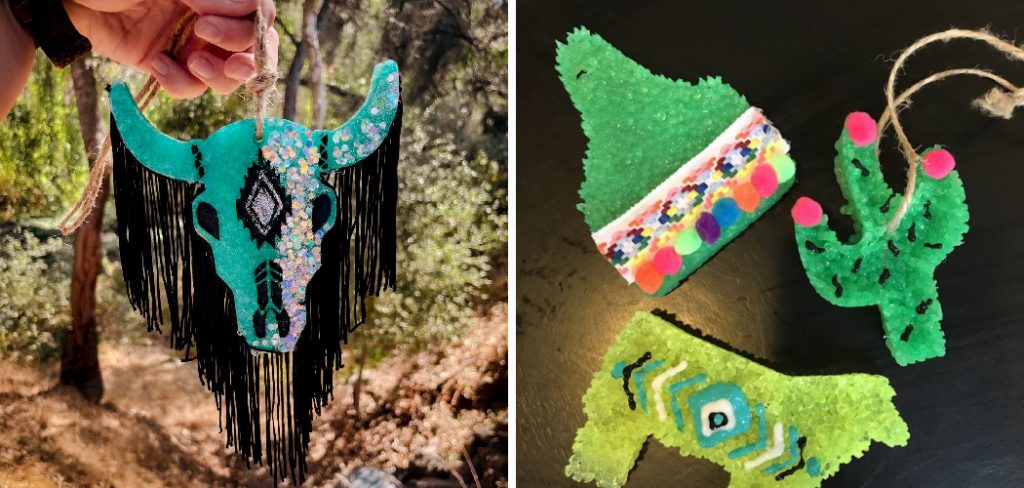
Car freshies, also known as car air fresheners, are a great way to add a touch of personality and freshness to your vehicle. Rather than settling for the mass-produced air fresheners you can find at any store, why not try decorating your own? Not only will it be more unique and one-of-a-kind, but it will also be a fun and creative activity. Here’s a step-by-step guide on how to decorate car freshies.
Materials Needed
- Wooden or paper car freshie cutouts (can be found at craft stores)
- Paint, markers, or other decorating materials of your choice
- Ribbon or string for hanging
- Scissors
- Glue or tape
12 Steps on How to Decorate Car Freshies
Step 1: Choose Your Design
The first step is to decide on a design for your car freshie. You can opt for a simple solid color, a fun pattern, or even a personalized design like your initials or favorite quote. And don’t be afraid to get creative – the possibilities are endless!
Step 2: Gather Your Materials
Once you have your design in mind, gather all the necessary materials. Make sure you have enough paint or markers to cover the entire surface of your car freshie. Also, choose a type of paint or marker that is compatible with the material of your freshie cutout (wooden or paper).
Step 3: Prepare Your Work Area
Before you start decorating, make sure to lay down some newspaper or a protective cover in your work area. This will prevent any accidental spills or stains on your furniture. So, choose a flat and well-ventilated area to work on.
Step 4: Paint Your Freshie
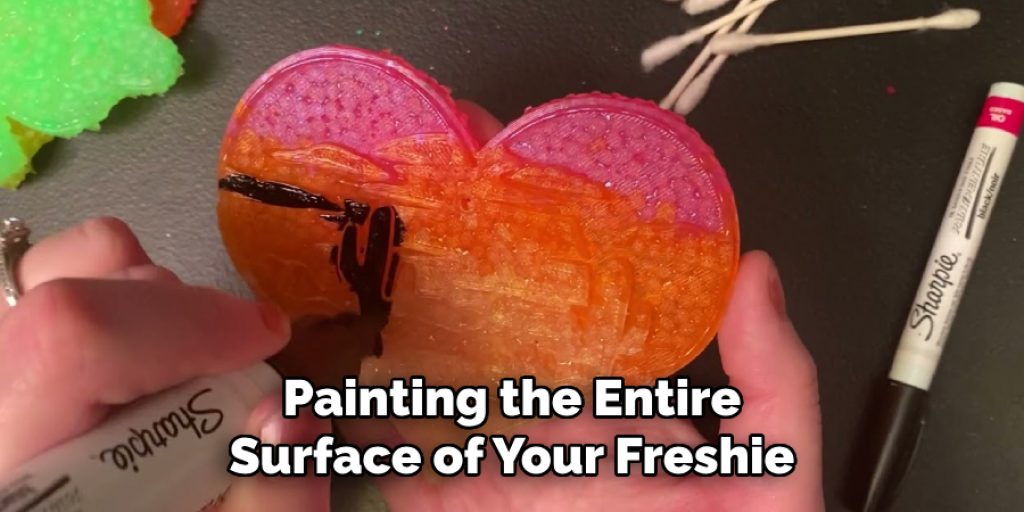
If you have chosen to use paint for your design, start by painting the entire surface of your freshie in your desired color. You may need to apply multiple coats for an even finish. Let each coat dry completely before adding another layer.
Step 5: Draw or Write Your Design
If you are using markers or other decorating materials, you can now start drawing or writing your design on the freshie. You can use stencils for more precise designs or freehand it for a more unique look.
Step 6: Add Details
To make your car fresher and even more eye-catching, consider adding some extra details like glitter or rhinestones. You can also use different colors to make your design pop. If you are using paint, let it dry completely before adding any additional details.
Step 7: Cut Out Your Design
Once your design is complete and all materials are dry, carefully cut out your freshie using scissors. Make sure to follow the shape of the cutout and be precise so that it hangs nicely in your car. As an option, you can also leave a border around your design for a more professional look.
Step 8: Punch a Hole
Using a hole puncher, make a small hole at the top of your freshie. This will be where you attach the ribbon or string for hanging. Evenly, space out the hole so that your freshie hangs straight.
Step 9: Thread the Ribbon
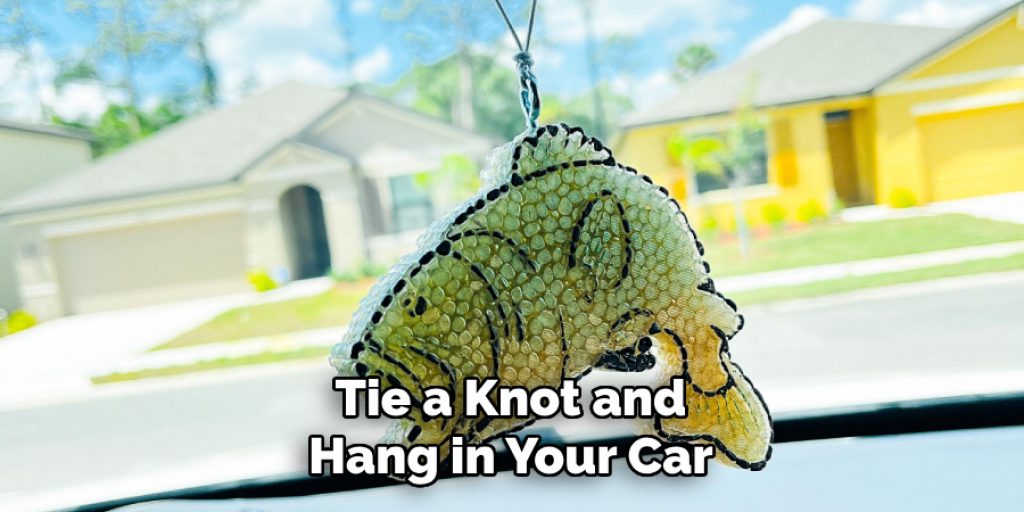
Take a piece of ribbon or string and thread it through the hole. Leave enough length on both ends to tie a knot and hang in your car. You can use different colored ribbons for a more colorful display. And if you prefer, you can also use a car freshie clip instead of ribbon for hanging.
Step 10: Secure the Ribbon
Once your ribbon is threaded through the hole, tie a knot at the ends to keep it in place. You can also add a dab of glue or tape on the back of the freshie to secure the ribbon even more. However, make sure the glue or tape does not show through to the front of your design.
Step 11: Let It Dry
Before hanging your new car freshie in your vehicle, let it dry completely. This will ensure that the paint and decorations are fully set and won’t smudge or come off easily. Then, give it a quick sniff to enjoy the scent of your chosen air freshener.
Step 12: Hang and Enjoy!
Finally, find the perfect spot in your car to hang your freshly decorated car freshie. You can hang it from the rearview mirror or on a hook near your dashboard. Not only will it add a pleasant fragrance to your vehicle, but it will also be a unique and personalized touch that reflects your style. And the best part? You can make as many freshies as you’d like to switch out whenever you feel like it!
Decorating car freshies is a fun and easy way to add a personal touch to your vehicle. By following these steps, you can create your own unique designs and have fun in the process. So, next time you need a car air freshener, why not try making your own?
9 Safety Measures to Keep in Mind While Decorating Car Freshies
1) Use Protective Gear
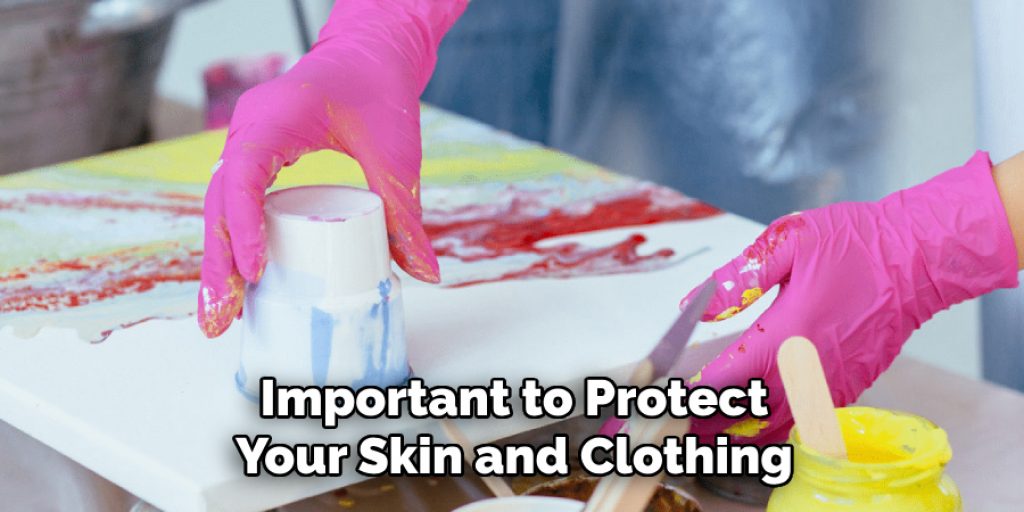
When working with paints, markers, or other decorating materials, it is important to protect your skin and clothing. Wear gloves and an apron to avoid any accidental stains or spills. And if you are using glitter or rhinestones, make sure to wear eye protection.
2) Work in a Well-Ventilated Area
Some paints and markers can emit strong fumes, so it is important to work in a well-ventilated area. This will prevent any potential health hazards from inhaling these fumes. While working, you can also open windows or turn on a fan for better air circulation.
3) Keep Decorating Materials Away from Children and Pets
Craft supplies and decorating materials can be harmful if ingested by children or pets. Make sure to store them in a safe place where they cannot reach them. Once you are done with your project, clean up any leftover materials immediately.
4) Use Sharp Scissors with Care
When cutting out your car freshie design, use sharp scissors and handle them with care. This will ensure a clean and precise cut while also preventing any accidental cuts or injuries. Then, make sure to properly store your scissors away from reach.
5) Follow Instructions for Decorating Materials
Different decorating materials may have specific instructions for use and safety precautions. Make sure to read and follow these instructions carefully before using them. This will help ensure the best results and prevent any potential hazards.
6) Avoid Using Flammable Materials
When choosing your decorating materials, avoid using anything that may be flammable. This is especially important if you plan on hanging your car freshie near the dashboard or any other area where it may come in contact with heat sources.

7) Keep the Work Area Clean and Organized
A clean and organized work area not only makes for a more enjoyable crafting experience but also reduces the risk of accidents. Make sure to clean up any spills or messes immediately and put away materials when not in use.
8) Use Non-Toxic Materials
Some decorating materials may contain harmful chemicals, so it is important to choose non-toxic options. This is especially important if you plan on using your car freshie for an extended period of time.
9) Dispose of Waste Properly
Once you are done making your car fresh, make sure to dispose of any waste materials properly. This includes throwing away used paints and markers in the appropriate containers and recycling any packaging. Keeping a clean and organized work area also helps with proper disposal. Overall, following these safety measures will ensure a fun and safe crafting experience when decorating car freshies.
8 Things to Avoid When Decorating Car Freshies
1) Using Permanent Markers
While they may seem like a convenient option, using permanent markers can cause issues when decorating car freshies. The ink from these markers tends to bleed and smudge easily and can also fade over time.
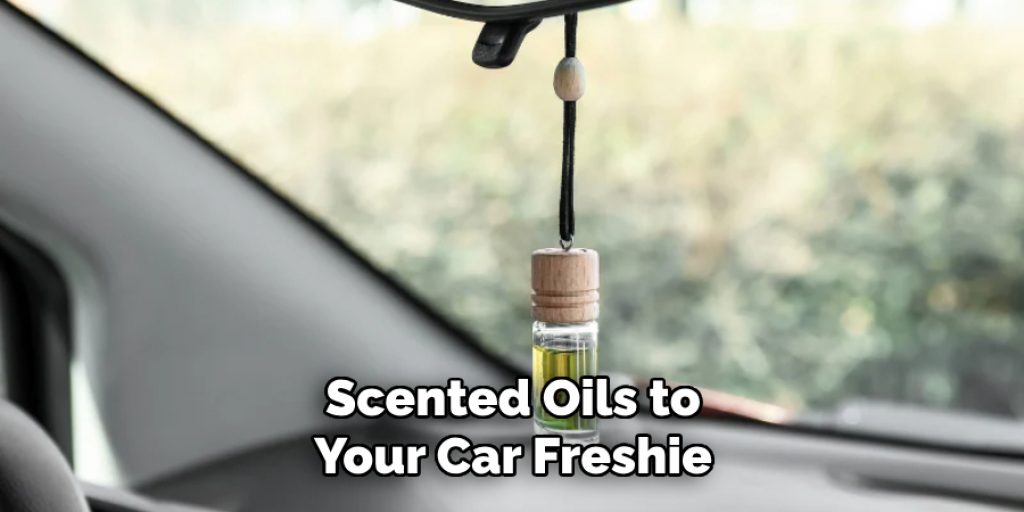
2) Overloading with Scented Oils
It may be tempting to add a lot of scented oils to your car freshie for a stronger fragrance. However, overloading the freshie with oils can cause it to become too heavy and potentially fall off its hanging spot.
3) Putting Paint on the String or Ribbon
Some people may be tempted to paint the string or ribbon that is used for hanging the freshie. However, this can cause the string to become stiff and difficult to tie or manipulate. Then, when hanging the freshie in your car, it may not hang as nicely or have the desired effect.
4) Using Sharp Objects for Decoration
While adding glitter and rhinestones can add a touch of sparkle to your design, using sharp objects like pins or needles can be dangerous. These objects can easily fall off the freshie and become a hazard if touched or ingested by children or pets.
5) Rushing the Drying Process
It is important to let your decorated freshie dry completely before using it in your car. Rushing this process can cause the paint and decorations to smudge or come off easily, resulting in a less-than-desirable final product.
6) Not Testing Materials First
Before using any new materials on your car freshie, it is always a good idea to test them first. This can help you avoid potential issues and ensure that the materials work well with each other. As an added bonus, you can also use the test piece as a mini freshie for your car.
7) Using Tape Instead of Glue
While tape may seem like a quick and easy alternative to glue, it is not the best option when decorating car freshies. The tape can easily come off in hot temperatures and leave behind a sticky residue on your dashboard or other surfaces.
8) Neglecting to Clean and Maintain Your Freshie
To keep your car fresh-looking and smelling its best, it is important to clean and maintain it regularly. This includes wiping off any dust or dirt that may accumulate on the surface and refreshing the scent with a few drops of your chosen essential oils. With proper care, your decorated freshie can last for months! So, make sure to avoid these common mistakes and have fun creating your own unique car freshies.
Overall, decorating car freshies is a fun and creative activity, but it is important to keep safety in mind. By following these tips and avoiding certain things, you can ensure a safe and successful project that will add some personality and freshness to your car.
8 Additional Tips
1) Use Unique Shapes and Designs
Instead of sticking to traditional car freshie shapes, try experimenting with different designs such as flowers, animals, or even a mini version of your favorite food. This will make your freshie stand out and add a touch of personality.
2) Layer Different Materials
Get creative by layering different materials to create a unique texture on your freshie. For example, you could use a combination of felt and glitter or paint and fabric to add depth and dimension.
3) Add Personal Touches
Incorporate personal touches into your freshie design by using photos, stickers, or quotes that hold special meaning to you. This will not only make your freshie more meaningful but also serve as a great conversation starter.
4) Use Natural Scents
Instead of relying solely on artificial fragrances, consider adding natural scents to your car freshie. You can use dried flowers or herbs like lavender, rose petals, or eucalyptus for a more subtle and refreshing scent.
5) Try Different Hanging Methods
While most people hang their car freshies from the rearview mirror, there are other creative ways to display them in your car. You could use a suction cup to attach it to the windshield, hang it from a vent clip, or even place it in a cup holder.
6) Make Matching Sets
If you have multiple cars in your household, consider making matching sets of car freshies for a cohesive and coordinated look. You can use similar colors, designs, or themes to tie them together.

7) Use UV Resistant Materials
To ensure your freshie stays vibrant and doesn’t fade in the sun, opt for UV-resistant materials such as paints and markers. This will also help prevent any potential damage to your car’s interior from prolonged exposure to sunlight.
8) Have Fun and Be Creative
Most importantly, have fun and be creative when decorating your car freshie. There are no limits to what you can create, so let your imagination run wild and make a freshie that truly reflects your personality and style.
Decorating car freshies is a fun and easy way to add some personality and freshness to your vehicle. By avoiding common mistakes and following these tips on how to decorate car freshies, you can create a unique and long-lasting freshie that will make your daily commute a little more enjoyable.
Frequently Asked Questions
Can I Use Any Type of Paint or Marker for Decorating My Car Freshie?
It is recommended to use acrylic paints and permanent markers that are labeled as “fade-resistant” or “UV-resistant.” This will ensure the colors don’t fade over time and hold up well in sunlight.
How Often Should I Refresh the Scent of My Car Freshie?
This will depend on personal preference and the strength of your chosen essential oils. Some people prefer to add a few drops every week, while others only refresh the scent once a month. Experiment with different amounts and frequencies to find what works best for you. Overall, it is important to keep in mind that the scent will gradually fade over time and may need to be refreshed occasionally.
Can I Use Glitter on My Freshie?
Yes, you can use glitter to add some sparkle and shine to your freshie. However, it is important to be cautious when using glitter as it can easily fall off and become a hazard if ingested or touched by children or pets. Consider sealing the glitter with a clear sealant to prevent it from shedding. Additionally, make sure to use extra caution when handling and disposing of any excess glitter to avoid harm to yourself and the environment.
How Do I Clean My Car Freshie?
To clean your freshie, simply wipe it down with a damp cloth or paper towel. You can also use a small amount of mild soap if necessary. Avoid using harsh chemicals or soaking the freshie in water, as this can damage the materials and scent. If your freshie has a fabric cover, make sure to spot-clean it gently to avoid any damage to the design.
Can I Use Essential Oils Other Than Those Recommended?
Yes, you can use any essential oils of your choice to create a custom scent for your freshie. However, it is important to note that some essential oils may have a stronger scent and could potentially irritate those with sensitive noses or allergies. Always test a small amount first and use caution when using strong scents. Also, make sure the oils you choose are safe for topical use and not harmful if inhaled. Overall, have fun experimenting with different scents and finding what works best for you.
Can I Make My Own Hanging Cord or String?
Yes, you can make your own hanging cord or string using materials like embroidery floss, ribbon, or twine. This will allow you to customize the length and style of the hanging method to suit your preferences. Just make sure the cord or string is strong enough to hold the weight of your freshie and secure it tightly to prevent any accidents while driving. You can also add beads or charms to the string for an extra touch of personalization.
Can I Hang My Car Freshie Anywhere in the Car?
You can hang your freshie from various places in your car, such as the rearview mirror, windshield, or air vent. Just make sure it doesn’t obstruct your view while driving. Overall, have fun decorating and enjoy your personalized car freshie! So go ahead and get creative with these tips and have a blast making your own unique freshie to add some personality and freshness to your car.
Conclusion
In conclusion, decorating car freshies is a fun and creative activity that can be a practical way to keep your car smelling great. By avoiding common mistakes and following these tips on how to decorate car freshies, you can ensure a successful and safe project.
So gather your materials, let your imagination run wild, and create a one-of-a-kind freshie for your car! Remember to have fun and enjoy the process. Safe travels with your new, personalized car freshie! Keep it fresh and stylish with these tips and create a unique freshie that will make your daily commute a little more enjoyable.
Angela Ervin
Angela is the executive editor of DIY quickly. She began her career as an interior designer before applying her strategic and creative passion to lifestyle and home. She has close to 15 years of experience in creative writing and online content strategy for housekeeping, home decorations as well as other niche efforts. She loves her job and has the privilege of working with an extraordinary team. She lives with her husband, two sons, and daughter in Petersburg. When she's not busy working she spent time with her family.


