
How to Tie Knots Between Beads
Knotting is a standard procedure for beads and is helpful while stringing jewels or other gems jewels. By inserting a knot amongst beads, one bead can come out if the rope splits. It could be a quite productive method to attach beauty to your accessories too!
Throughout this method, you may use every form of rope, like leather and hemp string, as far as it is relatively thin or elastic. There, we would use a silk cord to display how to create knotting among beads. Everything of this begins with an overhand knot!
Tools and Equipment
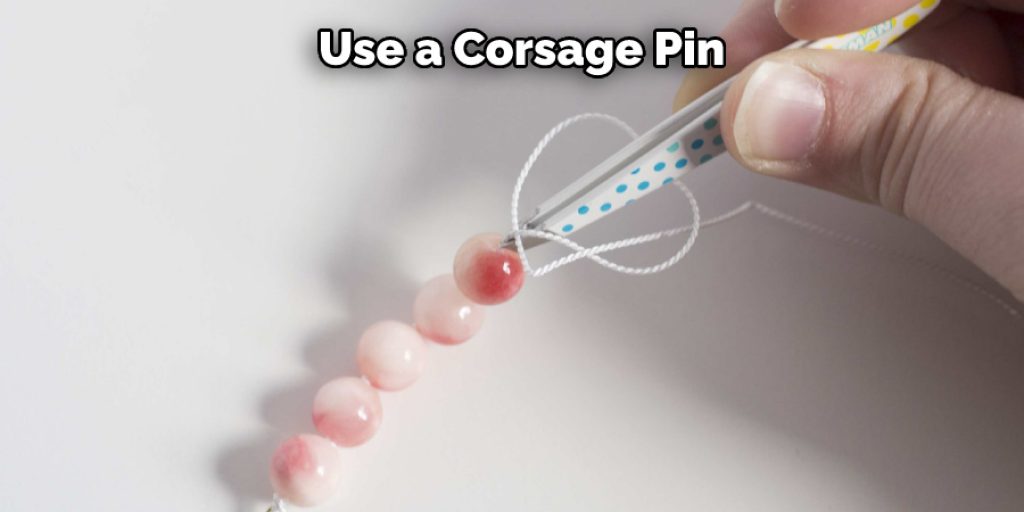
The use of either a corsage pin or an old stick pin is an easy way to tie. (A plain pin isn’t robust sufficient for this.) Though you’re doing a lot of knitting, you might like to try either training how to do an awl, and a pair of scissors, or looking at a tri-cord knitter for a much more higher-tech solution!
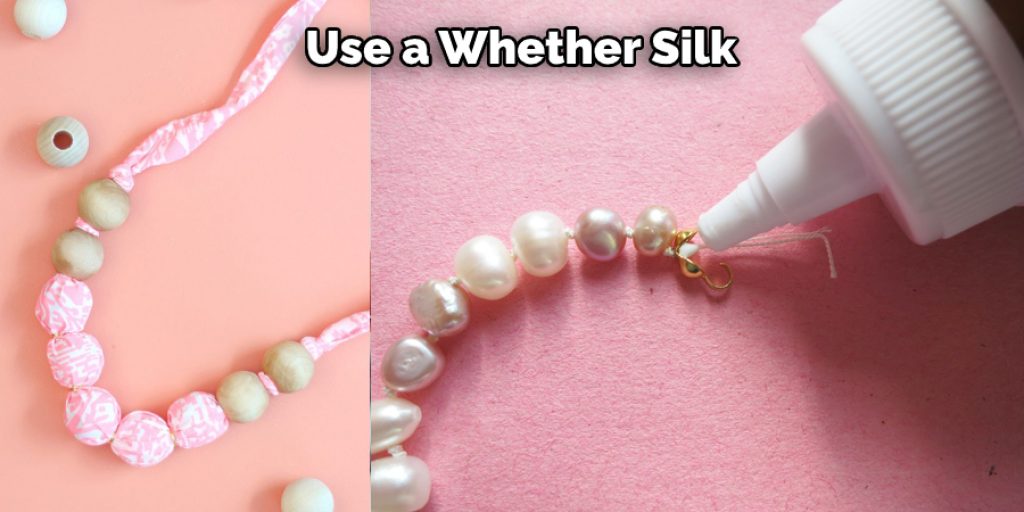
Such techniques can encourage you to keep ties precise and robust. Many bead providers sell professionally crafted knitted fabric equipment. Some of them do sell books about this strategy, and also clips for a typical jewelry suit the shade of the string to your beads. You would like to use whether silk or nylon string for the braiding.
Any of such products may be bought with an attached needle or personally ordered needles and yarn. Just use pre-attached thread choice if you’re trying to tie for the very first step, as its one fewer thing to work with, and it’s pretty cheap. The majority charge just a couple of dollars.
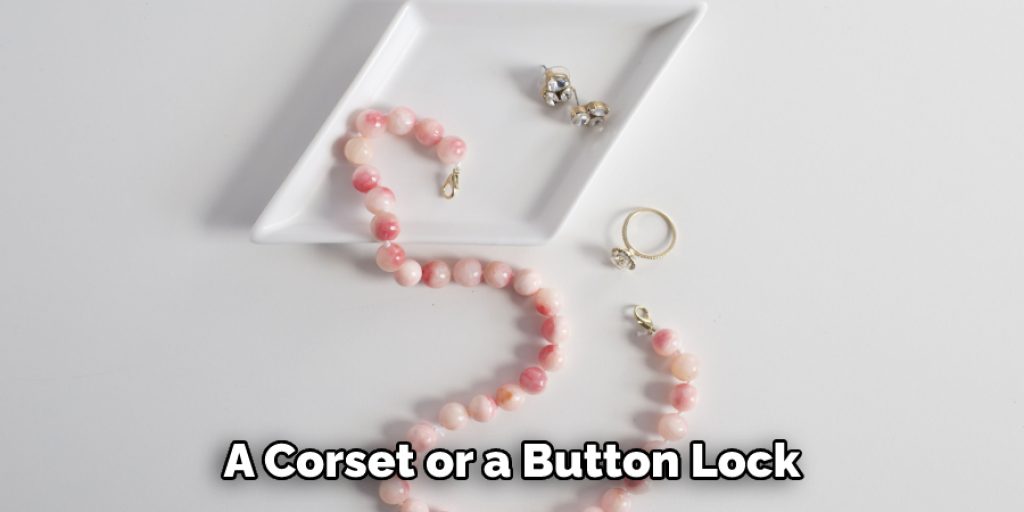
Assemble such resources and components
- A corset or a button lock.
- Beads
- Cord
- Not mandatory: tip to the pin
Instructions
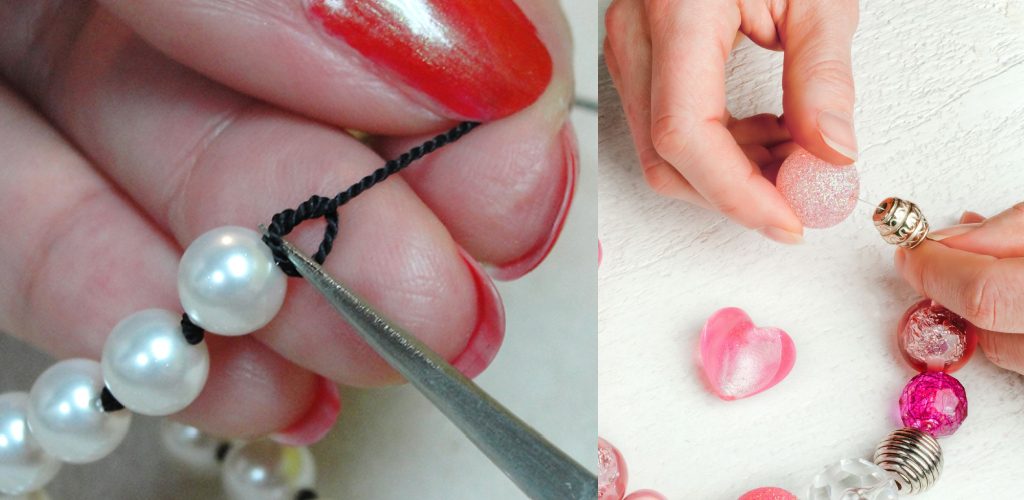
- Attach an overhand knot and yarn with your first bead, to continue. To start constructing another overhand knot. Do not only take the string yet-else; the knot did not end up lying beside the bead!
- I was using tweezers to hold the string directly next to the first bead. To do just that, put your tweezers into the circle.
- Pull it back close, and the tie should slip through the string till it meets the tweezers.
- Slip right the tweezers gently out from the circle and use them to move the knot ever tighter to the bead once more. So continue till you’ve got sufficient knots hooked on to create the perfect design!
- The beads get a nice texture. The ties position the dots so that you can do every bead.
The patterned ornaments and tangled wrist bands provide a more polished and pricey feel. Unless the bracelet also splits as the client on the dance floor swirls about, only one bead is missing. The chain has little risk of cracking. The hard portion of the bead gap continues to rub against the hardened tie, rather than the weak bead thread.
More straightforward bead products (like pearls, malachite, or coral) are stopped from scraping and over-tightening the bead faces off. The jewelry takes less than that to produce, as it takes fewer beads (1-1/2 mm per dot). Even you can trade it for profit!
Instructions: How to Tie Knots Between Beads
Step 1: Attach an Overhand Knot
Attach an overhand knot and yarn with your first bead to continue. Then, to start constructing another overhand knot. Do not only take the working yarn over the top of the bead on your left but also put it around the right-most bead.
Now take the yarn coming from your skein and go over the top of the newly formed knot, then put it around the left-most bead. Pull both pieces of yarn tight. You’ve now created an overhand knot that goes around two beads!
Step 2: Start the Second Knot
Next, you’ll start creating a second overhand knot with the same process as in Step One. But this time, you’ll be going around three beads instead of two. So take the working yarn over the top of the bead on your left and also put it around the right- and middle-most beads. Now, take the yarn underneath the left-most bead.
Step 3: Tighten the Knot
Now, gently pull on both of the working yarns to tighten the knot. Make sure it’s snug against all three beads. If it’s not tight enough, the beads will be able to slide around on the yarn.
Step 4: Using Tweezers to Hold the String
Now you’ll take your tweezers and hold on to the end of the string that’s attached to the skein (or ball) of yarn. This will help keep the string from getting tangled as you work.
Step 5: Make the Second Knot
Again, take the working yarn over the top of the bead on your left and also put it around the right- and middle-most beads. Now, take the yarn underneath the left-most bead.
Step 6: Position the Dots
Now you need to position the two black beads so they sit side by side in the middle of the three beads. Take the left-most bead and thread it over the middle bead and under the right-most bead. Then take the right-most bead and thread it over the middle bead and under the left-most bead.
Step 7: Cut the String
Now, cut the working yarn about 1/2 inch (1.3 cm) from the bead. You can now pull the string through the loop to secure it or tie a second knot if you’re using a slippery yarn.
Step 8: Finish the Knot
To finish the knot, take the end of the string and thread it through the loop created by the two working yarns. Then pull on the string until the knot is tight against the bead. You can trim the excess string if you like, but it’s unnecessary.
Some Helpful Tips and Suggestions:
1. Decide what size knot you would like to create.
2. Thread the needle with a piece of beading thread that is about 18″ long.
3. Double the thread and tie a knot at one end, leaving a small loop.
4. String on your beads in the order you want them to appear on your finished project.
5. Once you have all the beads strung on, tie a knot at the end of the thread, again leaving a small loop.
6. To make the actual knot between two beads, hold the thread about an inch above the first bead. Insert the needle through the bead (from bottom to top), then back through the loop you created when you doubled the thread.
7. Pull the thread tight, but not too tight, so that the bead sits snugly against the first bead.
8. Now, do the same thing with the second bead, ensuring that the knot is sitting against the first bead.
Conclusion:
That’s it! You now know how to tie knots between beads. While there are many ways to tie knots between beads, these few methods we’ve outlined here should give you a good foundation to start with. Then, experiment with different techniques and find what works best for you. It may seem like a daunting task when you are first starting, but with a little practice, you will be able to knot beads like a pro in no time at all.
Have fun with it and experiment with different colors and designs. Once you have gotten the hang of tying knots between beads, try making some jewelry pieces of your own. We hope this blog post has been helpful. We would love to see what you come up with. Happy beading!
Read also – How to String Beads with Thread


