
How To Decorate Styrofoam Balls
Introduction
That is precisely how we’ve completed selecting the top handmade Christmas decorations to create this year, with designs ranging from nostalgic to personalize (and some kiddy decorations).
Although such innovative Christmas project concepts vary in skill set and price range, many seem inexpensive and crafted from stuff you’ve got across the houses like kitchen rope, thread, and random pine needles. Of course, with the go-to store-bought choices (such as Mom’s favorite antique items!), you could also pair such simple-to-make decorations.
Processes On How To Decorate Styrofoam Balls
Process One
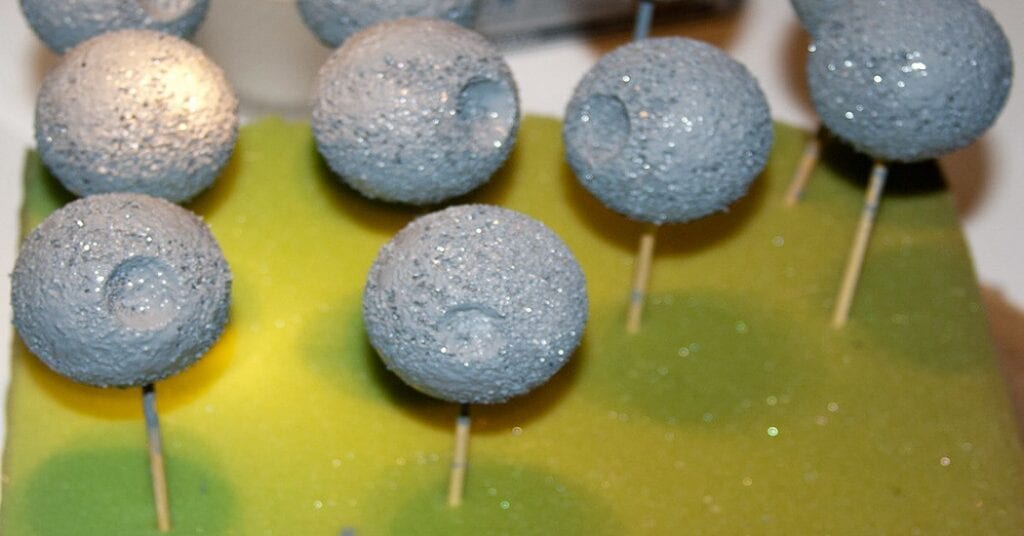
- To make a Styrofoam ball, you will need a lighter and a styrofoam ball. First, melt the ends of the styrofoam ball with the lighter. Then, allow the ball to cool for about five minutes. This will help you not burn your fingers when you touch them.
- Add floral wire, ribbon, or other ornamentation by wrapping around the inside of the melted area on one end of the ball. Again, be careful when handling hot items!
- Carefully place another styrofoam ball with its opposite side against this first one in an even manner, keeping both balls upright at all times. The melted edges should now touch each other and form what looks like a “double bubble.”
- Do this two more times until you have three stacked Styrofoam balls that are supported by their melting edges from becoming separated too far apart.
- Insert a pencil or solid object into the center of your three stacked Styrofoam balls. This will act as inner support for all six surfaces you are about to cover in tissue paper and paint layers.
- Using cut pieces from various colors of tissue paper, carefully layer one color over another on each side of the stack so that when viewed from above, it looks like this: red/gold (top), green/yellow (middle), and blue/silver(bottom). Repeat with different combinations until you have covered every surface.

- Carefully use Mod Podge to glue these same colored tissues onto individual sides at a time using small but generous amounts – not too thickly! Allow them to dry completely before moving to the next color combination.
- Repeat this process for each of your six surfaces until you are happy with the result and have glued on all layers.
- When every surface has dried completely (usually overnight), carefully use a craft knife or other sharp object to cut off any pieces that may be sticking out too far from the ball’s shape – it will save time later.
- Carefully insert these loose parts back where they belong to ensure proper coverage. This step is optional but can help create cleaner edges if done correctly.
- Finish by adding one last layer of Mod Podge over the entire ball; this will seal up any gaps left behind and provide an additional protective barrier against water exposure.
- Let the ball dry for an additional hour before using it as a decoration!
Process Two
This site is filled with the holiday favorites you learn and enjoy, like stars, fairy wings, red, green, and white. And also, don’t stress. Balls made from styrofoam are pleasant to be used in art pieces. You could color them, put in toothpicks, attach eyes and sense them, transform them into machines, the list begins. We provide lots of styrofoam ball projects, and children enjoy them.
Now is the time to get together in the forest! While it may be easy to buy your Christmas lights, when it comes to designing your apartment’s most cheerful tree, everyone understands that handmade Christmas decorations are the perfect way to create a tree full of excitement and positive vibes – not to mention that this provides for a fun Christmas event for the whole community. These crafted lovelies proudly display the standard variations of red, yellow, and orange with the range of designs they show so unique and stunning.
Styrofoam pieces, colorful felt, severribbons, tassels, as well as some crystal headpieces once placed with each other to make such Homemade Felt and Ribbon decorations with the support of simple materials, such as several design sticks, adhesive, marker, and rotating cutter, could appear to be wonderfully artistic and fun-filled executions for your Xmas tree which your guests will undoubtedly enjoy! It appears that it’ll really be a really crafty night!
Some Tips to Remember
If you don’t like gluing surfaces, try taping them instead. You’ll have more control and less chance of sticking too much paper down on one spot, but don’t forget to peel off the tape afterward so that any glue drips from previous steps don’t stick onto your project.
Conclusion
We have stated several options for decorating styrofoam balls. But you must ensure all the techniques are safe before performing the task. And it would help if you also carefully used paint and other chemicals.
Check it out to learn to paint craft foam.


