How to Draw Henna on Paper
Henna is a traditional art form that originated in the Middle East, North Africa, and South Asia. It’s typically used to decorate hands and feet for weddings or other rituals. The design can last up to 3 weeks! The art of Henna is a simple, yet beautiful way to decorate your skin. It has been used for centuries in many cultures and countries around the world.
In this blog post, we will cover how to draw henna on paper with step-by-step instructions so you can try it at home! You’ll need some henna powder, lime juice or lemon juice, water, an applicator stick (like a popsicle stick), and oil-based ink pens with waterproof ink. Read below for detailed instructions!
5 Benefits of Using Henna:
- Henna reduces inflammation
- Henna can be used as self-care for symptoms of arthritis.
- Henna is used to treat mild depression and insomnia
- Henna has antimicrobial properties, making it useful against bacterial infections.
- Henna fights hair loss by protecting the hair follicles.
Materials and Supplies Needed:
- Piece of paper (regular printer paper works best)
- Pencil/pen
- Paintbrush
- Henna powder
- Flat bowl or plate
- 2 tbsp of lemon juice
Step by Step Guide: How to Draw Henna on Paper
Step 1: Prepare the Paper
To make your henna stencil, start by drawing a large circle on your paper. Inside of that, draw a smaller, incomplete circle about two inches down. You can leave it like that or decorate it however you’d like.
Step 2: Mix Your Henna Powder and Lemon Juice
Mix two tablespoons of henna powder and two tablespoons of lemon juice in a bowl. Add sugar to the mixture, which will keep it from drying out and cracking later on.

Step 3: Mix in Water
Add water slowly to the mixture until it becomes a thick paste. You can also add oil or cocoa butter at this point for more shine!
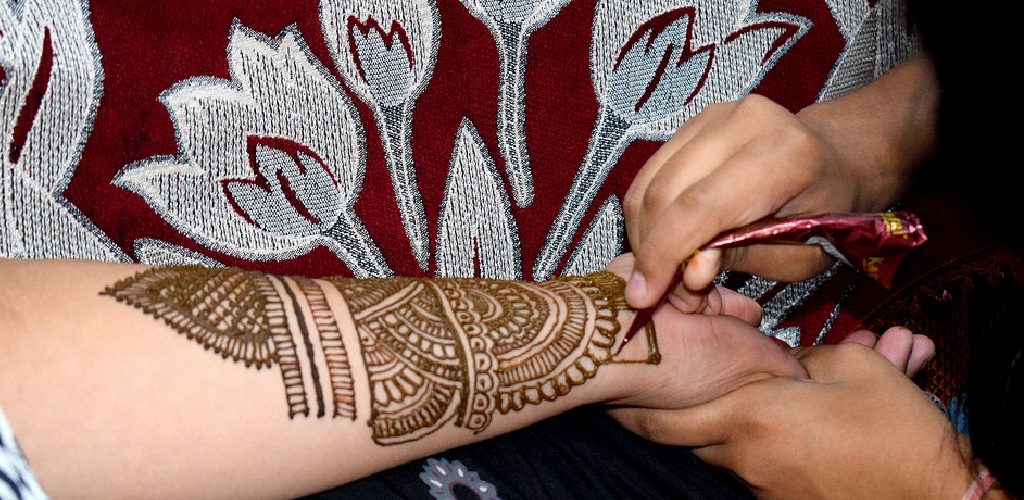
Step 4: Apply the Henna Paste to Your Skin
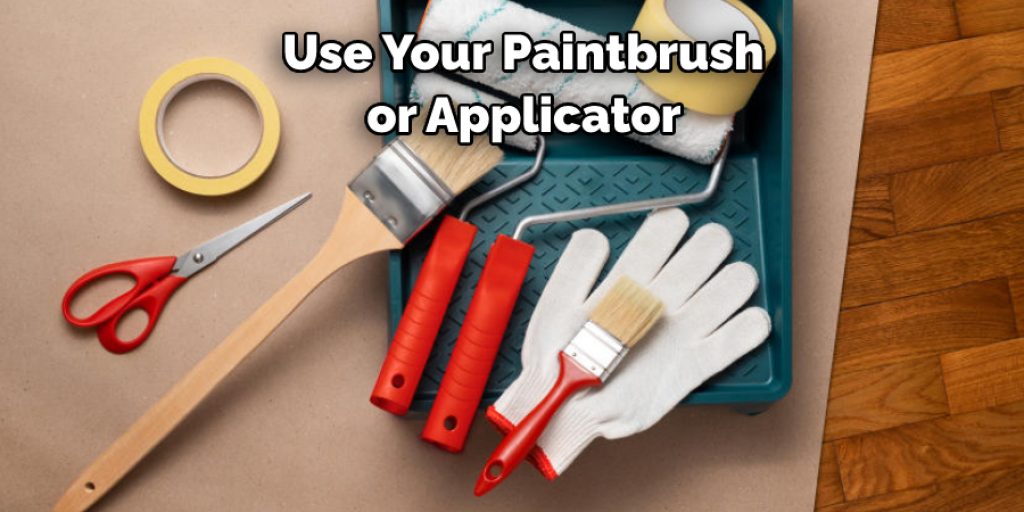
Start by applying the henna paste to the inside of your wrist with a paintbrush or applicator stick. Gently dab it on in sections, moving up your arm. When you reach the top of your inner arm, start at your elbow and work down toward the back of the hand to avoid overlapping lines.
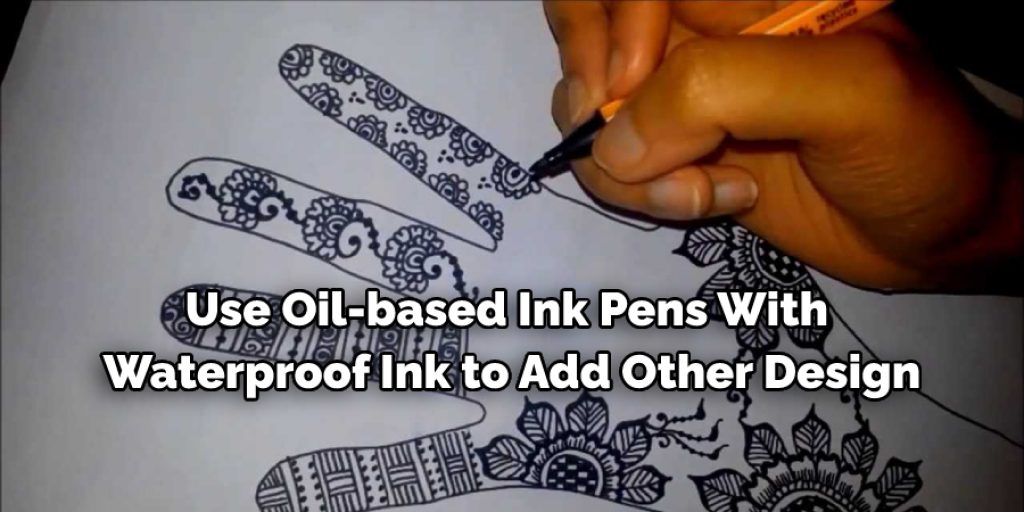
Step 5: Add Other Tattoo Designs
Use oil-based ink pens with waterproof ink to add other designs to your henna paste. You can also use glittery pens for extra sparkle! How do you know when Henna is done drying?
How long should I wait for the paste to dry before washing it off? If you have applied a very light layer of henna, it will dry up in 20 minutes. However, if you have applied a thick layer, it can take up to 1 hour for it to dry.
Step 6: Wait at Least 8 Hours
When you’re done, wrap your design in plastic cling wrap and wait at least eight hours before removing the wrapping and washing off all residual henna with soap and warm water. Your design will be darker than it is while wet!
Step 7: Enjoy Your New Henna Tattoo!
Henna tattoos are temporary, but they last anywhere from two to four weeks on the skin. You can also do this on paper or fabric that you plan to wear or use at a future date!
Step 8: Store Leftover Henna
Start by applying the henna paste to the inside of your wrist with a paintbrush or applicator stick. Gently dab it on in sections, moving up your arm. When you reach the top of your inner arm, start at your elbow and work down toward the back of the hand to avoid overlapping lines.
Some Tips and Tricks:
1. For this particular design, it may be helpful to use a piece of paper with lines. If you don’t have drawing paper, you can always print out the design/illustration online and trace the design onto whatever paper you would like to work on. If you choose to do so, make sure that your print-out is at least 8 1/2″ by 11″, or the size of your paper.
2. When coloring, don’t press hard on the marker, especially for lighter colors. You can always go over it if you need to, but too much ink will make the design look smudged and messy. Don’t worry about making mistakes; you can always erase a smudge or a mistake.
3. The finer the tip, the better your results will be! Always make sure that it is pointed and sharp before you begin to color. It will look much more detailed and accurate if you use a fine-tipped marker.
4. If you’re using markers, don’t lean over them when you’re coloring with them! This will cause the colors to bleed and mix, creating unwanted colors. Just be sure to keep away from any major heat sources (such as the heater, stove, etc.)
5. Don’t forget your wrist! Make sure you don’t just use your arm to move back and forth when shading with the marker. Make sure to use your wrist and move in a consistent motion.
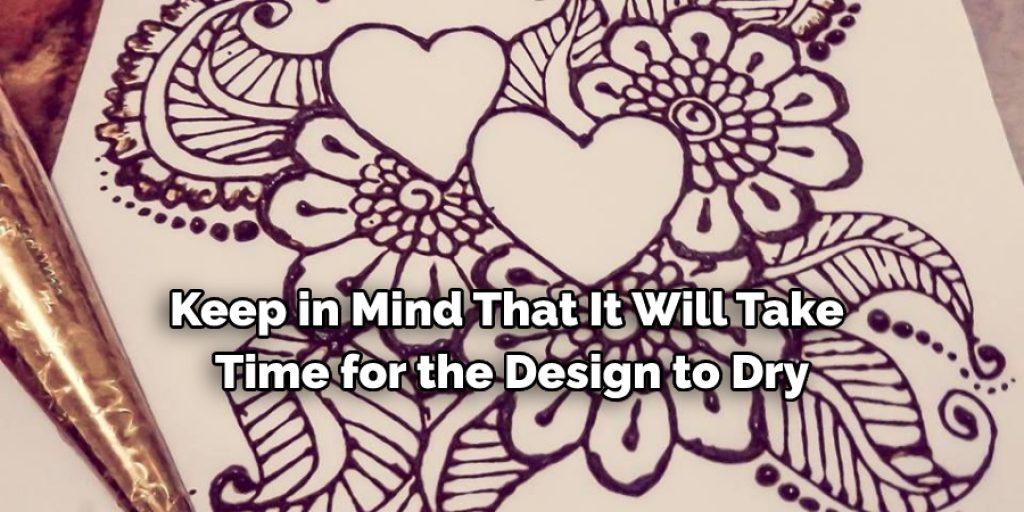
6. Keep in mind that it will take time for the design to dry; make sure your color is at a good speed so that no ink spills onto the design if you accidentally bump into it when it is still wet/damp! However, if this does happen, you can always use rubbing alcohol to clean it up.
7. If your design is too dark when you finish, take a baby wipe (or any other non-toxic skin cleaner or soap) and rub it onto the design until the color lightens. It will not completely lift the ink, but it will lighten the design so it is not too dark.
8. For very small designs/words/numbers, you may want to try using a fine-point sharpie marker instead of a standard color marker. They are great for making extremely detailed lines and sharp curves!
Frequently Asked Questions
Can you henna on paper?
Yes, you can henna on paper. However, it is important to note that the color will not be as vibrant, and the paper may not last as long as when it is hennaed with a professional kit.
What do you draw henna with?
Henna is a natural dye that can be used to create temporary tattoos ornaments. It is made from the leaves of the henna plant, which are dried and then ground into a powder.
To use henna, mix it with water and apply it to your skin in a thin layer. The color will be absorbed into your skin over time, and the tattoo will be permanent.
Is henna a art?
Yes, henna is an art form that has been used for centuries to decorate hair and nails. It is made from a plant called Lawsonia inermis, which is found in India, Sri Lanka, and Africa. Henna is extracted by boiling the leaves in water until they turn a deep brown color.
Conclusion:
To achieve a perfect henna pattern, make sure you have the necessary supplies on hand and avoid using any oil-based products, which can darken and blur the henna. Once you’ve sealed it with a layer of varnish, allow it to dry for at least 24 hours so the ink can set properly. And there you have it!
You’ve just completed your very own DIY Henna tattoo kit. For best results apply this project on skin that has been shaved or waxed clean beforehand if possible. Now go out there and get drawing some cool designs! If you are interested in learning how to draw henna on paper, the blog post has more information that can help. So in this article, you know about how to draw henna on paper
Check out our article How to Draw Makeup on Paper
Elizabeth Davis
Elizabeth is a creative writer and digital editor based in the United States. She has a passion for the arts and crafts, which she developed from a young age. Elizabeth has always loved experimenting with new mediums and sharing her work with others. When she started blogging, she knew that DIYquickly would be the perfect platform to share her tutorials and tips. She's been writing for the blog from the beginning, and her readers love her helpful advice and easy-to-follow instructions. When she's not writing or editing, Elizabeth enjoys spending time with her family and friends.