
How to Dry Wet Paper Fast
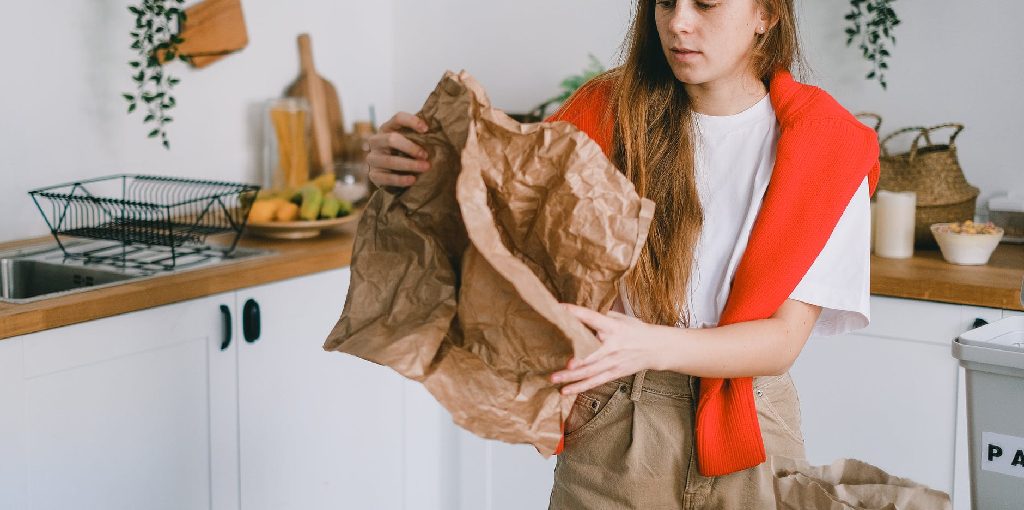
You might have found yourself in a situation where you are left with wet paper products. For instance, what if your printer ran out of ink and you spilled water all over the page? This blog post will guide you through how to dry wet paper fast to avoid becoming too damaged before it can be read or used again.
To remove excess water from your product, start by blotting it with a dish towel or napkin. Gently dab away any puddles until they are gone. When this has been completed, use another dish towel to blot up any remaining moisture on the surface of the paper product itself.
10 Ways To Dry Wet Paper Fast:
1. Paper Towel
To remove a wet stain from paper towels, blot the area with a dry towel and press firmly. Then take another fresh dry towel and wipe off any excess liquid left on the paper. This method is also great for dried paint artwork because it prevents smudging colors as you blot away the excess paint.
2. Blow Dryer
After you finish your artwork, you can immediately start heating it without ruining it. However, be careful not to heat it for too long, as this can cause the paint to sink into the paper and damage the painting.
3. Shower with a Lotion Dispenser
In order to make this special mixture, you need to add lotion to a clean, empty hand soap bottle. Then, while showering as usual, you need to hold the nozzle above the wet paper and spray it evenly over the paper several times until all of it is saturated. You can use a bubble bath instead of soap to allow more lotion dispersion into the water.
4. Household Sponge
This method is great for artwork that is not too wet on thick watercolor paper because it allows the painting time to gradually dry instead of drying from one second to another after being submerged in water.
This method can also be used to soak up water from dried paint artwork. Procure a clean sponge and run it under warm water until it is damp. Place the painting on a flat surface and firmly press the wet sponge over the paper, blotting away excess liquid left behind.
5. Microwave Oven
After you finish your artwork, you can begin heating it directly without ruining it. However, be careful not to heat it for too long, as this can cause the paint to sink into the paper and damage the painting.
6. Hair Dryer
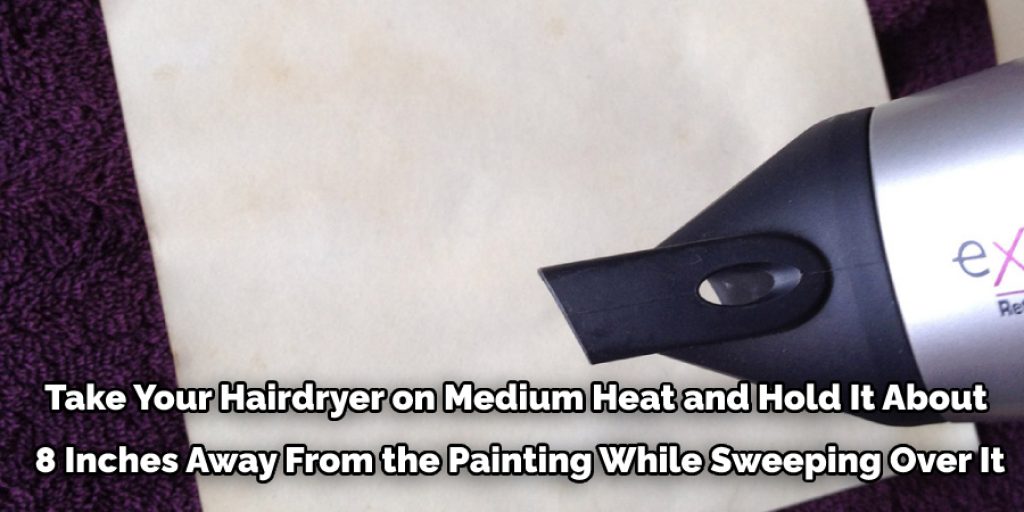
This method is great for drying artwork that has seeped in on thin watercolor paper or absorbent papers. It is also great for fluffing up the paper’s surface and revive dried paint. Take your hairdryer on medium heat and hold it about 8 inches away from the painting while sweeping over it slowly with consistent movement.
7. Paper Weights
Place several heavy objects (books work well), lay them over the wet painting, and let it dry for several days before removing papers.
8. Tray of Ice Cubes
In order to fix watercolor mistakes, you first need to dip a clean cloth into some water. Once the cloth is wet, you should ring out any excess drops of water (but don’t wipe the cloth on the painting).
Then, you should place the cloth on top of your artwork. After that, you need to take several ice cubes and put them on another clean cloth. The ice cubes should be 8 inches away from the painting, and you should be careful not to put them directly on the watercolor paper. The ice cubes will slowly melt and absorb the excess liquid from your artwork as it gradually dries.
9. Dish of Soaking Water
This method is good for wetting up gesso papers because it gradually absorbs the water but doesn’t make a mess. You should take your dish of water and submerge the painting completely for several hours, allowing it to seep into the paper.
10. Watering Can
This method is good for doing a small painting on thick watercolor paper that has to be quickly watered down. Dip your watering can nozzle into the water and spray over the wet area of your paintings until all the extra liquid is absorbed. If you don’t have a watering can, you can use a spray bottle instead and put the nozzle under the water and spray until all the extra liquid is gone.
Procedures: How to Dry Wet Paper Fast
STEP 1:
Cut the paper to its final size if needed. Don’t dry wet paper of a different size than you want it to be when dry.
STEP 2:
Take the paper and lay down blotting papers over it in layers, say 3-6 sheets thick (but don’t put too many because they’ll take up space that you need for the paper when it dries). This is to absorb moisture in the paper.
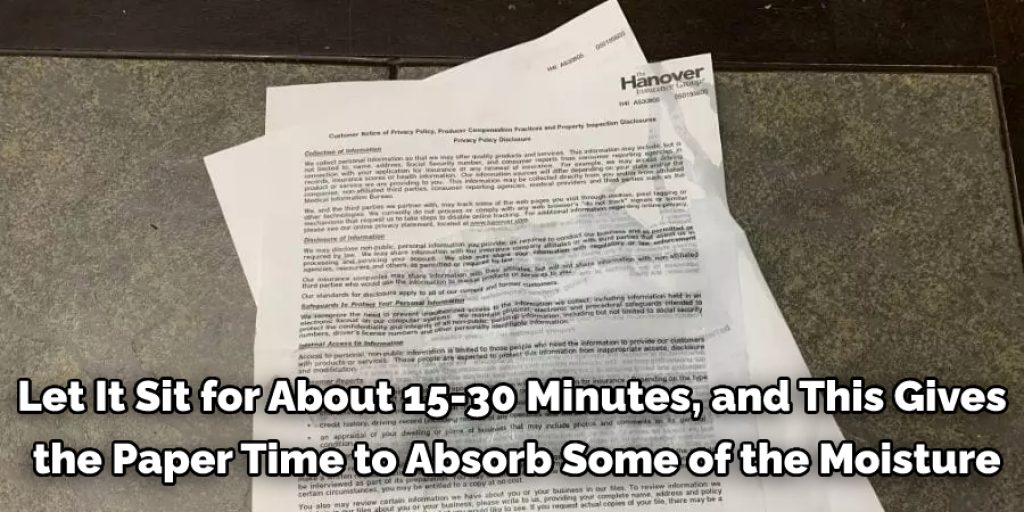
STEP 3:
Take a weight (like a heavy book) and put it on top of the blotting papers. Let it sit for about 15-30 minutes, and this gives the paper time to absorb some of the moisture from underneath through capillary action.
STEP 4:
Take the weight and blotting papers off the paper and let it sit for at least a day, preferably 2 or 3 days. Be sure to check if the paper is dry before moving on to the next step to ensure that it doesn’t have any wet spots that you don’t see. If there are any wet spots, leave them out for longer and check again.
STEP 5:
After the paper has had time to dry, take another blotting paper (1-3 sheets thick) and put it on top of the paper. Put a weight over this as well. Let sit for about 2 hours or so, then check if it’s dry. If it’s still wet, leave it for longer and check again. If it’s dry, proceed to the next step.
STEP 6:
Take the weight off and cut the paper to its final size. This is where things get a little tricky because if you want it all one color or are making an interesting pattern in the paper, you’ll need to make sure that the paper is dry where you want it to be before cutting. If you’re not doing anything interesting, proceed as usual and cut.
STEP 7:
Take your final weight (a heavier book than what you used for drying) and put it on top of the paper. Let sit overnight this time or 24 hours, checking periodically to see if the paper is dry. If the paper isn’t dry, leave it longer and check again.
Frequently Asked Questions
What temperature should you dry paper?
There is no definitive answer to this question since it depends on the type of paper and the humidity level in the room where you are drying the paper. However, generally, you should dry paper at a temperature between 120 and 140 degrees Fahrenheit.
Can you iron homemade paper?
Yes, you can iron homemade paper. However, it is important to note that you should not use too much heat when ironing homemade paper, as this could cause the paper to crack.
Can you bend homemade paper?
Yes, you can bend the homemade paper. It is important to use the right kind of paper and to follow the instructions carefully.
To make homemade paper, you will need:
- A piece of paper that is at least 18 inches by 24 inches.
- A straight edge or ruler.
- A pair of scissors.
- Tape measure or a piece of string.
- Glue or stapler.
Conclusion:
The paper towel is soaked in water. But don’t worry, you can save it! Here we have mentioned some steps to drying wet paper fast, so your project won’t be ruined by a little water damage. First things first, get out the towels! Get at least two or three clean white towels and lay them flat on top of one another. Place these overtop the wet paper to absorb any excess moisture that may have spread onto other surfaces.
Next, take an additional dry towel and place it under each stack for added protection against leaks from below (the underside). Afterward, set up fans in opposite directions around the papers; this will help circulate air, evaporating any remaining liquid faster than if left alone. Now everything is set; let the fans work their magic and leave them overnight to dry up the water. We hope you are now clear on how to dry wet paper fast.
Read On Our Other Blog – How to Dry Wet Paper Without Wrinkles
Elizabeth Davis
Elizabeth is a creative writer and digital editor based in the United States. She has a passion for the arts and crafts, which she developed from a young age. Elizabeth has always loved experimenting with new mediums and sharing her work with others. When she started blogging, she knew that DIYquickly would be the perfect platform to share her tutorials and tips. She's been writing for the blog from the beginning, and her readers love her helpful advice and easy-to-follow instructions. When she's not writing or editing, Elizabeth enjoys spending time with her family and friends.


