How to End Laminate Flooring at Doorways
Are you looking for a way to make your laminate flooring installation look professional and polished? Properly wrapping the edges at doorways is an important detail that can elevate the look of your space.
In this blog post on how to end laminate flooring at doorways, we’ll review the steps needed to accurately finish off the job with perfect corners. From taking measurements to sawing and installing trims, here’s all you need to know about ending laminate flooring at doorways like a pro! With our easy-to-follow instructions, you won’t have any trouble creating beautiful transitions between rooms in no time.
Why is It Important to End Laminate Flooring at Doorways?
Properly ending laminate flooring at doorways provides a clean and seamless transition between rooms. It also prevents the edges of the flooring from chipping or getting damaged, which can happen if they are left exposed. Additionally, ending laminate flooring at doorways adds a professional touch to your installation and makes it look complete.
Needed Materials
- Measuring Tape
- Pencil
- Saw
- Trim Pieces (Matching the Laminate Flooring)
- Miter Saw (Optional)
- Adhesive or Glue (Optional)
- Installation Kit (For Click-and-Lock Flooring)
11 Step-by-step Guides on How to End Laminate Flooring at Doorways
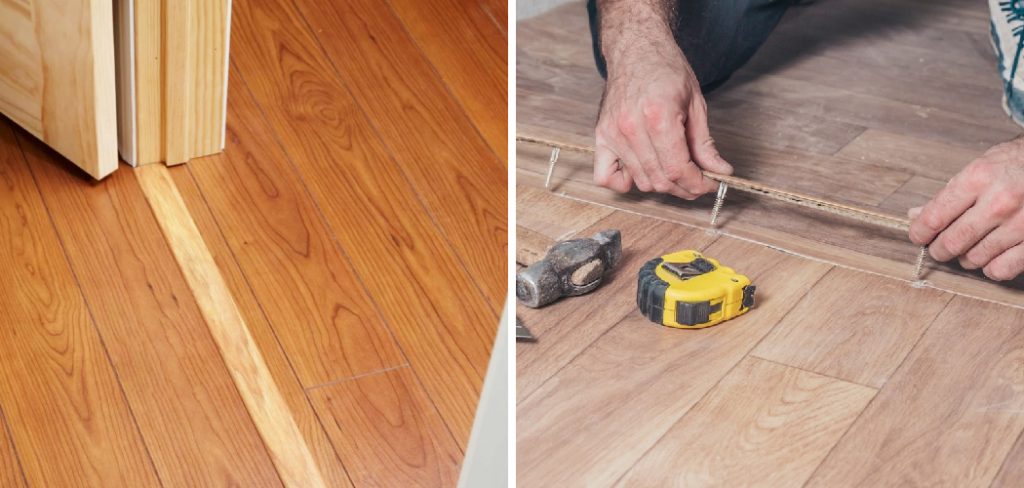
Step 1: Measure and Cut the Planks
The first step in ending laminate flooring at doorways is to measure the width of the doorway. Take note of this measurement as you will need it when cutting the planks. Next, cut a plank along the length using a saw, making sure to leave a quarter of an inch for expansion.
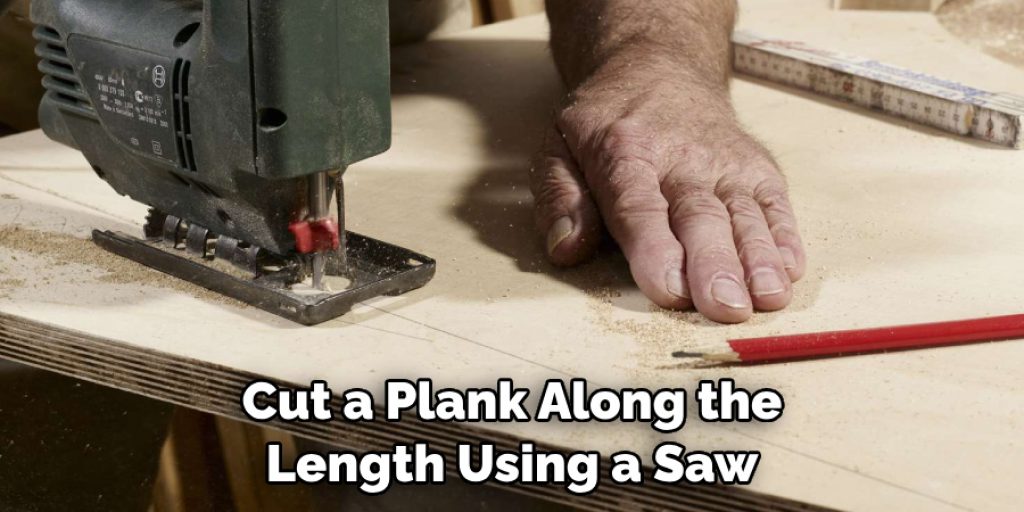
It’s essential to cut the planks accurately, as any gaps or overlaps can affect the final look. You can use a miter-saw to make precise and angled cuts if needed. It’s always best to use a scrap piece of flooring to test the cuts before making them on the actual planks.
Step 2: Measure and Cut the Jamb
Measure the height of the jamb from the floor, including any padding or underlay. Use a saw to cut the bottom of the jamb according to your measurement. It’s important to have the jamb slightly higher than the flooring to allow for expansion. It’s also recommended to use a jamb saw for a more precise cut. It’s better to cut the jamb a few times gradually instead of cutting too much at once. But, if you accidentally cut too much, you can use a jamb extender to fix it.
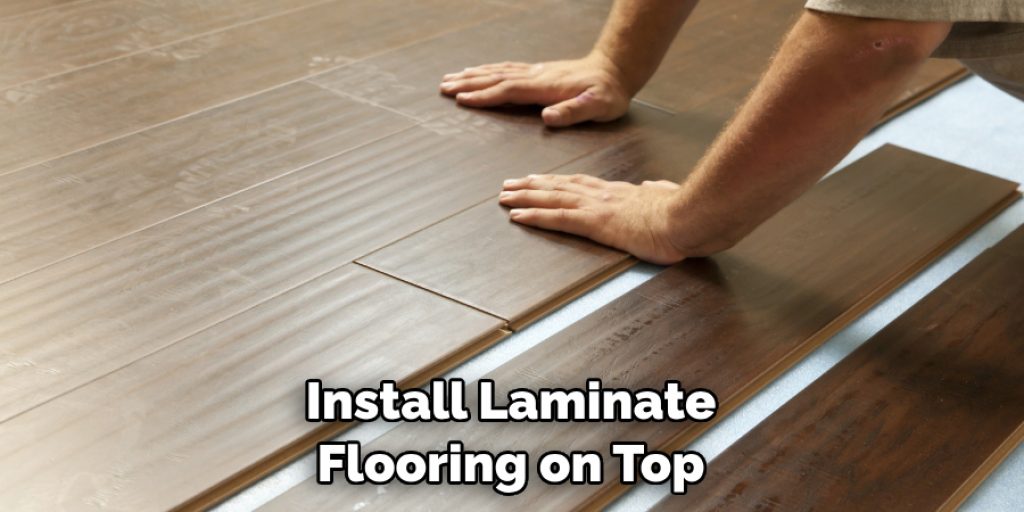
Step 3: Install Planks Around the Doorway
Starting from one side, install the planks around the doorway using spacers to leave room for expansion. Make sure they are tightly fitted and level with each other for a smooth transition. This step is crucial as it ensures that the flooring will stay in place and look even at the doorway.
You can use a tapping block and rubber mallet to secure the planks in place. It’s also a good idea to use adhesive or glue if you have any loose planks. You can check out our guide on how to fix gaps in laminate flooring for more tips.
Step 4: Measure and Cut the Trims
Measure the length of each side of the doorway and cut two pieces of trim accordingly. The trims should be slightly longer than the measurement to allow for a clean and precise fit. It’s always better to cut the trims longer than needed as you can always trim them down later.
Make sure to match the color and style of the trims with your laminate flooring for a cohesive look. Otherwise, it can make the doorway stand out in an unflattering way. It’s also recommended to use a miter-saw to make angled cuts for a professional finish.
Step 5: Install Trims on Top of Planks
Using a hammer and finishing nails, install the trim on top of the planks. Make sure to place the nails at an angle for better hold. Repeat this process on the other side of the doorway. But, if you have a click-and-lock laminate flooring, you can skip this step as the trim will not be needed.
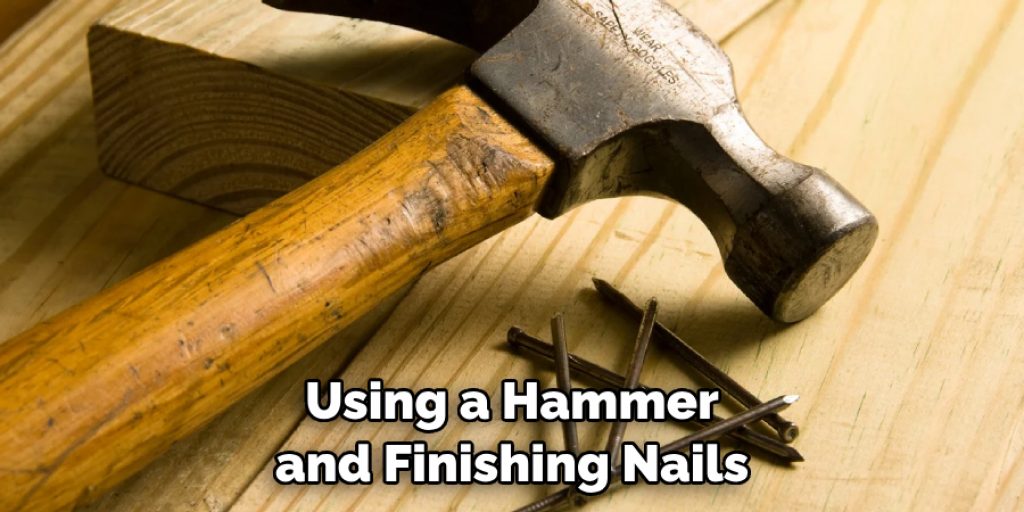
It’s also essential to use a level and spacers to ensure that the trims are straight and leveled. You can also use adhesive or glue for a more secure attachment. You can check out our guide on how to install laminate flooring for more tips.
Step 6: Measure and Cut Trim for Jamb
Measure the height of the jamb from the floor and add half an inch to that measurement. Cut a piece of trim according to this measurement, making sure it fits snugly against the jamb. This piece will cover the gap between the jamb and the flooring.
If you are using a jamb extender, make sure to add its width to the measurement before cutting. It’s also recommended to use adhesive or glue for a secure fit. You can also use a jamb saw to make precise and angled cuts if needed.
Step 7: Install Trim on Jamb
Using a hammer and finishing nails, install the trim on the jamb. Make sure it’s level with the flooring for a professional finish. It’s important to place the nails at an angle for better hold and a cleaner look. You can use spacers to ensure that the trim is straight and leveled. However, if you are using a jamb extender, make sure to position it correctly before nailing down the trim. You can also use adhesive or glue for a more secure attachment.
Step 8: Fill Nail Holes (Optional)
If you don’t want any visible nail holes, you can fill them with wood filler, sand it down once it’s dry, and paint or stain it to match the trim. But, if you are happy with the look of the nail holes, you can skip this step. That’s why it’s crucial to match the color and style of the trims with your laminate flooring to make any nail holes less noticeable.
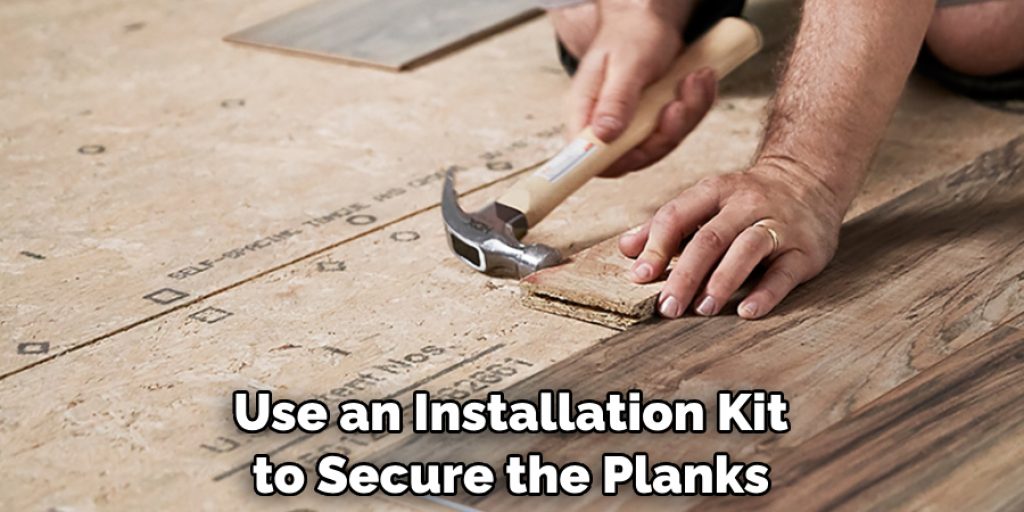
Step 9: Install Click-and-Lock Flooring
If you’re installing click-and-lock flooring, use an installation kit to secure the planks in place. Follow the manufacturer’s instructions for the best results. Although, make sure to leave a quarter of an inch gap between the flooring and the wall for expansion. This step is critical as it ensures that your flooring will not buckle or move in the future. You can also use adhesive or glue if you have any loose planks.
Step 10: Glue Down Flooring (Optional)
If you choose to glue down the flooring, make sure to use an appropriate adhesive and follow the manufacturer’s instructions carefully. However, it’s not recommended to glue down laminate flooring unless you have a concrete subfloor. It can make the flooring more difficult to remove in the future if needed. If you have a concrete subfloor, it’s essential to use a moisture barrier before gluing down the flooring to prevent any damage.
Step 11: Clean Up
Finally, sweep or vacuum any debris and wipe down the floors for a clean finish. Enjoy your beautifully ended laminate flooring! Always remember to take your time and have the right tools for a smooth and professional installation. If you encounter any issues, don’t hesitate to seek professional help or consult our other guides for more tips and tricks on laminate flooring. And with these steps, you now know how to end laminate flooring at doorways like a pro!
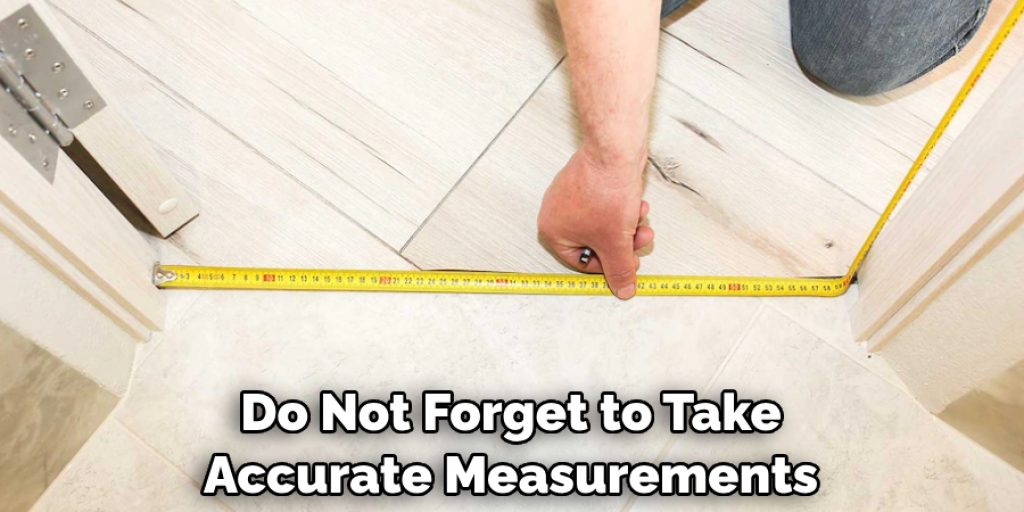
Following these steps, you can end laminate flooring at doorways like a pro without any trouble. With the right tools and techniques, your installation will look polished and complete. Do not forget to take accurate measurements, use spacers for expansion, and install trims for a professional finish.
Whether you’re a DIY enthusiast or a professional installer, with our guide on how to end laminate flooring at doorways, you can achieve a flawless transition between rooms. So go ahead and give it a try – your floors will thank you! Have any other tips for ending laminate flooring at doorways? Let us know in the comments below!
Tips for Ending Laminate Flooring at Doorways
- Take Accurate Measurements.
- Use Spaces to Allow Room for Expansion.
- Cut Trims Slightly Longer Than the Measurement for a Precise Fit.
- Install Trims Using Finishing Nails and an Angle for Better Hold.
- Fill Nail Holes With Wood Filler if Desired.
- Follow the Manufacturer’s Instructions When Using Installation Kits or Adhesives.
- Clean Up Any Debris and Wipe Down the Floors for a Polished Finish.
- Don’t Be Afraid to Ask for Help or Consult a Professional if Needed.
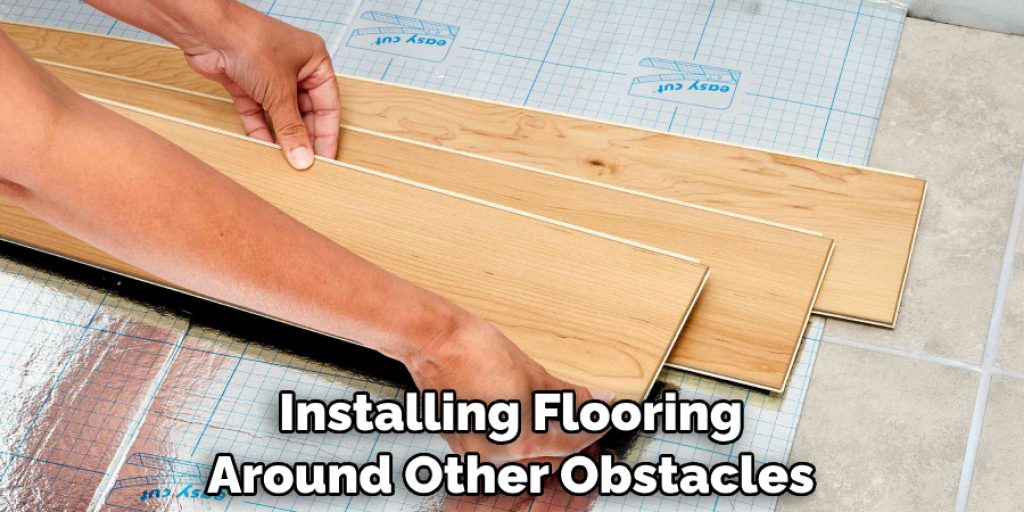
Now that you know how to end laminate flooring at doorways, you can also use these techniques when installing flooring around other obstacles such as stairs, columns, or vents. Just remember to measure accurately, cut precisely, and take your time for a flawless finish. Happy installing! End of Document.
Frequently Asked Questions
Q1. What if I Don’t Have a Saw or Jamb Saw?
Ans: You can rent tools from your local hardware store or ask a friend for help. If you’re working with click-and-lock flooring, you won’t need a saw to cut the planks. It’s always best to have the right tools for a smooth and successful installation.
Q2. Can I Install Laminate Flooring Without Trims?
Ans: While it’s possible to install laminate flooring without trims, it’s not recommended. Trims add stability and support to the edges of the flooring, prevent damage or chipping, and give a polished look to your installation. It’s best to use trims, especially around doorways, for a professional and finished appearance.
Q3. How Do I Clean Laminate Flooring?
Ans: To clean laminate flooring, sweep or vacuum regularly to remove any debris or dirt. You can also use a damp mop with a mild cleaner specifically designed for laminate floors. Avoid using harsh chemicals or excessive water as they can damage the flooring. Always follow the manufacturer’s cleaning instructions for the best results.
So there you have it – everything you need to know about ending laminate flooring at doorways. With the right tools, techniques, and tips, you can achieve a professional finish that will elevate the look of your space. Thank you for reading and happy installing!
Q4. Can I Install Laminate Flooring on Top of Existing Flooring?
Ans: It’s not recommended to install laminate flooring on top of existing flooring, as it can cause unevenness and instability. It’s best to remove the existing flooring before installing laminate for a smooth and durable finish.
However, if you must install it on top of existing flooring, make sure it is clean, level, and in good condition. Use an underlayment for added stability and follow the manufacturer’s instructions carefully. Always consult a professional if you’re unsure or inexperienced in this type of installation.
Conclusion
Now that you know how to end laminate flooring at doorways, you are better equipped to take on any project for your own home. Knowing how to complete the job with precision and confidence is an important step in completing a renovation project. With patience and perseverance, you can complete projects with ease. Don’t forget to be precise when measuring and cutting so that your floor looks its best when it’s all finished.
Finally, take time to admire your completed project; it’s a great feeling knowing you did it all yourself!
If you need anything from tool advice to specific instructions on how to use machinery for a project involving laminate floors or other materials, reach out to professional contractors who specialize in this kind of work–they can provide valuable insights and help foster a successful outcome of any project. Now, grab some tools and get started on your next project –you can do it!
Angela Ervin
Angela is the executive editor of DIY quickly. She began her career as an interior designer before applying her strategic and creative passion to lifestyle and home. She has close to 15 years of experience in creative writing and online content strategy for housekeeping, home decorations as well as other niche efforts. She loves her job and has the privilege of working with an extraordinary team. She lives with her husband, two sons, and daughter in Petersburg. When she's not busy working she spent time with her family.