
How to Extend Chandelier Wire
Extending your chandelier wire is a great DIY project, and it’s pretty simple. You need essential tools like an electric drill, screwdriver, pliers, wire cutters/strippers, electrical tape, or heat shrink tubing. You’ll also need to decide if you want to use stranded copper wire or solid copper wire. Stranded wire has more flexibility than reliability, so it’s often used for longer wire runs in larger fixtures with many bulbs.

Solid is most commonly found in smaller fixtures with fewer lights. However, the extra thickness can sometimes cause problems with turning on the light switch when installing them inside furniture pieces like dressers or cabinets where there are tight corners and small spaces between objects. Read on to know more on how to extend chandelier wire.
10 Ways on How to Extend Chandelier Wire:
1. Splice in News Wire:
If the chandelier is older and you don’t know how much wire there should be, splicing in the new wire will add capacity to your chandelier. At this point, you can add as much additional wiring as needed to reach your desired length.
Next, cut two pieces of wire, twist the ends together and insulate. This works exceptionally well with stranded wire since it is already a bundle, as you can separate a section to use.
2. Add New Wires:
In instances where you know how much wire your chandelier should have been wired with originally, running a new wire will be much easier. At this point, you can add as much additional wiring as needed to reach your desired length without having to splice in a new section.
3. Add Wire Offset:
If you want to add more wire to your chandelier, follow the steps to add new wires or splice in the additional wire. As you are feeding the new wiring section up into the ceiling cap below, move about 6 inches of old wiring off to one side so that it is not being used.
Then attach the new wiring section to the old section with wire nuts and continue adding the additional wiring, again making sure that none of it is touching any other existing wiring.
4. Use Wire Nuts:
Wire nuts are great for holding together chandelier wires because they allow you to run additional wire sections without having to solder them together. They work well with both old and new chandeliers.
5. Twist Wire Together:
If you only need to run a few inches of additional wiring, twist the ends of the wires together without using an insulator. This works especially well with stranded wire since it is already a bundle as you can separate a section to use.
6. Use Wire Clamps:
Wire clamps are great for adding chandelier wire to existing wiring. They can be used on both old and new chandeliers, though they work best with modern chandeliers that have ‘s’ hooks or wire loops at the end of each strand. As you run your new wiring section up into the ceiling cap, loop the chandelier wire around the existing wiring and attach it to itself with a wire clamp.

7. Use a Ferrule:
If you need to add chandelier wire to existing wiring that has been run through a pendant light canopy, you will have to reach into the ceiling cap. A ferrule is essentially a small metal tube that can be used as an extension for your hand so that it will hold onto the insulation of the new wiring you are feeding up through the ceiling cap. Slide a small piece of wire into the ferrule and pull it out of the ceiling cap. This will create a small loop on one side that you can feed your additional wiring into.
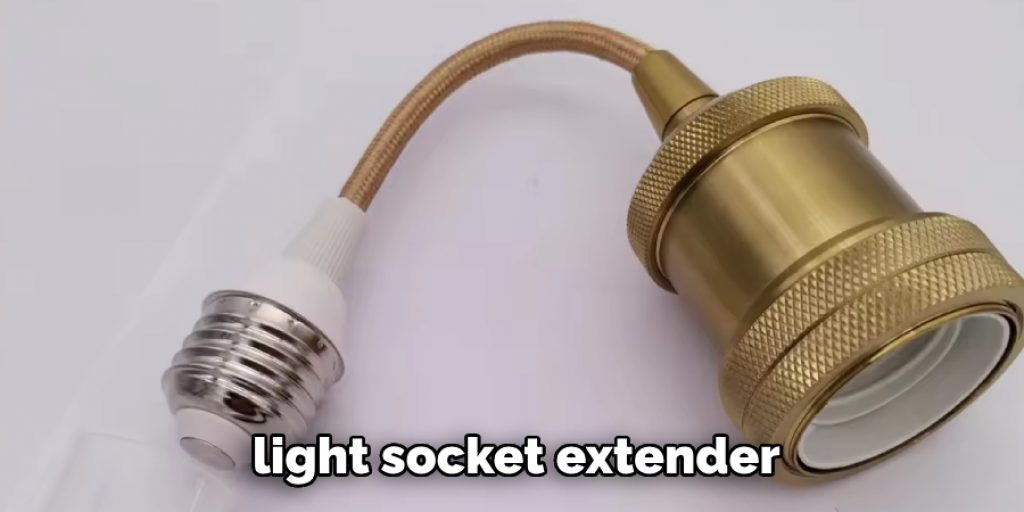
8. Use a Light Socket Extender:
A light socket extender is an excellent way to extend your chandelier wire because you can attach the original light bulb to it and thus avoid having to change out any of your light bulbs. Thread it up through the ceiling cap, slide the original piece of chandelier wiring into one open end and attach it to the other open end with a wire nut.
9. Use Wire Fencing Connectors:
Wire fencing connectors are great for extending chandelier wires because they will allow you to connect multiple chandelier strands at once instead of only adding one strand at a time. To make things easier, choose a connector that will fit the gauge of your existing wiring. Then slide both strands of the wiring through it and twist it back together on one side so that they are held in place.
10. Use a Fish Tape:
A fish tape is another method for extending chandelier wires because you can feed multiple cables up into the ceiling cap at one time. As you feed it through, attach a piece of chandelier wire to the end of the fish tape and secure it with a zip tie. Then pull out as much additional wiring as needed without dealing with any tangles or knotting.

Tips and Tricks:
- To find the middle point, bend the wire in half.
- Cut both pieces slightly longer than you think you need to. Of course, you can always cut off the extra cord, but it’s harder to add more if something doesn’t reach you!
- If the cord is too long, you can always tuck it into the chandelier itself, but don’t go overboard!
- Use pliers to help with your wire-bending.
- Make sure the wire doesn’t have sharp or rough edges, or it will cut through your paracord.
- Another trick is to thread the wire through the cord before wrapping it around the chandelier.
- Test out how your paracord handle will look with your chandelier before you attach it for good!
Conclusion:
The wire on your chandelier is likely to need an extension if it doesn’t reach the ceiling or needs to spread out more for a larger room. For that, you will need some copper wiring and connectors. But, first, measure how much of an extension you want by stretching the existing wire from one end of the space where it hangs down over to near where you will place it on top of the other side’s wall plate.
Then cut another piece of wire so that its length equals this measurement plus about six inches extra, which will give enough slack for future adjustments as needed. We hope this blog post on how to extend chandelier wire has been helpful. Let us know your thoughts in the comment below!


