How to Fix a Broken Retainer Wire
If you’re a teenager or adult with braces and you’ve lost your retainer wire, it’s not as difficult as you may think to fix the problem. All that is needed is a pair of needle-nose pliers and either electrical Tape or dental floss. The first step in repairing the broken wire is to remove any old adhesive from the area where the break occurred.
Next, loop one end of dental floss around one side of the broken wire and wrap it tightly over itself on the other side. You will then use an object such as a pencil eraser or wooden toothpick to press down on both ends until they are firmly secured. Read on to learn more information about how to fix a broken retainer wire.
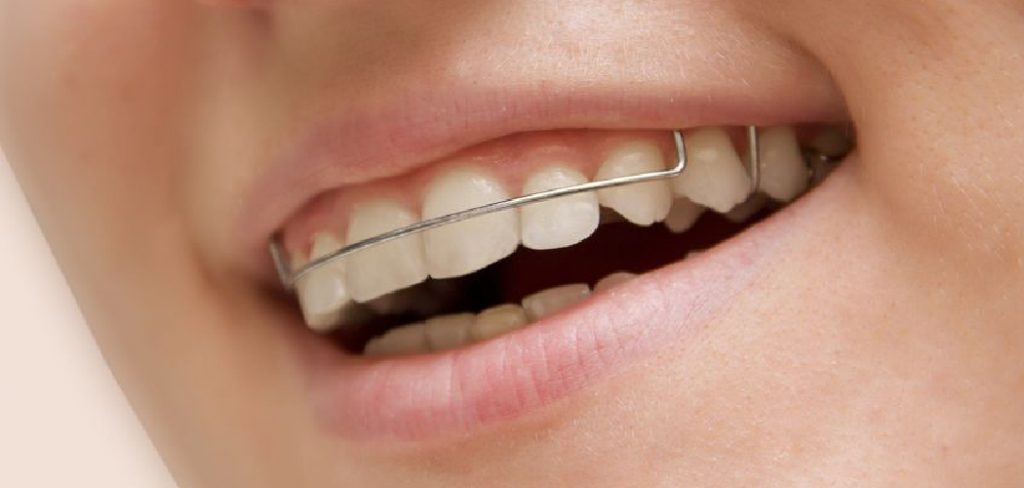
What is a Retainer Wire?
A retainer wire is a thin, metal wire that is attached to the back of your teeth after braces are removed. Its purpose is to hold your teeth in place and prevent them from shifting after orthodontic treatment. The wire is typically bonded to each tooth with a special dental adhesive. You may have a retainer wire on the upper and lower arches of your teeth.
You may also have a removable retainer, which is a clear plastic tray that fits over your teeth and is worn at night. This type of retainer may also have a wire component attached to it for added stability.
Why Do Retainer Wires Break?
Retainer wires can break due to various reasons such as normal wear and tear, accidental damage, or improper care. These wires are thin and can easily bend or break if not handled carefully. Some common causes of broken retainer wires include eating hard or sticky foods, grinding or clenching your teeth, and not following proper oral hygiene.
You may also experience a broken retainer wire if you have a habit of biting down on your teeth or using them to open packaging. If the wire is not properly secured to your teeth, it can become loose and eventually break.
Five Reasons Why You Should Fix Broken Retainer Wire:
1. To avoid paying ridiculous amounts of money
2. Not all orthodontists use the same type or gauge of wire, which means different orthodontists will charge you a different price.
3. If you lose your retainer after the warranty is up, you would have to buy a new one for about the same price.
4. When your retainer comes in the mail, you might not know how to put it on, and it will be a waste of money if you do not use it properly.
5. Fixing a broken wire will usually take an hour or less, depending on how bad the damage is to the wire.
8 Ways on How to Fix a Broken Retainer Wire:
1. Use a Rubber Band
Some people have tried this solution to fix their broken retainer wire, and it works! Cut a rubber band that will fit around the bracket of the missing wire, slide it over your teeth, and voila! It is just as effective as wearing a retainer. Some customers have said that this works for about a day. So, if you are in a pinch and cannot get to your orthodontist right away, this is an option. You can also use orthodontic rubber bands specifically designed for this purpose.
2. Use Tape
You know those knockoff braces you can buy at the costume store? Well, if you have them on hand, they can help fix your broken retainer wire! Take some tape and Tape the two ends of the wire together so it is tight enough to fit snugly around your teeth. This solution can work for a few days, so it is more long-term than the rubber band. Keep in mind that this solution is not recommended by orthodontists and should only be used as a temporary fix.
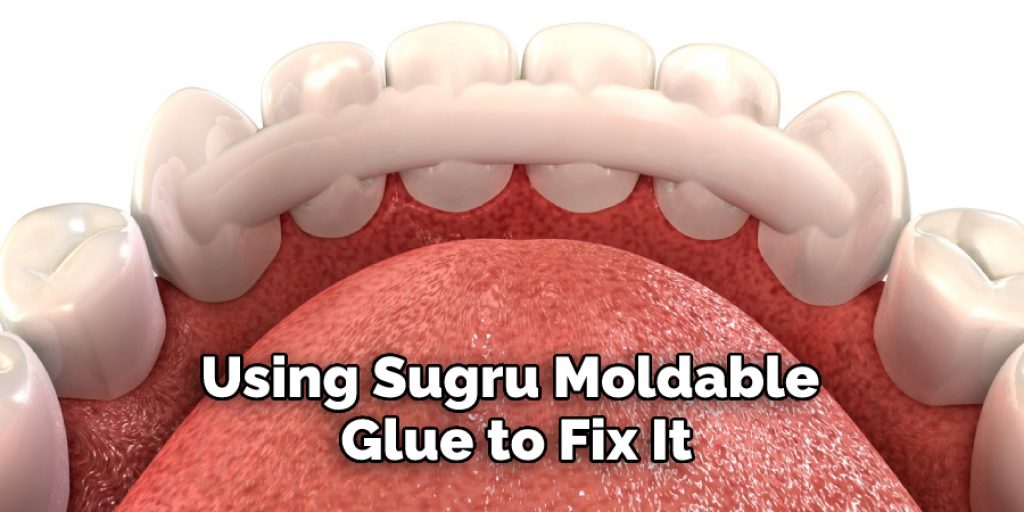
3. Use Sugru Moldable Glue
This solution can also be used for any other removable appliance you have, not just a retainer wire. Take out the broken piece of your appliance and follow the instructions on using this moldable glue to fix it! It can last up to 3-4 months if done correctly. This solution is a bit more expensive but is worth the investment if you cannot get to your orthodontist right away. The best part is it dries clear and blends in with your appliance, making the repair barely noticeable. You can purchase this product online or at most craft stores.
4. Use Wire Cutters
This solution allows you to wear your retainer again. Take some wire cutters and clean the ends of the broken pieces of your retainer. Use these wire cutters to make two small holes at each end of the fractured part, creating a new clasp. Then, you can loop some floss or wire through these holes and tie it tightly to secure the ends together. This solution is not recommended as a long-term fix and should only be used until you can see your orthodontist.
5. Use a Water Bottle
This solution can help place your broken piece again. Take a water bottle and cut it in half, cutting off the top of the bottle while leaving enough to cover the wire clasps at either end of the broken part of your appliance. Then, take pliers and squeeze each piece together so that each end of the wire is inside one-half of the water bottle. Then cut the top off, revealing your new clasp! This solution should only be used as a temporary fix and is not recommended as a long-term solution.
6. Use an Old Credit Card
This solution works best if your appliance is still holding onto one end of your teeth. Take an old credit card and bend the plastic back and forth until it breaks off the card. Then cut a small slit at each end of the broken part of your appliance, like you would make a new clasp with a wire cut. Use Tape. This solution is very similar to using Tape for your broken device. Cut a piece of Tape that will fit around the wire clasp, but be sure to leave some extra tape so you can cut it off afterward.
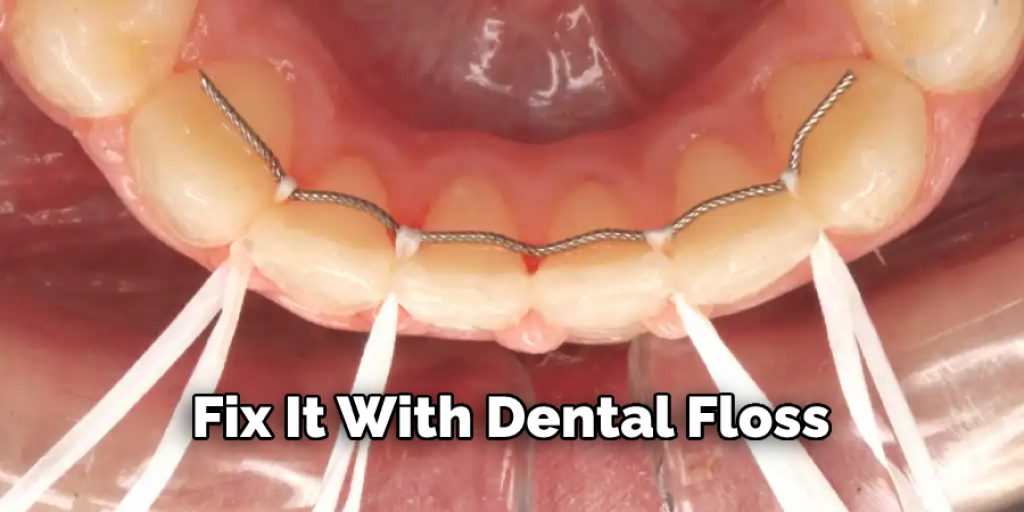
7. Use Dental Floss
This solution is very cheap, but it only works when the wire hasn’t fallen off completely. First, cut a small slit in both ends of the broken part of your retainer using wire cutters or scissors. Then take dental floss and thread it through both slits, making a knot so that it stays in place. Just remember to cut the floss when you are finished wearing your retainer! This solution is a temporary fix and should only be used until you can see your orthodontist.
8. Use Elastic String
This solution is similar to using dental floss. Cut a small slit in both ends of your broken appliance, and cut two pieces of elastic string that will fit into the slits. Tie each piece of string into a knot so that it is now sewn into place. Then, take some scissors or wire cutters, slide them under the line, then cut off the extra elastic. This solution is not recommended as a long-term fix and should only be used until you can see your orthodontist.
Following these solutions can help fix your broken retainer wire until you can get to your orthodontist for a proper repair. It is important to fix your retainer as soon as possible because it helps maintain the position of your teeth and prevents them from shifting back to their original position.
Do You Need to Use Professionals?
While these solutions may work in a pinch, it is always best to go see your orthodontist for a proper repair. Professional orthodontists have the knowledge and tools to fix your retainer correctly and ensure that it fits properly. They will also be able to check if the rest of your appliance is still working as it should be. If you continue to have problems with your retainer wire, even after trying these solutions, it may indicate that there is an underlying issue that needs to be addressed by a professional. It is always better to be safe than sorry when it comes to the health of your teeth and the effectiveness of your orthodontic treatment.
In addition, using professionals for fixing your broken retainer wire can also save you time and hassle. While the temporary solutions mentioned above may work for a short period of time, they are not meant to be long-term fixes. Going to your orthodontist ensures that your retainer will be fixed properly and will last you until your next scheduled appointment.
How Much Could It Cost?
The cost of fixing a broken retainer wire can vary depending on the severity of the break and the type of appliance you have. In some cases, it may be covered by your orthodontic treatment plan, while in others, it may come at an additional cost. It is always best to consult with your orthodontist about any potential costs before proceeding with a repair. It is also important to communicate with your orthodontist if you are experiencing any financial difficulties, as they may be able to provide alternative options for payment or repairs.
It is essential to take care of your retainer and ensure it is functioning properly to maintain the results of your orthodontic treatment. If you experience any issues with your retainer, do not hesitate to contact your orthodontist for assistance. By following these solutions and seeking professional help when needed, you can keep your teeth aligned and maintain a healthy smile.
Some Tips and Suggestions:
1. If your wire is only slightly broken, you may be able to fix it with dental floss or a paperclip! Just thread the floss through one side of the retainer and pull across and out the other side. This method may work for some metal wires.
2. There are also several methods on how to temporarily fix your broken appliance (with Tape, rubber bands, elastic string, etc.) so that you can wear it again. These are most effective when the wire itself has not fallen off of your teeth.
3. Some customers have said that these solutions do not work long-term if they constantly eat or drink throughout the day. Customers have also found that this method does not work if you are continually opening your mouth. This is because the retainer will become loose and slide out of place with all of this movement.
4. You may want to check with your orthodontist first before trying any of these methods, as they may have a better solution or idea for how to fix your broken appliance!
5. This can be a good idea if you have a metal wire on your appliance and try not to spend any more money on buying a new one.
6. You may want to take some before and after photos of your broken appliance if it is for something important, such as school or work. These retainer repair methods may not last as long as the one you would buy from a store, so it’s good to be prepared.
Overall, it is important to remember that these solutions are only temporary fixes and should not replace a proper repair from your orthodontist. It is best to see your orthodontist as soon as possible so they can properly fix your retainer wire and ensure that it will continue to function correctly in maintaining the position of your teeth. Additionally, if you experience frequent breakages with your retainer, it may be a sign that it needs to be adjusted or replaced. Always consult with your orthodontist for the best course of action when it comes to maintaining the health and function of your retainer.
Frequently Asked Questions:
Q: Can I Use Any Type of Tape for a Temporary Fix?
A: It is recommended to use orthodontic wax or medical grade tape specifically designed for dental use. Other types of tape may not be as safe or effective. You can consult with your orthodontist for the best type of tape to use in a pinch. It is important to note that tape should only be used as a temporary fix and not as a long-term solution. You should still see your orthodontist as soon as possible for a proper repair.
Q: Can I Use These Methods for Any Type of Broken Retainer?
A: These methods are best used for broken wire retainers. If you have a different type of retainer, such as plastic or acrylic, it is best to consult with your orthodontist for the best course of action. But if the wire on your retainer is broken, these methods may work for you. The key is to act quickly and see your orthodontist as soon as possible for a proper repair. You can also consult with your orthodontist for the best type of tape to use in a pinch. It is important to note that tape should only be used as a temporary fix and not as a long-term solution. You should still see your orthodontist as soon as possible for a proper repair.
Q: Can I Use These Methods If My Retainer Is Also Loose?
A: It is not recommended to use these methods if your retainer is also loose. This could cause further damage or discomfort. If your retainer is loosening or falling out of place, it is best to see your orthodontist for a proper adjustment or replacement. Once your retainer is secure, you can then use these methods as a temporary fix until you are able to see your orthodontist. It is always best to consult with your orthodontist for the best course of action when it comes to any issues with your retainer.
Q: Can I Continue to Wear My Retainer If It Is Broken?
A: While it may be tempting to continue wearing your retainer, it is not recommended if it is broken. Not only can this cause further damage or discomfort, but it may also prevent your retainer from properly maintaining the position of your teeth. It is best to see your orthodontist for a proper repair as soon as possible and use one of these temporary fixes in the meantime. It is important to keep your retainer in good condition to ensure the success of your orthodontic treatment. So, make sure to take proper care of it and see your orthodontist regularly for check-ups and adjustments.
Conclusion:
Once you have a retainer wire that is broken or bent, remove the wires from your mouth. This should be done with caution so as not to damage any teeth in the process. The next step would be to clean off any debris and food particles from where the broken part of the retainer wire was before using superglue on each side of it until it has been wholly glued together. You could also use dental cement for this purpose instead of going through all of these steps with regular old white-school glue.
After waiting at least 24 hours for the adhesive to dry thoroughly, put your orthodontic device back into place by inserting one end into an opening and then pulling out another end to create a loop that you could then place over your ear and tighten the loop around itself. We hope this blog post on how to fix a broken retainer wire has been helpful. Let us know your thoughts in the comments below!