
How to Fix a Guitar Amp
Introduction:
Guitar amplifiers are electronic devices that amplify the sound of an electric guitar. They can be either solid-state or valve (tube) and come in various shapes, sizes, power ratings, and quality levels. Guitars amplify without amplification equipment will produce very little noise but have less volume than amplified with an amplifier. In general, tube amps deliver warmer sounds while transistor amps provide higher volumes at a lower cost.
A transistor is a cheaper and cooler way to power a guitar than a tube. Some people think transistor guitars sound more natural, while others prefer the sound of a tube guitar. Transistor units also require less maintenance.
Some guitarists and producers prefer transistor amplifiers because they produce “purer” sounds with more sustain than their tube-powered counterparts. Today I will be discussing some easy techniques on how to fix a guitar amp.
What Types of Problems Happens in a Guitar Amplifier?
A guitar amplifier is a device that turns the electric signal from a guitar into sound waves. This process makes noise that can be played through loudspeakers or headphones. To create these electrical signals, a guitarist uses an electronic effect pedal with circuits like distortion, wah-wah pedals, or compressors to shape their tone.
The amplifier is not working correctly because there is too much voltage going through it. This causes the sound to be distorted and the power supply to not work properly. The problem is caused by too much high-frequency sound, improper grounding, poor input stage characteristics, and insufficient output transformer size.
Processes on How to Fix a Guitar Amp:
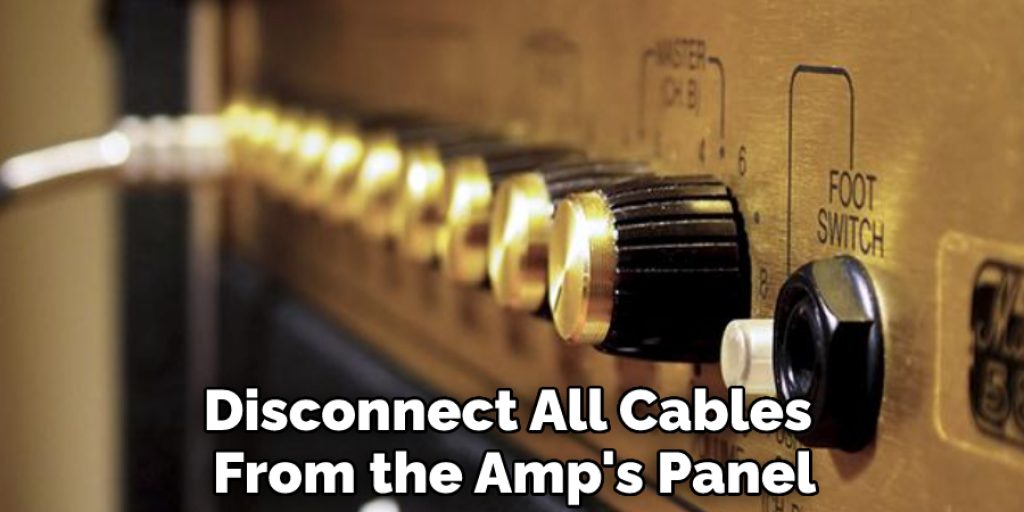
- Turn off the power and unplug from the outlet. Remove all cables, including speakers. Disconnect tubes or capacitors if they’re on a board by themselves (usually in preamps).
- Unscrew the device’s top panel to expose circuit boards; unscrew screws near tube base, too. Make sure not to touch anything inside! If you need help with this process, please see a qualified technician before proceeding further with repairs.
- Label each cable as it is removed so that when done taking them out of their slots, it can be put back into its position without having to fumble around looking for where it goes next time you need to do work on the amp again. This will make the process run more efficiently.
- Once cables are removed, disconnect wires from the tube base by lifting them and pulling away; unscrew screws on the base of tubes to remove the base.
- Clean all grounding wire connections with a cloth or screwdriver if they’re corroded or show signs of corrosion. If this is not done correctly, it can cause damage to your equipment which will cost considerably more to fix than what you initially paid for the amp!
- Replace capacitors that have been disconnected from their board if there’s any sign of bulging on the top surface, leakage (not just through holes), discoloration, etc. Capacitor life expectancy varies depending on the type but usually lasts between five and ten years before it needs to be replaced.
- If capacitors are leaking, replace them with Nichicon or Panasonic caps; these will cost more, but they have a longer life expectancy than other brands and hold their value better on the secondary market if you choose to sell your amp later.
- Remove all old solder from tube sockets by using desoldering braid or wick (though this can make holes in circuit boards). Solder new tubes into the socket without getting any excess solder onto pins inside the socket that contact the tube base because it’ll cause arcing when power is applied…also, check for leakage at each pinpoint where wires attach. Use flux pen before soldering, so joints don’t corrode quickly as well!
- Ensure screw connections are tight; ensure that all screws are straight, not bent or damaged.
- Inspect for loose speaker wire connections and tighten them up with a twist tie were needed to make sure they’re secure again. If the power cord has been replaced before, it might be time for another one. If you need longer than 15 ft of cable, you don’t want the amp going off in the middle of your performance!
- Check pots (potentiometers) on volume controls – these tend to be old and wear out after years of use, so replace as necessary if any problem is found when turning the knob back and forth from low to high settings. The knobs themselves can also become scratched over time, leading to poor quality sound output replace knobs as needed.
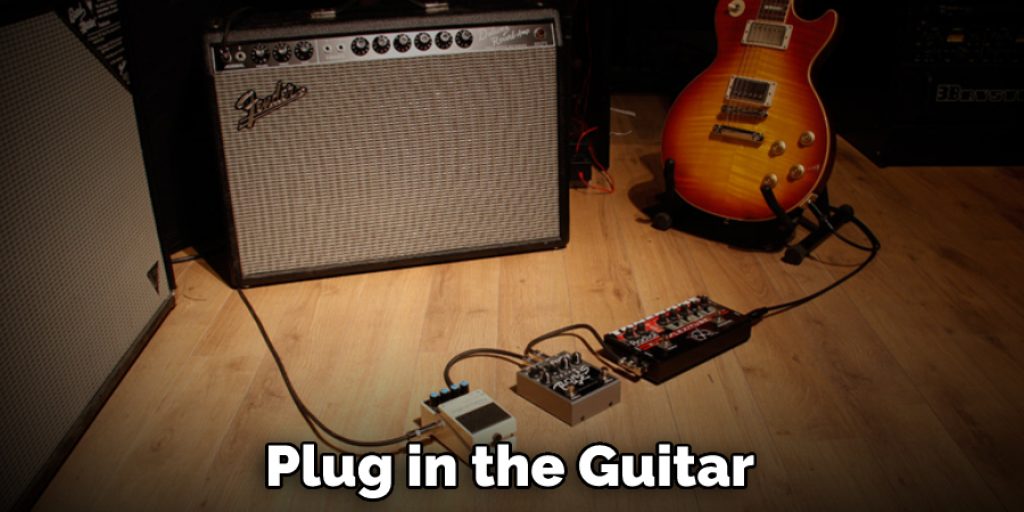
- With the amp still off, plug in the guitar to see if the good sound is being emitted from the inside of the amplifier – sometimes a simple rewire or power cord will fix this issue!
Precautions While Troubleshooting a Guitar Amplifier:
- Turn off the power and unplug the amp from its outlet before beginning to work on it.
- If you need to drill, use a bit with the right size for your hole and drill slowly not to overheat any of the components or cause damage by breaking one of them.
- Make sure there is good ventilation while working on an amplifier turned on because some vapors can be harmful if inhaled too often.
- Keep a fire extinguisher nearby in case of an emergency.
- Work on the amplifier with care, as they are expensive and delicate instruments.
How to Clean a Guitar Amplifier?
- Scrape the dust off with a credit card or guitar pick.
- Remove any excess residue from inside using a vacuum cleaner and brush attachments.
- Apply an adhesive remover to remove tape, grease, gum, or glue on surfaces of the amplifier case (a lotion made for removing these substances works best).
- Clean all dirt from around knobs and buttons, such as the power switch and volume knob, because it will make them difficult to use later if not cleaned now.
Use dry cloths to wipe down areas that have been wetted during the cleaning process before they dry out completely to properly absorb moisture again since this makes them easier to clean in the future.
Difference Between the Stereo Amplifier and Mono Amplifier:
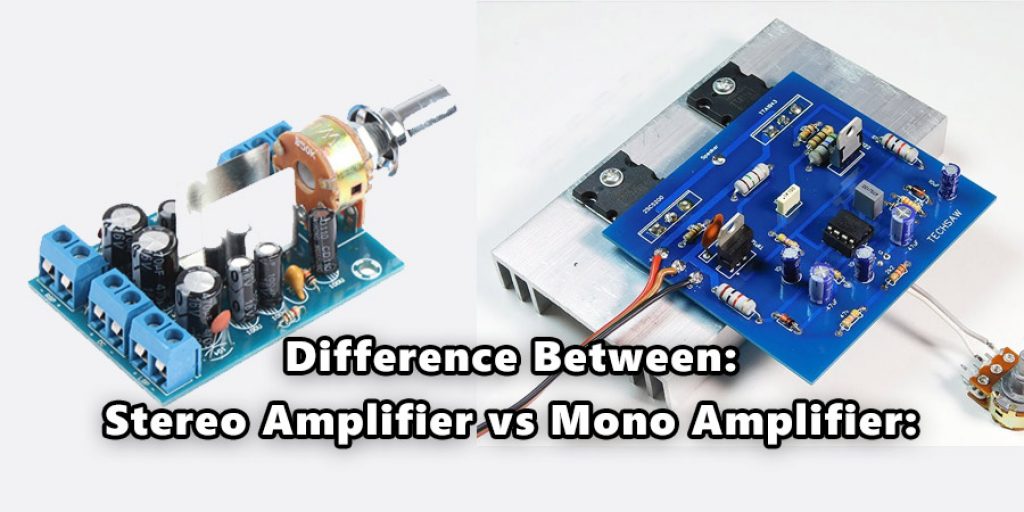
- A mono amplifier is a transistor or valve circuit that has only one input and one output. The signal is split to go to both the left and right channels, but it’s not mixed; instead, each side gets the same signal simultaneously.
- The stereo amplifier system splits up two inputs into four outputs – two for your speakers on either side of you, with an additional speaker in between them called a center channel. This allows the sound from different sources (e.g., vocals) to be heard by listeners on opposite sides of the room using more than just their ears alone. It also provides greater separation between instruments, letting those playing bass notes stand out while drums continue playing uninterrupted nearby.
Conversion of Stereo Amplifier to Mono Amplifier:
This is a simple DIY project that can be done in about an hour and for less than $30. The stereo amplifier will need to be rewired, so it only has one input and output, but the sound would still come out of both speakers (or just left).
First, disconnect all cables from the amp’s back panel; this includes speaker wires, power cable(s), remote control wire if applicable, etc.
- Afterwards, you need to remove your old power transformer by either unplugging or unscrewing it off at the top near where there may also be some screws on each side holding together your chassis cover; try not to disturb anything else inside while doing this. If possible, do not let any bare metal touch the chassis cover.
- Then strip any insulation from a wire and attach it to either one of the power wires on your speaker – do not use both. They should only be coming off of one terminal. You can test now if it still works by plugging in the amp with this new setup; you may need to adjust the volume knob or turn up/down variable potentiometer (if applicable) for sound through speakers as well.
How to Identify a Good Quality Amplifier?
An important thing to know when buying a guitar amp is the quality of the amplifier. There are other considerations, such as features and size, but it all starts with what your needs are. For example, if you plan to play gigs at bars or clubs, then an amp with a lot of power may be more suited for your needs.
If you want to play music in small places, you need an amplifier with less wattage. To find an amplifier with good sound quality, listen to it in different music stores.
You Can Check It Out to: Connect Guitar Amp to Mixer

Final Thoughts
We hope this article has given you the knowledge to fix up your guitar amp. We’ve done our best to cover a wide range of information and all aspects that can affect an amplifier. For obtaining the best result, you should always maintain all the steps properly. Thanks for reading!
You May Read Also – How to Make a Homemade Guitar Humidifier


