
How to Fix an Overwound Clock
If you have an old clock that has stopped working, it may be because the weight is overwound. A clock’s weight winds the spring, which powers the gears. If the importance continues to turn after it winds down, this can cause damage to your clock’s mechanism and lead to a broken or non-working clock.
As the saying goes, time flies when you’re having fun. But what happens when time seems to be flying too fast or worse when it’s crawling by? If your clock is ticking too quickly or slowly, there may be something wrong with its timing mechanism. There are different ways to fix this problem on your own, depending on what type of movement your clock uses for power. This blog post will show you how to fix an overwound clock.
What is an Overwound Clock?
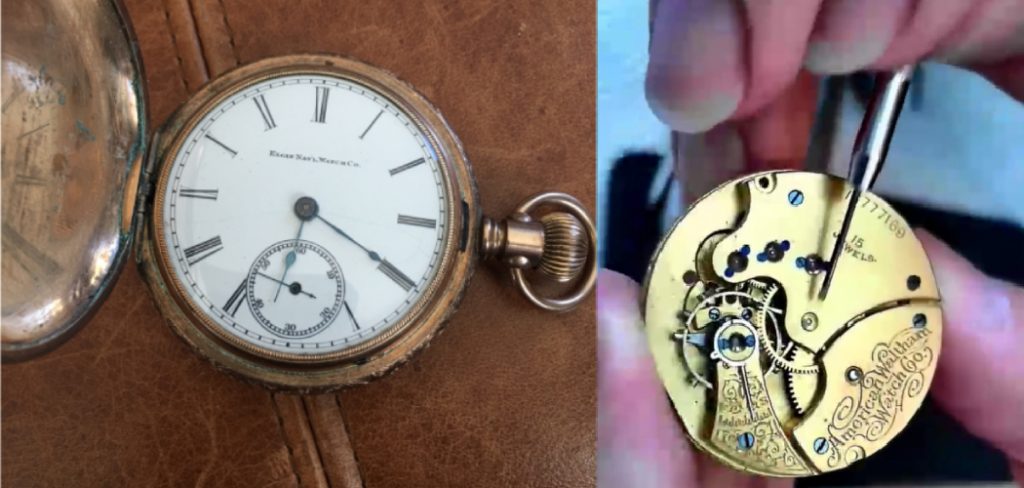
An overwound clock is one that has been wound too tightly or for too long. This can cause the spring to become overstretched, leading to issues with the clock’s mechanism. These clocks are often vintage or antique and require special care when handling and fixing them.
It is important to note that overwinding a clock can happen in both manual and automatic winding clocks. In a manual clock, the user must turn a key or crank to wind the spring, while an automatic clock uses gravity to rotate the weight which winds the spring.
The signs of an overwound clock include a ticking sound that is too fast, the hands moving too quickly or not at all, and in some cases, the clock stopping altogether. If you notice any of these symptoms, it is important to address them as soon as possible to avoid further damage.
Why Does a Clock Become Overwound?
There are several reasons why a clock may become overwound, including:
Forgetting to Wind the Clock:
If the user forgets to wind their manual clock and then winds it too much at once, this can result in an overwound spring.
Turning the Key or Crank Too Tight:
When winding a manual clock, it is important to be gentle and not turn the key or crank too tightly. This can cause the spring to become overwound.
Incorrectly Setting the Hands:
In some cases, setting the hands of a clock backwards or forwards can also cause the clock to become overwound. This is because when setting the hands, the user may accidentally wind the spring further.
Needed Materials:

To fix an overwound clock, you will need the following materials:
Clock Oil or Lubricant:
To ensure the clock’s mechanism runs smoothly, you will need to use a clock oil or lubricant.
Screwdriver:
You may need to open up your clock’s casing to access the movement and fix any issues. A screwdriver will be needed for this step.
Soft Cloth:
It is important to handle delicate clocks with care. Using a soft cloth when handling the clock will help prevent any scratches or damage.
10 Ways on How to Fix an Overwound Clock:
1. Remove All the Batteries:
This one may seem like a no-brainer; however, it’s worth mentioning if batteries power your clock. Sometimes you cannot tell that this is the problem, and the clock will run again once the batteries are placed back in. You can avoid any confusion by removing all the batteries and then putting them back in.
It’s important to note that this method only applies to battery-powered clocks and not manual or automatic winding clocks.
2. Turn it Upside Down:
Believe it or not, this has worked for me on more than one occasion. Changing the position of the clock hands seems to reset whatever mechanism is causing it to be overwound. Just be sure to handle the clock with care and keep it steady while flipping it over.
You can also try gently tapping the clock on a soft surface to see if that frees up any stuck gears. It’s essential to be gentle with this method and not apply too much force, as it can cause more damage.
3. Change the Strength of the Spring:
This one may seem like more of a permanent fix; however, if you are up for some fun with tools, this is an excellent way to get your clock ticking again without using any of the other methods. Some clocks allow you to adjust the spring’s strength, usually by using a screwdriver on a nut located near the spring. Adjusting this can regulate the winding tension and prevent overwinding.
It is important to note that this method may require some trial and error before finding the perfect tension for your clock.
4. Tap the Clock on Its Side:
This is another one that may seem like a no-brainer, but sometimes it’s the little things that make the difference. A gentle tap on its side may be all your clock needs to start ticking again. Just be sure to handle the clock with care and not apply too much force. But sometimes, a simple shake or tap can fix any stuck gears in the clock’s mechanism.
You can also try this method with the clock’s hands in different positions to see if that makes a difference. It may take a few tries, but it’s worth it if your clock starts working again. The key is to be gentle and patient.
5. Use a Pencil:
If you’ve tried all of the above and your clock is still not ticking, it’s time to get a little more hands-on. Take a pencil (or something else with a thin, cylindrical shaft) and insert it into the hole on the side of the clock. Gently turn the shaft until you feel the mechanism inside start to move. This method is similar to using a key or crank, but it allows for more control and precision.
You may need to try this method from different angles or even use two pencils at once. Just be sure not to apply too much pressure, as it can damage the spring further.
6. Use a Toothpick:
If you don’t have a pencil, another household item has the same effect. If you place a toothpick in your clock’s hole and turn it gently, it should do the trick as well! Again, the key is to be gentle and not apply too much pressure.
You may need to try this method from different angles or even use two toothpicks at once. And just like with the pencil, it may take a few tries before your clock starts ticking again. The important thing is to be patient and gentle.
7. Remove the Pendulum:
Clocks without pendulums can be stopped by removing them. You will need to take out the screws; however, it is an excellent place to start. Once you remove the pendulum, swing it gently, and it should start ticking again.
It’s important to note that this method only applies to clocks with pendulums. If your clock does not have a pendulum, do not attempt this method.
8. Replace the Mainspring:
This solution may be for those of you looking for a more permanent fix, but replacing your clock’s mainspring is not as daunting as it may seem. There are a lot of tutorials on how to do this that can be found online.
But it’s important to note that this method does require some clock knowledge and experience, so if you’re not comfortable tinkering with the inside mechanisms of your clock, it may be best to take it to a professional.

9. Use a Hair Dryer:
This is another technique that can be used for clocks without pendulums. Turn your hairdryer on to its highest heat setting and hold it about six inches from the clock for a few minutes. This should help loosen any stuck gears and get your clock ticking again.
Be sure not to leave the hairdryer near the clock for too long, as it can damage delicate parts or cause overheating.
10. Use a Magnet:
This technique will require some trial and error, but it has worked for users in the past. Place a magnet on top of your clock and hold it there for a few seconds. If all goes well, the mechanism should start to move again. Just be sure to remove the magnet quickly so it doesn’t interfere with any other parts of the clock.
It’s important to note that this method may not work for all clocks, and caution should be taken when using magnets near delicate clock mechanisms.
Following these methods on how to fix an overwound clock should help get your clock ticking again in no time. Just be sure to handle your clock with care and patience, as forcing any parts can cause further damage. And if all else fails, it may be time to take it to a professional for repairs.

Some Tips and Suggestions:
1. Never use a tool to unwind the clock. The force of the gears rubbing against each other will cause uneven wear and may prevent you from winding your clock properly in the future.
2. Stop winding when there is still some room on the crown/knob left, even if it is only a few turns. This ensures that you won’t overwind your clock.
3. If you have not used your clock in a while, don’t try to solve the problem by winding it hard because you think it just doesn’t work correctly anymore or something wrong with the gears. This will probably break your clock.
4. When trying to correct an over-wound clock, you will almost always break it if you use excessive force. Just like when winding your clock, stop when there is still some room left on the crown.
5. If your hour wheel (the wheel with the 1-12 numbers on it) breaks off or falls out completely when trying to fix your over-wound clock, you will have to replace it. This can be not easy and probably best left to a professional clockmaker.
6. If it’s possible, take your clock to a professional clockmaker and let them fix it.
7. You can also try using a fishing line or strong string to unwind your clock instead of the crown/knob if you don’t have access to it. But, again, make sure that there isn’t any dust on either end of the string before you begin, and be very careful not to let the string go too fast or it may snap and break your clock.
How Do You Release a Clock Mainspring?

If your clock’s mainspring is overwound, you’ll need to release it before you can wind it up again. To do this, remove the hands from the clock and locate the winding stem. You should see a small hole in the center of the stem. Use a paper clip or a small screwdriver to insert it into that hole while also applying pressure to the opposite end of the clock. This should release some tension on the mainspring, allowing you to unwind it safely.
You may need to repeat this process a few times before the mainspring is fully released. And as always, make sure to be gentle and patient when working with delicate clock mechanisms.
Now that you know how to fix an overwound clock, your timekeeping will no longer be interrupted by this common issue. With these tips and solutions, you can confidently handle any winding problems that may arise with your clock.
Frequently Asked Questions:
Q: How Do I Know if My Clock is Overwound?
A: If your clock has stopped ticking or chiming, it is possible that the mainspring has been overwound. You may also notice a tightness when trying to wind the clock. It’s important to stop winding the clock once you feel resistance, as overwinding can damage the delicate mechanisms inside. You can also check for any visible signs of damage or warping on the mainspring.
Q: Can I Fix an Overwound Clock Myself?
A: It is possible to fix an overwound clock on your own, as long as you have some basic knowledge of clock mechanisms and are comfortable handling them. However, if you are unsure or do not feel confident in doing so, it may be best to take the clock to a professional for repairs. This will ensure that the clock is properly fixed without causing any further damage.
Q: How Often Should I Wind My Clock?
A: The frequency of winding depends on the type of clock you have. Some clocks only need to be wound once a week, while others may need to be wound daily. It’s important to refer to your clock’s manual or do some research to determine the proper winding schedule. Overwinding can be prevented by following this schedule and being careful not to force the clock when winding.
Q: Can I Use Oil to Fix an Overwound Clock?
A: It is not recommended to use oil or any other lubricant on your clock’s mechanism without consulting a professional first. Using the wrong type of oil or applying it incorrectly can cause damage to your clock. If you are unsure about using oil on your clock, it’s best to leave it to a professional.

Q: How Much Force Should I Use When Winding My Clock?
A: It’s important to only use gentle and steady force when winding your clock. Avoid using excessive force or trying to force the crown or knob past its natural stopping point. This can cause damage to the clock’s mechanism and lead to overwinding. If you feel resistance when winding, stop immediately and refer to your clock’s manual for guidance.
Overall, being gentle and patient is key when handling delicate clock mechanisms. So next time you find yourself with an overwound clock, remember these tip and solutions to get it ticking again in no time! Happy clock fixing!
Conclusion:
Overwinding your clock can result in the hands flying off and damaging other components. To fix an overwound clock, you need to release the tension on the springs that are wound too tightly by turning them counterclockwise with a screwdriver or hex key until they stop moving back and forth. If you have an overwound clock, the best way to fix it is by rewinding in reverse. You will need to take off the pendulum and get under the dial with a screwdriver.
Loosen one of the screws on top of either side of where your hand would be if you were holding onto it from underneath. Turn this screw so that both hands are going counterclockwise at once until they stop spinning altogether. Put everything back together again, and voila! The time should start ticking normally now! We hope this blog post on how to fix an overwound clock has been helpful. Let us know your thoughts in the comments below!


