How to Get Sand Out of Washing Machine
Do you ever feel like your washing machine takes forever to complete one cycle? If so, and maybe the culprit! The presence of sand in a washing machine can cause it to take longer and use more energy than usual. This is why it’s important to know how to eliminate this pesky issue.
In this blog post, we will discuss why sand gets into your washer in the first place, as well as how to get sand out of washing machine. So if your clothes always seem gritty after a wash or you keep experiencing technical issues with your appliance, then read on – we have all the answers that’ll make life easier for both you and your washer!
Why Does Sand Get Into Your Washing Machine?
There are several different reasons why and may end up in your washing machine. For one, if you live near the beach or spend a lot of time outdoors, then it’s likely that small bits of sand have made their way into your clothes and gotten trapped in your washer over time.
Another reason could be that your clothing has picked up grains of sand while drying on the outdoor clothesline. Or perhaps you recently moved to a new home and weren’t aware that the previous owner kept their washer outside – either way, there are steps you can take to remove any traces of sand from your washing machine.
What Will You Need?
To successfully remove sand from your washing machine, you will need a few basic supplies:
- A small vacuum or handheld broom to get the smaller pieces of sand out of your washer hose and inner drum
- An old toothbrush or scrub brush to loosen any large clumps of sand in more difficult areas, such as the drain pipe
- Lint-free rags for cleaning up messes and wiping down surfaces
- Sandpaper (optional) if your washer has rough spots that need extra attention
Once you have all of these supplies, you are ready to get started!
8 Easy Steps on How to Get Sand Out of Washing Machine
Step 1. Vacuum or Sweep Small Pieces of Sand
Start by using your vacuum or handheld broom to remove any small pieces of sand from the outer surface of your washer. Be sure to check inside the drum and all areas where sand could have entered and gotten trapped over time. If you are having trouble reaching certain areas of your washer, you may need to use a long metal hanger or other similar tools to help dislodge sand and other debris.

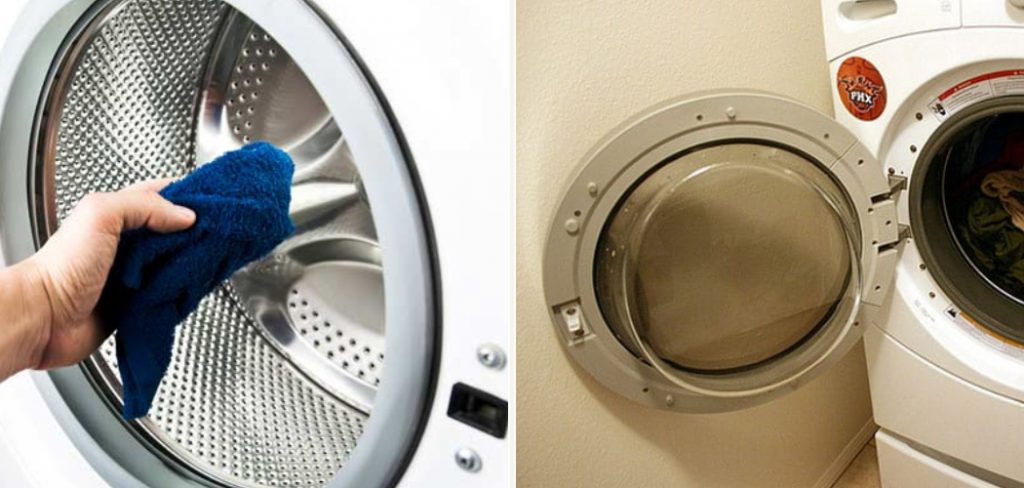
Step 2. Scrub the Inner Drum and Drain Pipe
Next, use your old toothbrush or scrub brush to gently scrub your washer’s inner drum and drain pipe. This will help to loosen any clumps or buildup of sand that may be present in these areas. You can also use a damp rag to wipe down these surfaces and remove any residual sand or debris that may have loosened during the scrubbing process.
Step 3. Soak Up Any Spills
While you are working on cleaning the inside of your washer, take this opportunity to soak up any spills or messes that may have occurred from removing the sand from its various nooks and crannies. Use lint-free rags to wipe away any residue or bits of sand that remain on your washer’s exterior surface.
It will also be helpful to use sandpaper or another fine-grade abrasive material to smooth out any rough or uneven spots that the sand may have created, such as around the drain pipe.
Step 4. Wipe Down the Exterior
It is also a good idea to wipe down the exterior of your washer with a damp rag, as small bits of sand have likely accumulated in all the nooks and crannies around this area, too. Be sure to pay special attention to any small crevices or openings that could be difficult to clean manually, such as buttons or controls on the front panel of your washer.
If you are using sandpaper, be sure to remove any leftover residue from the rough areas once you have finished.
Step 5. Empty Your Washing Machine
Once you have removed any trace of sand from your washing machine, it’s time to ensure that no more sand enters in the future. This means ensuring that you always use high-quality laundry detergent and fabric softener when doing your laundry and dumping out any excess water before shutting off the washer
It is important to remember not to overfill your washing machine, as this can cause more sand and debris to be trapped inside.
Step 6. Run Your Washing Machine

In order to get rid of any remaining traces of sand that may be stuck in the inner drum or drain pipe, it is a good idea to run your washer on its highest recommended setting for a few cycles. This will help to flush out any leftover debris and ensure that there are no lingering particles that could affect how your laundry turns out in the future.
If you notice that small bits of sand continue to enter your washing machine over time, then feel free to repeat this process as often as needed until all signs of sand have been removed. Depending on how much sand has entered your washer and how long it has been there, this may take several cycles or just one.
Step 7. Clean Your Washer’s Filter
In addition to cleaning the inner parts of your washer, be sure also to clean out its filter. This is a small removable compartment that can often get clogged or filled up with sand and other debris over time. To remove the filter, locate it on your washer and follow any instructions that may come in your owner’s manual.
Typically, you will need to use a small flat-head screwdriver or other similar tools to remove the filter’s cover. Once opened, take this opportunity to clear away all traces of sand from this area as well using an old toothbrush or scrub brush. You can then replace the filter cover and seal it back into place on your washing machine once you are finished.
Step 8. Leave the Door Open
After completing all these steps, leaving your washing machine door open is important to allow for proper air circulation. This will help prevent any residual sand from collecting inside your washer in the future and allow any bits that may still be stuck inside the drum or other areas to dry out completely.
Keep in mind that leaving the door open for too long may also cause your washer interior to become mildewed or moldy over time, so make sure that you are only leaving it open long enough for there to be a noticeable decrease in how much sand remains on its surface.
If needed, use a clean rag soaked in the bleach-free disinfectant solution and wipe down any exterior surfaces of the washer, including around the controls and knobs on the front panel.

By following these steps, you can effectively get sand out of your washing machine and keep it clean and free from debris.
Whether the problem is a result of one large piece of sand or a number of smaller particles, these tips will help ensure that your washer runs smoothly and efficiently. So the next time you notice bits of sand in your laundry, be sure to take action immediately so that it doesn’t become a more serious problem.
5 Additional Tips and Tricks
- Use a fine-mesh strainer or sieve to remove larger pieces of sand from the washing machine before running it.
- Fill an empty bucket with warm water and add some liquid laundry detergent. Soak your clothes in this mixture for about 20 minutes, agitating them occasionally to help release any stuck-on sand particles. Then rinse them thoroughly under clean water until all the soap is removed.
- Use a soft bristled brush to gently scrub any stubborn bits of sand off your clothing if needed. You can also try using an old toothbrush for hard-to-reach areas or detailed fabric folds.
- If you don’t have access to a washing machine at home, consider taking your clothes to a nearby laundromat or dry cleaner. Most establishments have industrial-strength washing machines that can effectively remove even the stickiest of sand particles.
- Consider investing in a portable washing machine for use at home, especially if you often spend time at the beach or other sandy locations.

With a little bit of effort and the right tools, getting sand out of your clothes is simple and hassle-free!
Conclusion
Getting sand out of your washing machine as soon as possible after coming home from the beach is important. The longer you wait, the harder it will be to clean. There are a few different ways to go about this, and the best method for you depends on how much time and effort you’re willing to put in. With a little time and effort, you can clear the problem and get back to doing laundry as usual.
Hopefully, the article on how to get sand out of washing machine has been helpful. Whether you’re dealing with small or large amounts of sand, several useful strategies and tips can help you get your clothes clean and free from debris.
So if you’ve recently returned from the beach or another sandy location, be sure to take action immediately so that you don’t have to deal with any lasting problems. Good luck!
You Can Check It Out to Use a Grill Mat