
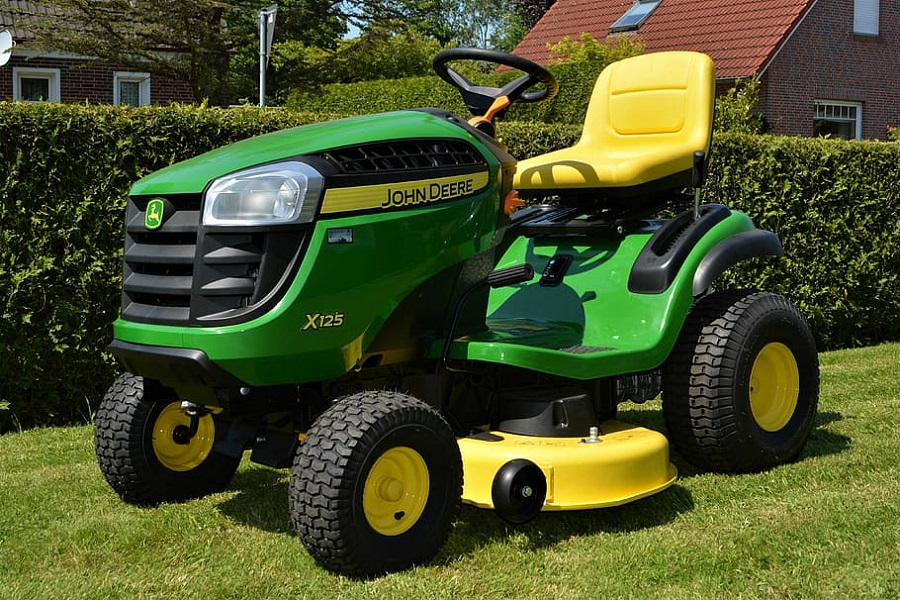
How to Glue Lawn Mower Seat Back on
No matters how much you love your lawnmower and how much you care for it. Sooner or later, you will have to face the annoying problem with the seat. That’s what leads many homeowners in some distressful situations. Commonly, the seat covering will come off, the cushion will become hardened, and so on.
In order to keep your lawn mower in optimal condition, you have to learn how to glue the seat back on. This simple step will extend the lifespan of the seat and prevent future damage. So, come with me and let’s show you the exact ways.
The speaker is a DIYer who loves to work on all sorts of projects. Recently, they were working on repairing their lawnmower seat. The seat had come off the plastic hinge it was mounted to, so the speaker used Gorilla Glue to seal the pieces back together.
After about 24 hours of drying time, the glue has set up nicely and is just as strong as before! This blog post will show you how to glue the lawn mower seat back on in 5 easy steps:
Summary: If your lawn mower seat back is broken, you can glue it back on with a few simple steps. First, remove the old seat back by gently pulling it away from the frame of the lawn mower. Next, clean the surface where the seat back will be glued on with a cloth or a dry erase marker to make sure the area is clean and free of any dust or dirt. Next, use a hot glue gun to attach the new seat back to the frame of the lawn mower. Finally, use a rubber band to hold the seat back in place until the glue has dried.
DIY: How To Glue Lawn Mower Seat Back On
Step One:
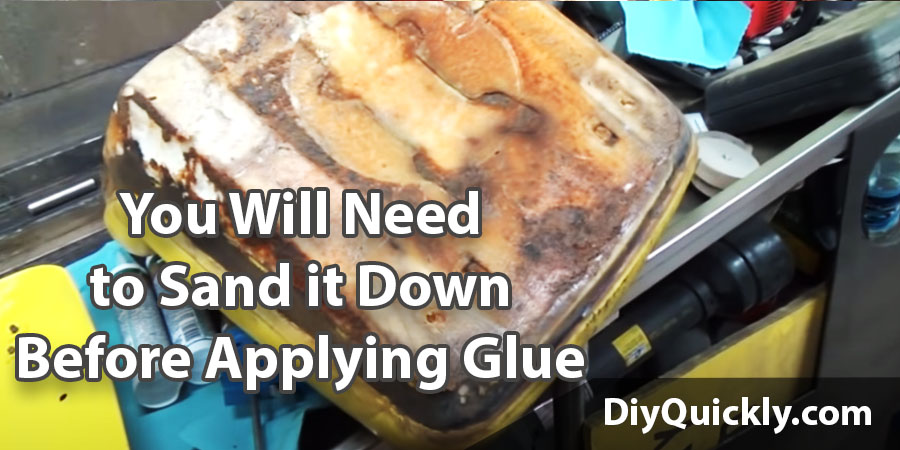
Remove the seat entirely. Then, start removing the vinyl cover. It may be old now, and you may need to replace it with a new one. Keep in mind that if there is any rust on this part, you will need to sand it down before applying glue.
Step Two:
You should clean both sides of your fastener before you set it aside for later use. One side of the fastener should have an adhesive pad still attached. You should carefully peel off this layer so that nothing sticks or peels away from either surface.

Step Three:
Use a small putty knife to scrape away any excess glue on the fastener surfaces. This will ensure that only fresh glue attaches itself there when you are attaching them in your final step.
You may also want to clean this area with rubbing alcohol or warm water beforehand if it is dirty from rust or other dirt; be careful not to get any of these liquids onto either surface while working!
Step Four:
Now we’re ready for re-assembly – first, apply adhesive ONLY (no need for cement!) liberally along both sides of one of your new plastic pieces where they attach together across the bottom edge. Place this tightly against the backside of your mower’s front metal frame (where the original metal fasteners attach) – make sure to line up the holes and screws.
Step Five:
Now take your old plastic seat (or a new one, if you need to replace it), press it against the newly attached plastic piece, and attach it to the metal frame with original screws; make sure you don’t overtighten these!
Step Six:
Now take your other new replacement seat piece and place it on top of this one, attaching them together across their bottom edge. Put a liberal amount of adhesive only (no need for cement!) along both sides where they meet at either end – this is important because we’re going to be pulling hard when we put our completed assembly back onto its base.
We want this glue to hold so that there’s no chance that the mower seat will fall off again any time soon! If necessary, use clamps or weights to keep everything in place while waiting for drying.
Things to Avoid to Glue Lawn Mower Seat Back On:
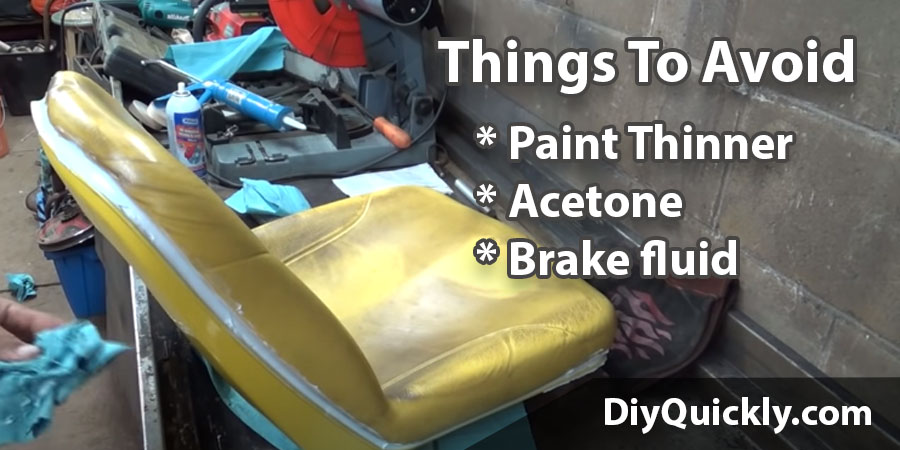
Paint Thinner:
The fumes from paint thinners are toxic and can cause serious illnesses.
Acetone:
This type of solvent is also used in nail polish remover, so you want to avoid it when possible.
Brake fluid:
You should never use brake fluid or anything containing sulfuric acid as a bonding agent for gluing your lawnmower seat back on.
Precautions to Glue Lawn Mower Seat Back On:
Wear gloves: You don’t want to get the glue on your hands because it’s very difficult to wash off.
Protect clothes and shoes: The best way is a coverall or old clothing for both you and any other person assisting in repairing the lawn mower seatback. If there are children, keep them away from the project area at all costs.
Keep the work area clean before starting this process of gluing the lawn mower seat back on: Make sure you have a flat surface without any debris (including dust) around if possible so that you can make sure the bond will be strong enough once you have applied the glue.
Conclusion:
When it comes to repairing your lawn mower, you may not be the most handy person. That’s okay! There are a lot of different ways that you can get help for this project from either friends or family members, as well as by hiring out professionals. We recommend looking into these other options before attempting to fix something on your own if you are unsure about what needs repair and how best to do so.
If none of those work for you and doing it yourself is worth the risk (you have experience fixing things like this), then follow our step-by-step guide below with pictures in order to know exactly where everything should go when gluing back onto your seat.
You may read also – How To Make Lawn Stripes
Elizabeth Davis
Elizabeth is a creative writer and digital editor based in the United States. She has a passion for the arts and crafts, which she developed from a young age. Elizabeth has always loved experimenting with new mediums and sharing her work with others. When she started blogging, she knew that DIYquickly would be the perfect platform to share her tutorials and tips. She's been writing for the blog from the beginning, and her readers love her helpful advice and easy-to-follow instructions. When she's not writing or editing, Elizabeth enjoys spending time with her family and friends.


