
How to Install a Bathtub on Concrete Floor
A bathtub is a perfect place to relax and unwind, but installing a bathtub on a concrete floor might seem impossible. This blog post will walk you through the steps of how to install a bathtub on the concrete floor. First, we recommend that you prep your concrete surface by removing any paint or sealant with a scraper and then sand it down until smooth.
Next, make sure to measure where your bathtub should go because once it’s installed, there’s no going back! Finally, lay out adhesive sheets along the perimeter of your tub area and fill in with mortar mix. Make sure not to put too much as this can lead to leaks if too many bubbles form from the excess mortar mixture. Read on to learn more information.
Why Install a Bathtub on Concrete Floor?
Bathtubs and showers take up much floor space and add considerable weight to your home. Installing a bathtub on your bathroom’s concrete floor eliminates the need to install tub joists on the floor while reducing the materials and work needed for this project. Additionally, the concrete floor is ideal because it will not rot or warp. It will provide you with the necessary support for your bathtub.
Tools and Materials for Bathtub on Concrete Floor:
- Concrete mixer
- Wood stakes (2×4 boards work best)
- Shovel or post-hole digger
- Tape measure
- Chalk line/rope level
- String (for leveling)
- Plywood base (to support tub and tile)
- Tile adhesive
Step by Step Guide: How to Install a Bathtub on Concrete Floor
Step 1 – Prepare Tub
Before you can start using your new bathtub, you need to do some preparations first. Take the bathtub out of the box and ensure there is no damage. If the box is in good condition, open it and remove the styrofoam packaging inside. Next, take off all the protective films that are on both sides of the tub. Finally, put the bathtub on top of the plywood base you prepared earlier.
This way, it will be easier to level the tub during installation. Next, use a trowel or flat head screwdriver to remove any air bubbles under the tub. This is important because if air bubbles are left inside the tub, they will only expand once it is filled with water. This can damage your bathroom’s floor.
Step 2 – Prepare Concrete Floor
The next step in this process will be to prepare the concrete floor by cleaning it and roughing it up so that the adhesive can stick properly. Ensure that you have swept up all debris from the room. Once the floor is clean, use your shovel or post-hole digger to puncture the concrete about two inches deep. This will serve as a place for your plastic sheeting and wood stakes to connect with the concrete.
Step 3 – Prepare Reinforcing
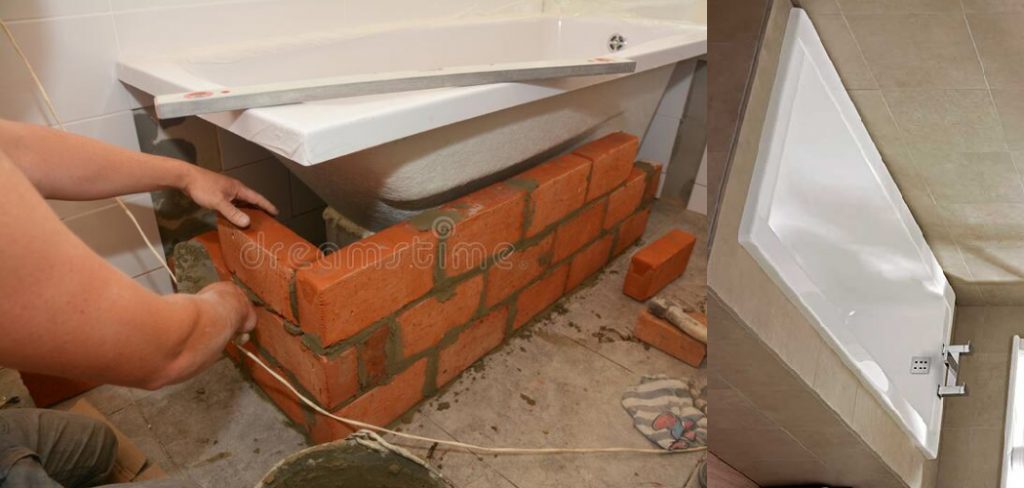
Next, you must install reinforcing where your bathtub rests on the plywood base. Finally, take you will need to prepare to reinforce your concrete floor. This assures that the tub’s weight is distributed evenly throughout the room. Otherwise, it could crack or cause other issues with the bathroom’s existing structure.
Use a marker to mark out guidelines you can follow when installing your wood stakes around your bathtub. The stakes should be evenly spaced and about two inches away from the tub. Use your shovel or post-hole digger to puncture small holes in the concrete floor through these guidelines. Once installed correctly, the wood stakes should be tall enough to stick out of the concrete, approximately 1/4 of an inch.
Step 4 – Prepare Tub for Installation
You must prepare your bathtub for installation by putting it in the approximate location where you want to install it. Then, place a level on top of the tub and ensure it is straight. Use bricks or some other weight if necessary to keep the tub from moving while you prepare for installation.
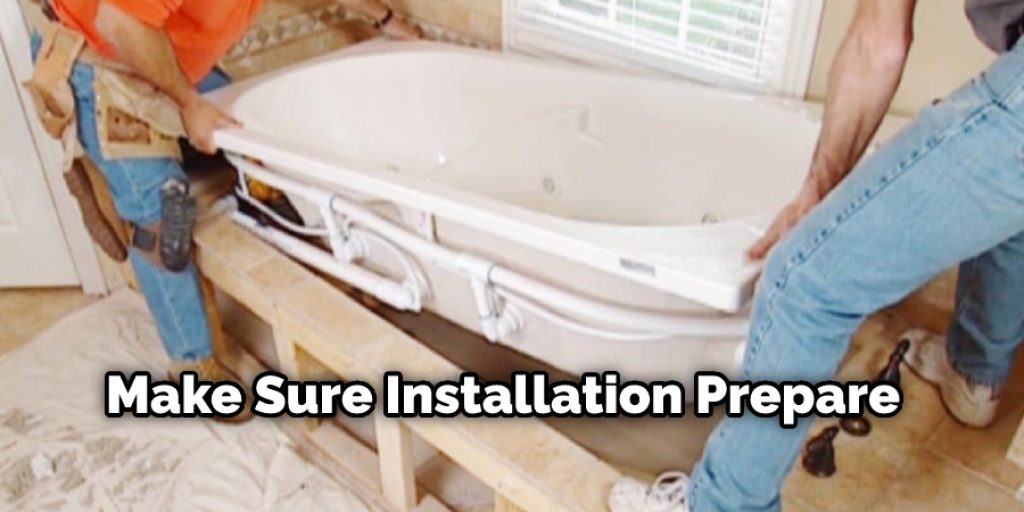
Step 5 – Install Tub
Once both your bathroom’s concrete floor and bathtub are prepared, you can finally install your bathtub. Use a transit or laser level to ensure the tub is completely straight before installation. This way, you will avoid installing it at an angle that could cause issues later on.
Once you have double-checked the location of your bathtub for accuracy, use a shovel to dig a bed for your tub. The size of this bed should be around four inches deep and big enough to fit the plywood base you had prepared earlier. Use the plywood base as a guide when digging out the trench.
Step 6 – Mix Concrete
Next, you need to mix a concrete batch and fill the trench you dug around your bathtub. Use a shovel or post-hole digger to fill the area with concrete. This should be about four inches thick. Once the bed has been filled, smooth it out using a trowel to level with the surrounding concrete. Use your level to ensure that both areas are flat and even with one another. This will help avoid any cracks forming in the future.
Step 7 – Install Tub Floor Drain
The next step in this process is installing the floor drain under your bathtub. You can purchase these at any hardware or home improvement store, which is fairly inexpensive. Next, cut out the concrete part where you will install your floor drain using a circular saw with a diamond blade.
Use a chisel to dig out the corners on all four sides, and use a sledgehammer or mallet to break up any parts that seem too difficult to remove by hand. After completely removing the concrete where your floor drain will be installed, use sandpaper to smooth down all of the edges so they are not sharp.
Step 8 – Cut Out Hole
The studs where your tub will sit need to be cut out to make room for the drain. Again, these can easily be purchased at a hardware store and come in different sizes, depending on the size of your bathtub. Measure and mark each stud, so you know where to cut and use a band saw to cut them out. Use a hammer and pry bar to remove any pieces of stud that are broken or splintered.
Step 9 – Prepare Floor Drain for Installation
When you have finished cutting out the holes for your floor drain, use sandpaper to clean up all sharp edges around the opening. Then take some sealant and use it around the edge of the drain to have a completely sealed surface.
Step 10 – Install Floor Drain
Once your floor drain has been prepared, it’s time to install it. The floor drain should be installed directly into the concrete with no space between them. You can use expanding foam or caulk if necessary to seal any cracks that form around the floor drain.
Conclusion:
The steps for installing a bathtub on concrete are relatively straightforward. However, you will need to have all the necessary tools, materials, and know-how before you begin. Once the concrete level is secure, it’s time to install the bathtub. We recommend using a mortar bed for your tub installation. Mortar is made from sand, cement, water, and sometimes lime or other additives that help adhesion between joints of materials stacked together.
It also helps prevent cracking in tile installations as well as waterproof surfaces. We hope this guide on how to install a bathtub on a concrete floor has helped educate you about what needs to be done when installing a tub on your own home’s flooring material of choice! Feel free to contact our team of experts if you have any questions or need more help with your bathtub installation project!
Angela Ervin
Angela is the executive editor of DIY quickly. She began her career as an interior designer before applying her strategic and creative passion to lifestyle and home. She has close to 15 years of experience in creative writing and online content strategy for housekeeping, home decorations as well as other niche efforts. She loves her job and has the privilege of working with an extraordinary team. She lives with her husband, two sons, and daughter in Petersburg. When she's not busy working she spent time with her family.


