How to Install Rockwool Insulation in Ceiling
Installing rockwool insulation in your ceiling can have many benefits for your home. Rockwool insulation is known for its excellent thermal and acoustic properties, making it a popular choice for homeowners looking to improve their home’s energy efficiency and reduce noise levels. In this section, we will discuss some of the key reasons why you should consider installing rockwool insulation in your ceiling.
The main advantage of installing rockwool insulation in ceiling is that it helps to reduce energy consumption and costs. This type of insulation creates a thermal barrier, preventing heat from escaping during the winter months and keeping cool air inside during the summer.
As a result, your home will be more comfortable throughout the year and you may even see a decrease in your energy bills. In this blog post, You will learn in detail how to install rockwool insulation in ceiling.
Step-by-step Instructions for How to Install Rockwool Insulation in Ceiling
Step 1: Inspect the Ceiling
Before beginning, it is important to inspect your ceiling and determine if any repairs need to be made. Look for any cracks or holes that could let air pass through and make sure they are properly sealed before installing the insulation.
Step 2: Gather Materials and Tools
To successfully install Rockwool insulation in your ceiling, you will need the following materials:
- Rockwool Insulation Batts or Rolls
- Measuring tape
- Utility knife or scissors
- Protective gear (gloves, mask, goggles)
Step 3: Measure the Ceiling Space
Measure the length and width of your ceiling space using Measuring tape to determine how much insulation you will need. Be sure to account for any obstructions such as ductwork or wiring. Using a utility knife or scissors, cut the Rockwool insulation batts or rolls to fit the measurements of your ceiling space. It is important to wear protective gear while cutting and handling the insulation.

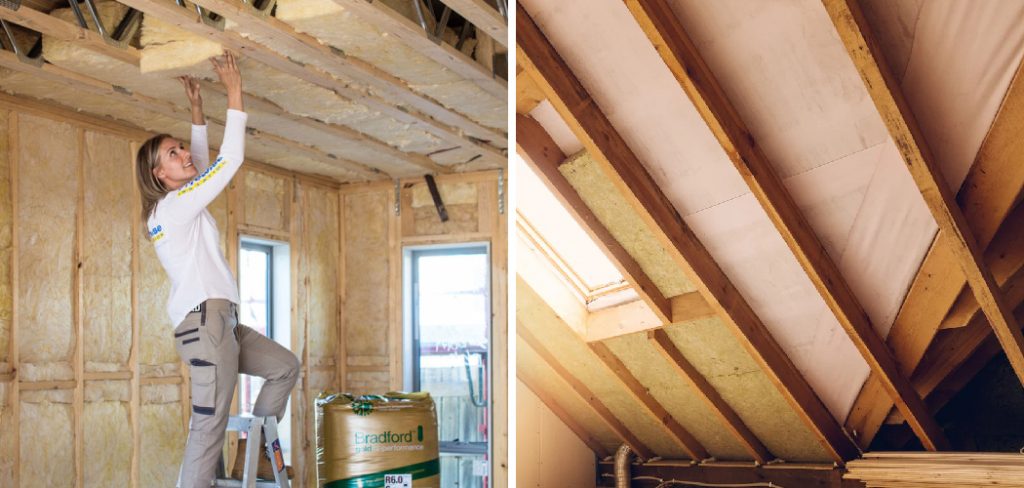
Step 4: Place the Insulation
Carefully place the cut insulation into the ceiling space, making sure it fits snugly and does not leave any gaps. If necessary, you can use a staple gun to secure the insulation in place. If there are any gaps or spaces left between the insulation and the walls or other obstructions, use scraps of insulation to fill them in. This will help ensure that your ceiling is properly insulated.
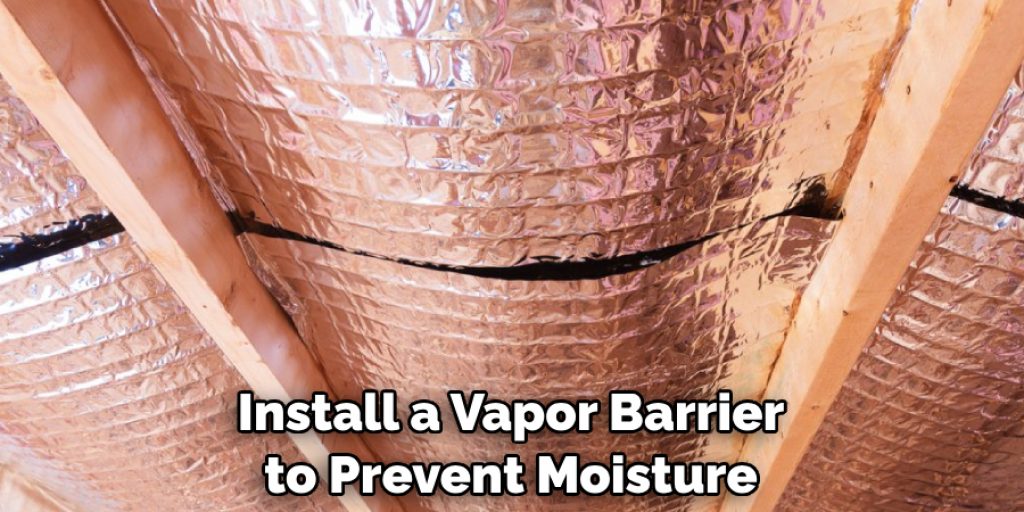
Step 5: Install Vapor Barrier
If you live in a damp or humid climate, it is important to install a vapor barrier over the insulation to prevent moisture from seeping through. Simply lay the barrier over the insulation and secure it in place with staples or tape.
Step 6: Seal Any Leaks
Inspect the ceiling again for any remaining cracks or holes and seal them with caulk or expanding foam. This will help improve the overall insulation of your ceiling. If you plan on installing drywall over the insulation, now is the time to do so. Otherwise, you can move on to the final step.
Step 7: Clean Up
Once you have finished installing the insulation, be sure to properly dispose of any waste materials and clean up the work area. This includes disposing of any scraps of insulation, used protective gear, and tools. Installing rockwool insulation in your ceiling is a great way to improve energy efficiency and reduce noise levels in your home.
By following these simple steps, you can enjoy the benefits of improved energy efficiency and a more comfortable home. Now that you know how to install rockwool insulation in ceiling, it’s time to get started on your next home improvement project.

Tips for How to Install Rockwool Insulation in Ceiling
- Before starting the installation process, it is important to wear protective gear such as gloves, goggles, and a dust mask. Rockwool fibers can irritate the skin, eyes and respiratory system.
- Make sure to have proper ventilation while installing Rockwool insulation. The fibers can cause respiratory issues if inhaled for a prolonged period of time.
- Avoid cutting the insulation inside your home as it can create a lot of dust and small particles that are harmful if inhaled. It is recommended to cut the material outside or using a designated area with good ventilation.
- Be cautious of electrical wires while installing the insulation. Make sure to turn off the power supply before starting the installation process.
- Keep a fire extinguisher nearby in case of any accidents. Rockwool insulation is fire-resistant, but it is always better to be prepared for any unforeseen circumstances.
- Use proper tools such as a utility knife and straightedge for cutting the insulation. Avoid using dull or damaged tools as it can cause accidents.
- Dispose of any excess insulation properly. Do not leave it lying around as it can be a safety hazard and also cause environmental damage.
By following these tips, you can protect yourself and your home while installing Rockwool insulation in your ceiling. Remember, safety should always be a top priority when working with any type of insulation material. So, make sure to follow these precautions and create a safe environment for yourself and those around you.
How Do You Properly Prepare the Ceiling Before Installing Rockwool Insulation?
Before installing Rockwool insulation in your ceiling, it is important to prepare the area to ensure the best results properly. Here are some steps you can follow:
- Clean and Clear the Area: Remove any debris or objects hindering the installation process. This includes removing any old insulation material if present.
- Check for Any Leaks or Moisture: Before installing the insulation, ensure no leaks or moisture in your ceiling. If there are any, they should be fixed before proceeding with the installation.
- Seal Any Gaps or Cracks: Use caulk or foam sealant to seal any gaps or cracks in your ceiling. This will help prevent air leakage and improve the overall energy efficiency of your home.
- Install Vapor Barrier: If recommended for your climate, install a vapor barrier to prevent moisture from entering the insulation and causing damage.
Properly preparing your ceiling ensures that the Rockwool insulation is installed in a clean and secure environment, providing maximum effectiveness and efficiency. Overall, by following safety precautions and properly preparing the ceiling, you can successfully install Rockwool insulation in your ceiling and reap its benefits for years to come.
How Do You Properly Seal and Finish the Installation of Rockwool Insulation in a Ceiling?
After installing Rockwool insulation in your ceiling, it is important to seal and finish the installation to ensure its effectiveness properly. Here are some steps you can take:
- Securely Tuck the Edges of the Insulation: Make sure that all edges are securely tucked in and not hanging loose. This will help prevent air leakage and maintain proper thermal performance.
- Seal Any Gaps: Use caulk or foam sealant to seal any small gaps between the insulation and the ceiling joists. This will help improve energy efficiency and prevent air leakage.
- Install a Vapor Barrier: If recommended for your climate, install a vapor barrier over the top of the insulation to further protect against moisture damage.
- Cover With Drywall: Cover the insulation with drywall or another approved ceiling material to finish the installation. This will provide a clean and finished look and additional fire protection.
By properly sealing and finishing the installation of Rockwool insulation in your ceiling, you can ensure its effectiveness and longevity for years to come. Remember always to prioritize safety and follow proper installation techniques for the best results.
What is the Expected Lifespan and Maintenance for Rockwool Insulation in a Ceiling?
Rockwool insulation is a popular choice for insulating ceilings due to its superior thermal and acoustic properties. But how long can you expect it to last and what kind of maintenance does it require? In this section, we will explore the expected lifespan and maintenance needs of Rockwool insulation in a ceiling.

1. Expected Lifespan
Rockwool insulation is known for its durability and long lifespan. In fact, it can last up to 100 years if installed properly. This is due to the material’s resistance to moisture, mold, and pests, as well as its non-combustible nature.
However, the actual lifespan of Rockwool insulation in a ceiling may vary depending on various factors such as installation technique, exposure to extreme temperatures, and potential damage from renovation or repairs. With proper installation and maintenance, you can expect your Rockwool insulation to last for several decades.
2. Maintenance Needs
One of the best things about Rockwool insulation is that it requires very little maintenance. Unlike other types of insulation, Rockwool does not settle over time which means it will maintain its thermal performance for many years. It also does not require any special cleaning or treatments to maintain its effectiveness.
However, it is important to regularly inspect your Rockwool insulation for any signs of damage. If you notice any gaps, tears, or compression in the material, it should be repaired or replaced immediately to ensure maximum performance.
Are There Any Potential Health Hazards Associated With Rockwool Insulation in Ceilings?
Rockwool insulation is a popular choice for insulating ceilings due to its superior fire resistance and soundproofing capabilities. However, many people have raised concerns about the potential health hazards associated with this type of insulation.
In this section, we will discuss these concerns and what you can do to minimize any possible risks. One major concern is the presence of small fibers in rockwool insulation that can potentially cause respiratory issues.
These fibers are similar to those found in asbestos, which is a known carcinogen. However, unlike asbestos, rockwool fibers are not considered a significant health hazard when handled properly. To minimize any potential risks associated with installing rockwool insulation in your ceiling, it is important to follow safety precautions recommended by the manufacturer.
This includes wearing protective gear such as gloves, goggles, and a face mask while handling the insulation.

Conclusion
The main disadvantage of installing rockwool insulation in the ceiling is that it can be a difficult and time-consuming process. It requires careful planning, precise measurements, and proper installation techniques. This can be a challenge for inexperienced homeowners or DIY enthusiasts.
In conclusion, installing rockwool insulation in your ceiling is a wise and cost-effective decision. Not only does it provide excellent thermal and acoustic insulation, but it also helps with fire protection. The installation process may seem daunting at first, but with the right tools and techniques, it can be done easily by any DIY enthusiast or professional contractor.
I hope this article has been beneficial for learning how to install rockwool insulation in ceiling. Make Sure the precautionary measures are followed chronologically.
Angela Ervin
Angela is the executive editor of DIY quickly. She began her career as an interior designer before applying her strategic and creative passion to lifestyle and home. She has close to 15 years of experience in creative writing and online content strategy for housekeeping, home decorations as well as other niche efforts. She loves her job and has the privilege of working with an extraordinary team. She lives with her husband, two sons, and daughter in Petersburg. When she's not busy working she spent time with her family.