
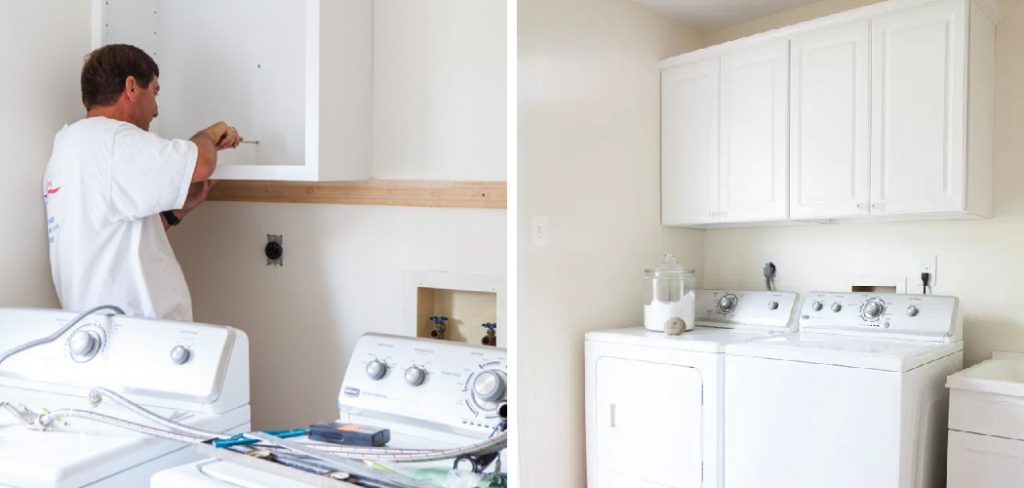
How to Install Wall Cabinets in Laundry Room
A wall cabinet is a term that is used to define the top cabinets elevated above the counter area. It offers the maximum amount of versatility for storing a bunch of household items, and that’s why it is one of the favorite items for homeowners. Maybe you are also interested in installing this useful item in your laundry room. Well, that’s a good idea. With the help of this item, you will be able to store the clothes and keep your room clean. But the question is how to install wall cabinets in the laundry room? In this article, I am going to show you how just make sure to stick with the article until the end.
How to Install Wall Cabinets in Laundry Room
Step 1
First thing first, you have to locate your studs and ensure the correct placement of the cabinet. The studs are things that you will put screws in through the cabinet and into the wall. Mark the places where you have got the studs.
Step 2
Now that you have your marks, it’s time to grab a scrap piece of wood (2×4) and use it to mark a line on the wall. Once you have your marks on the wall exactly where your studs are, you can proceed to the next step.
This wooden piece is going to be the bottom of your cabinet. Normally the cabinets are installed at 18 inches high, so make sure to maintain that height. Whatever height you take, line the wood piece with the line you have made with the level.
Now, mark the 2×4 piece at the same places you marked on the wall. You have to put the screws within these marked areas.
Step 3
Now, you have to secure the wood piece with the wall. For this, I will suggest you use four-inch screws. The screw has to go through the 2×4 wood piece and the wall.
So, it should have a good height so that it can hold the wood piece properly.
Step 4
Next, take some large head screws and start working with the cabinet. In this case, you have to pre-drill the cabinet, so it doesn’t get damaged during the mounting process. Once you have drilled the rear part of the cabinet, you have to hold it on the marked area now and start attaching it to the screws.
You will need another helping hand to hold the cabinet with the wall. After mounting it with the screws, and your cabinet, the installation will be completed. If you need to install more cabinets, measure the residual area of the wood piece, and repeat the process again. See, I told you, it’s pretty simple.
Angela Ervin
Angela is the executive editor of DIY quickly. She began her career as an interior designer before applying her strategic and creative passion to lifestyle and home. She has close to 15 years of experience in creative writing and online content strategy for housekeeping, home decorations as well as other niche efforts. She loves her job and has the privilege of working with an extraordinary team. She lives with her husband, two sons, and daughter in Petersburg. When she's not busy working she spent time with her family.


