
How to Knit Stripes in the Round
Knitting stripes in the round is a delightful way to add visual interest and texture to your projects, whether you’re crafting a cozy hat, a vibrant blanket, or an intricate sweater. This technique allows you to transition between colors seamlessly, creating bold patterns that can be as simple or complex as you desire.

In this guide on how to knit stripes in the round, we will walk you through the essential steps needed to master the art of knitting stripes in the round, providing tips on managing yarn changes, maintaining even tension, and ensuring a polished finish. Prepare to unleash your creativity and transform your knitting with stunning striped designs!
Benefits of Knitting Stripes in the Round
Knitting stripes in the round offers several benefits over knitting stripes flat, including:
No Need to Purl:
When knitting in the round, you only need to knit stitch, eliminating the need for the purl stitch. This not only makes knitting faster but also reduces hand fatigue.
Seamless Transition:
Knitting stripes in the round allows for a seamless transition between colors, as there is no need to break and rejoin the yarn at each color change. This creates a more polished and professional finish.
No Wrong Side:
Unlike knitting flat, where you have to remember which side is the right or wrong side, knitting in the round means that every stitch is on the right side, simplifying the process.
Materials Needed
Before diving into how to knit stripes in the round, let’s first gather all the necessary materials:
- Yarn of Your Choice in Two or More Colours
- Knitting Needles Appropriate for Your Chosen Yarn Weight (Circular or Double-pointed)
- Stitch Markers (Optional but Helpful for Keeping Track of Colour Changes)
- Scissors
- Yarn Needle for Weaving in Ends
7 Step-by-step Guides on How to Knit Stripes in the Round
Step 1: Cast On
To begin your striped project, start by casting on the desired number of stitches for your pattern. You can use a long-tail cast-on method for a stretchy edge or any other preferred method that suits your knitting style. Make sure to choose a number of stitches that are compatible with your circular or double-pointed needles, typically a multiple of the number of stripes you plan to create.
Once you have cast on, ensure that your stitches are not twisted around the needle – this will help avoid any mishaps as you begin to knit in the round. Now, you’re ready to move on to the next step!

Step 2: Knit in the Round
Using your preferred method, join the first and last stitch of your cast-on edge to form a circle. This will create a seamless tube for knitting in the round. Next, knit every round until you reach the desired length for your project’s base color.
If you’re new to knitting in the round, it may take some time to get used to knitting without having to turn your work, but don’t worry – with practice, it will become second nature.
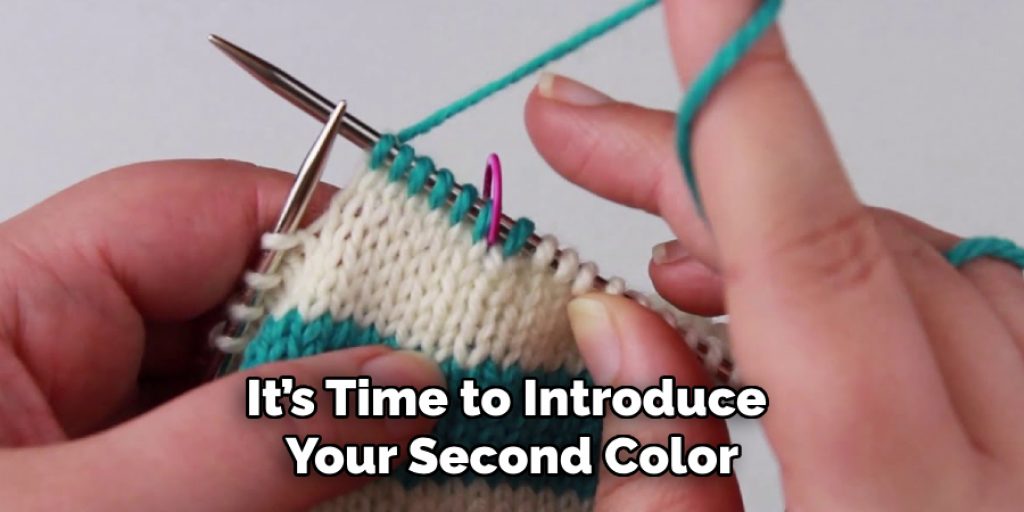
Step 3: Introducing the Second Colour
Once you have completed the desired length of your base color, it’s time to introduce your second color! At this point, you may want to use a stitch marker to keep track of your rounds, especially if your stripes are relatively thick.
Hold the new color yarn alongside the first color, leaving at least a 6-inch tail that can be woven in later. In the next round, knit with your second color for the desired length of your stripe. This will depend on your project and personal preference.
Step 4: Changing Colours
When it’s time to change colors, begin by knitting up to the last stitch of the current color. To make the transition seamless, ensure you have a good amount of yarn ready in both colours. With the current color on your needle, bring the new color up from the back and hold it together with the old color for that last stitch. Wrap the yarn of the new color around the old one and knit the last stitch using the new color. This will help create a tidy edge.
Remember to leave a tail of about 6 inches for weaving in later. Continue knitting the next round with the new color, ensuring you maintain an even tension to prevent any gaps. Repeat this process whenever you want to introduce additional colors throughout your project.
Step 5: Managing Yarn Changes
To avoid any loose or tangled yarn, it’s essential to manage the yarn changes correctly. As you knit, make sure to untwist both colours after each round to prevent them from getting tangled. Additionally, when introducing a new colour at the beginning of a round, make sure to cross the previous and current colours over each other to secure them in place.
It’s also helpful to weave in the ends of your yarn as you go instead of waiting until the end. This will save you time and prevent any confusion with multiple ends at the end of your project.
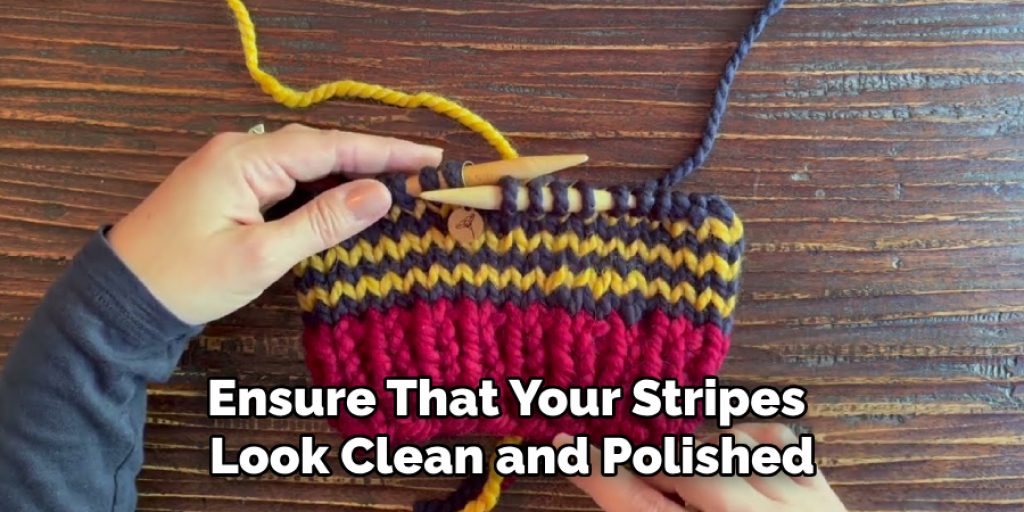
Step 6: Weaving in Ends
As you complete your project, remember to weave in all the loose ends by threading them onto a tapestry needle and weaving them through several stitches on the wrong side of your work. This will ensure that your stripes look clean and polished with no messy ends peeking out.
There are also various techniques for weaving in ends that you can explore, such as duplicate stitch or Russian join, to achieve a seamless finish.
Step 7: Finishing Touches
Once you have completed all your stripes and woven in all the ends, it’s time to finish off your project. You can bind off using your preferred method, such as a basic or stretchy bind-off, depending on the flexibility you want at the edge of your project.
Finally, block your project by washing and laying it flat to dry. This will help even out any tension inconsistencies and give your stripes a smooth and polished appearance. Following these steps, you’ll be able to create beautiful and seamless stripes in the round for all your knitting projects! Happy knitting!
Additional Tips
Practice Makes Perfect:
If you’re new to knitting stripes in the round, don’t be discouraged by initial challenges. Practice on smaller projects, like a hat or a cozy, to build your confidence and skill without feeling overwhelmed.
Choose Contrasting Colors:
To make your stripes pop, select yarn colors that contrast well with each other. This will highlight the transitions and enhance the visual appeal of your finished piece.
Mind Your Tension:
Maintaining even tension is key to a professional-looking finish. If you notice any unevenness, take a moment to adjust your grip and yarn feeding to ensure consistency throughout your project.
Keep it Neat:
To prevent colour bleed or muddiness, be mindful of how you handle the yarn when changing colours. Minimizing too much twisting or overlapping of the strands will result in cleaner lines.
Experiment with Textures:
Consider incorporating different textures or yarn weights within your stripes for added interest. Just be aware that this may affect the overall drape and feel of your finished project.
Plan Your Stripes:
Before starting, sketch or jot down your stripe pattern to visualize how the colors will interact. This can help you avoid any surprises as you progress through your project.
By following these additional tips on how to knit stripes in the round, you can refine your technique and create truly stunning striped knitting projects that showcase your creativity and skill!
Frequently Asked Questions
Q: Can I Use This Technique for Knitting Stripes on Flat Projects as Well?
A: Absolutely! You can follow the same steps mentioned above, but instead of joining your stitches in a circle, you will turn your work at the end of each round to knit back and forth. This will create a flat piece with striped color changes.
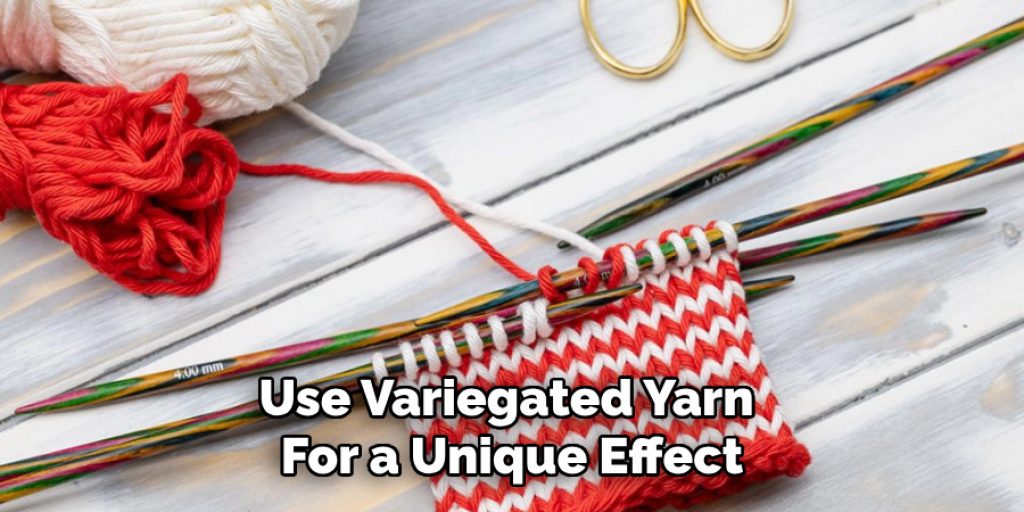
Q: How Do I Know Which Colour to Use for my Stripes?
A: The choice of colors is entirely up to you and depends on the look you want to achieve. You can play around with contrasting or coordinating colors or even use variegated yarn for a unique effect. Just remember to always have enough yarn of each color ready for seamless transitions.
Q: Can I Create Uneven Stripes Using This Technique?
A: Yes, you can! To create uneven stripes, simply change the colors at different intervals instead of keeping them equal. For example, you can alternate between two rounds of blue and one round of green for a varied stripe pattern. The possibilities are endless! Overall, have fun experimenting with different colors and widths to create your own unique striped projects.
Conclusion
Congratulations, you have now mastered the art of knitting stripes in the round! With these simple steps and tips on how to knit stripes in the round, you can create beautiful striped designs that will elevate all of your knitting projects. So go ahead and experiment with different colors and techniques to add some pizzazz to your knitting repertoire! Share your creations with others and spread the joy of knitting with stripes. Happy knitting! So why wait? Gather all your supplies and start creating beautiful striped creations today! Happy knitting!
Elizabeth Davis
Elizabeth is a creative writer and digital editor based in the United States. She has a passion for the arts and crafts, which she developed from a young age. Elizabeth has always loved experimenting with new mediums and sharing her work with others. When she started blogging, she knew that DIYquickly would be the perfect platform to share her tutorials and tips. She's been writing for the blog from the beginning, and her readers love her helpful advice and easy-to-follow instructions. When she's not writing or editing, Elizabeth enjoys spending time with her family and friends.


