How to Make a Cat Backpack
Introduction:
Cats are independent creatures that spend the majority of their time in solitude. They don’t need our company to be happy, but they will often come around for a scratch behind the ears or a bowl of food if we’re lucky enough to have them visit.
Despite being solitary animals, some cats have been known to form close bonds with humans and other pets, which may lead to an increase in cat frequency at your home. In this article, I will discuss how to make a cat backpack. So let’s get started.
Why Would You Want a Cat Backpack?
There are many reasons why someone might wish to have a cat backpack. Perhaps, for example, their arms are tired, and they would like to change places with their legs for a while. Maybe it’s because the weather outside is unpleasant, and they’d instead not go out on foot, or perhaps they simply feel like having an excuse to make use of their sewing machine again.
Generally, though, people buy them because cats love riding on peoples’ backs, and some owners like giving them what they want.
A Detailed Stepwsie Guide on How to Make a Cat Backpack:
Step 1: Gather Supplies
What you will need to make your backpack are as follows: A sewing machine (strongly preferred), matching thread (to go with the color of your chosen fur material), a pair of sharp fabric shears, an invisible zipper, two shades of felt (for ears and eyes) and needle and thread.
Optional supplies include but are not limited to nylon webbing for the shoulder straps, ribbon or belt buckle for the neck strap, interfacing for a more firm shape, and the third color of fur to line the inside of your bag.
Step 2: Cut Out Cat Pattern
Once you have all your supplies ready, it’s time to get started! First, print out this pattern. Make sure that when you’re printing it out, “actual size” or 100% is selected. This will ensure that the pattern prints correctly. Next, cut around the edges of the paper with scissors to create a rough copy of the pattern pieces. And remember which side of each piece is its right side (usually the shinier/smoother side).
Step 3: Trace the Pattern
Once you have your pattern cut out, lay it onto your chosen fur material (the one that will go on the bag’s exterior) and trace around it with a pen. Make sure to leave an extra 1/2 inch of space all around your traced pattern so you can make this bag reversible!
Now cut out the pieces you just outlined with scissors. Be careful not to stretch or damage the fur when cutting. Also, be aware that felt is much easier to cut than most coats are. I recommend using fabric shears for this step rather than sewing scissors if possible because they are sharper and more effective.
You may want protective gloves during this process as well since some furs have sharp edges.
Step 4: Cut the Mouth
Next, cut out the mouthpiece. This will be sewn to what is called the “interior” side of your bag (the side that won’t show when you’re walking around). Trace around this pattern on your lining fabric and then cut it out. You can use either fur or felt for this part, whichever you prefer.
And remember which side is its right side! It should be whichever color you want showing on the inside of your bag (fur or felt), not the exterior (skin).
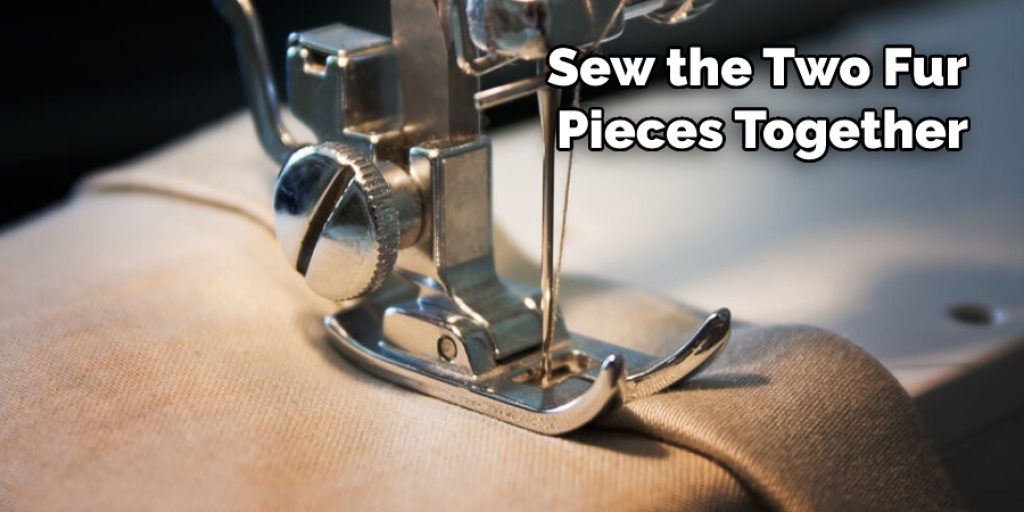
Step 5: Sew Lining to Exterior
Now with both exterior and interior pieces ready, it’s time to join them together! First, line up the two colors of fur to touch, then pin them together. Next, take out your matching thread and sew the two fur pieces together with a needle and invisible thread (or whatever thread color matches best).
Be sure to do this along all four edges of the mouth opening, so they are stitched in place. This will ensure that your bag is in one piece when you flip it inside out later on!
Step 6: Pin Zipper & Mouth Together
Once the exterior and interior sides of your cat’s mouth are sewn together, it’s time to join them with how ever many zippers you have lying around. I only used one for mine but feel free to use multiple if desired! So first thing’s first, open up your zipper halfway down its length. Then line up one side of your zipper with the mouth opening (fur on fur) and pin it in place.
Then align the other side of your zipper with the mouth opening (fur on fur) and pin it in place. Finally, make sure that the mouth is closed (zipper teeth are tucked away) and sew along both sides of your open zipper to join them together.
Step 7: Sew Ears Together
Now you’re ready to move on to sewing the ears! First things first, cut out two earpieces just like you did for all your other pattern pieces. And then lay one onto another alternating felt colors if desired until they look how you want them to. Next, pin these pieces together, then sew around all four edges to create a “pocket” you will use to turn your ears right side out later on.
Step 8: Turn Ears Right Side Out
Now that both of your earpieces are sewn together, carefully cut along the bottom edge of the pocket you created earlier. Then flip this entire piece inside out so that its “right side” is now showing (in other words, its furry side is facing inward). Next, push all four edges of your turned ear into themselves, creating a nice-looking pointed ear.
Next, press these edges down with your fingers until they are flat and pinned in place with some straight pins. Then sew around all four sides again to secure them into place. Remove any pins as needed, then repeat this process for the second ear!
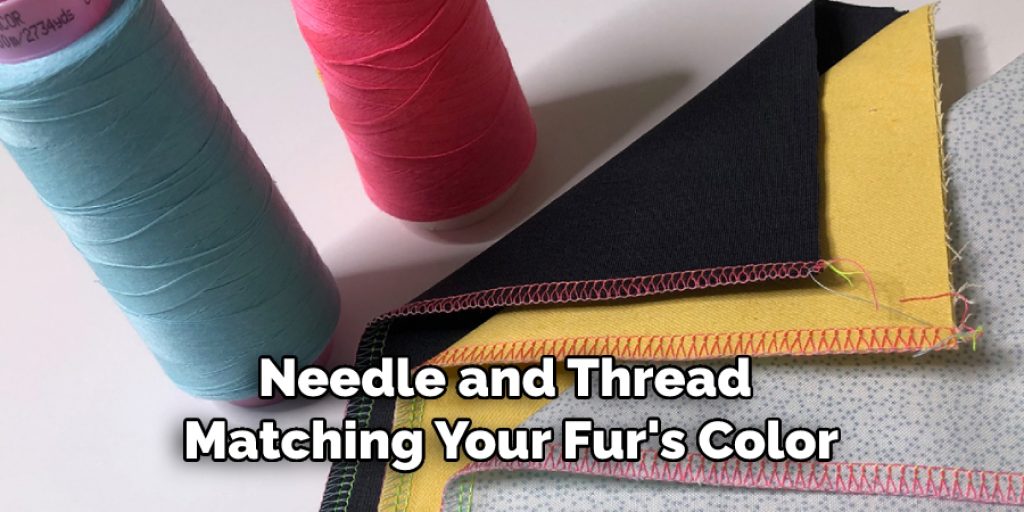
Step 9: Sew Ears onto Face
Now that the fur lining of your bag is completed, it’s time to attach your ears! First, take the two earpieces you just made and line them up on the exterior side of your cat’s face (fur on fur), then pin them in place. Next, make sure that both of these pieces are touching each other all around their edges.
And lastly, take out a needle and thread matching your fur’s color, sew along all four edges to join them together securely. Then once again, remove any pins as needed!
Conclusion:
I hope this article has offered all the adequate information on how to make a cat backpack. Ensure all the steps are correctly followed. Thank you and have a nice day!