How to Make a Ceramic Pumpkin
Creating a ceramic pumpkin is a delightful way to celebrate the autumn season and add a unique handmade touch to your fall decor. This simple yet enjoyable craft project is perfect for all skill levels, whether you’re a beginner or an experienced potter. By combining creativity with basic ceramic techniques, you can design and craft a charming pumpkin that can be displayed year after year.
In this guide, we’ll walk you through the essential steps for how to make a ceramic pumpkin, ensuring a fun and rewarding experience.
Why Make a Ceramic Pumpkin?
Making a ceramic pumpkin is not only a fun and creative activity but also allows you to express your artistic flair while getting into the spirit of the season. Crafting your own pumpkin offers a sense of accomplishment, providing a perfect opportunity to engage in a mindful practice that can relieve stress and promote relaxation. Unlike traditional store-bought decorations, a handmade ceramic pumpkin adds a personal touch to your home decor, making it a cherished piece that reflects your personality and style.
Additionally, this project is an excellent way to bond with family and friends, making it a memorable experience to share as you create beautiful autumn decorations together.
Materials and Tools
To create your ceramic pumpkin, you will need a variety of materials and tools to ensure a successful crafting experience. Here’s a list to get you started:
Materials:
- Clay: Earthenware or stoneware clay will work well for creating your pumpkin. Choose the colour based on your desired finish.
- Glaze: Choose a high-quality glaze in orange, green, or any other colour you’d like for decoration.
- Water: For smoothing and attaching pieces during the sculpting process.
Tools:
- Sculpting Tools: A variety of shaping and smoothing tools, including a wire cutter, rib tool, and carving tools.
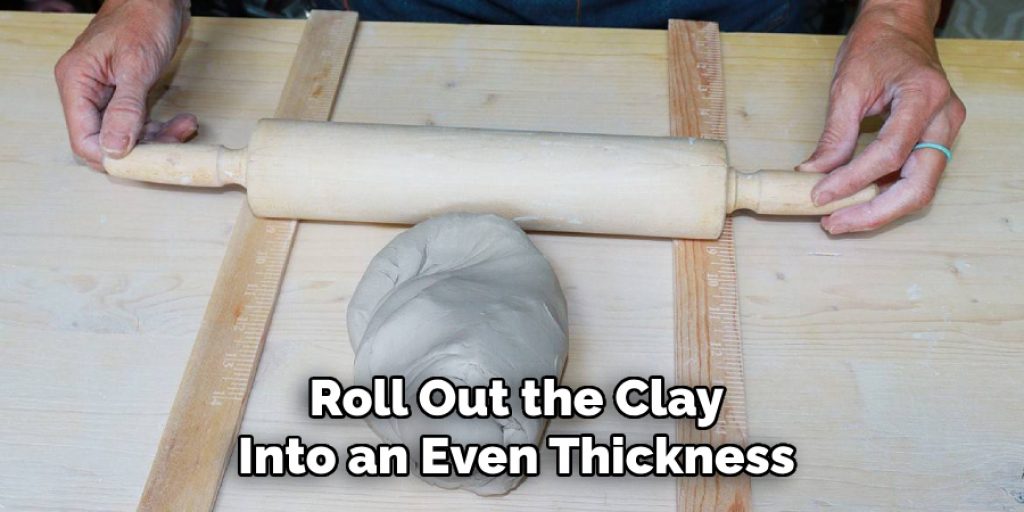
- Rolling Pin: To roll out the clay into an even thickness.
- Plastic Wrap: Useful for keeping your clay moist while you work.
- Paintbrush: For applying glaze and detailing your pumpkin.
- Kiln: To fire the clay and set your creation permanently.
Having these materials and tools on hand will help streamline the crafting process, allowing you to focus on bringing your ceramic pumpkin to life!
10 Methods How to Make a Ceramic Pumpkin
1.Hand-Building with Coils:
The hand-building technique using coils is a fundamental method for crafting a ceramic pumpkin. Begin by rolling out long, thin coils of clay. Start forming the pumpkin’s base by spiraling the coils upward in a round shape, pinching the coils together as you stack them. Continue adding coils until you reach the desired height and shape of the pumpkin. Smooth out the seams between coils with your fingers or a smoothing tool to create a uniform surface.
After the base is complete, shape the pumpkin’s ribs by pinching and pressing the clay along the sides. Allow the pumpkin to dry thoroughly before bisque firing in the kiln. This method provides a hands-on approach to creating a textured, organic-looking pumpkin.
2.Slab Construction:
Slab construction involves using flat pieces of clay, or slabs, to build the pumpkin. Start by rolling out a slab of clay to a uniform thickness. Cut out shapes for the pumpkin’s base and sides using a template or freehand. Assemble the pieces by scoring and slipping the edges to ensure a strong bond. Gently curve and shape the slab pieces into the pumpkin form, smoothing out any seams.
Add additional slabs to create the pumpkin’s ridges and texture. Once assembled, let the pumpkin dry completely before bisque firing. This technique allows for precise control over the pumpkin’s shape and texture, ideal for creating more structured designs.
3.Pinch Pot Method:
The pinch pot method is a simple and effective technique for creating a small ceramic pumpkin. Start with a ball of clay and press your thumb into the center to create a small indent. Gradually pinch and stretch the clay outwards, rotating the ball to form a rounded, hollow shape. Continue pinching and shaping until you achieve the desired size and form of the pumpkin.

Use additional clay to create the pumpkin’s stem, attaching it with scoring and slipping. Add texture to the pumpkin’s surface with a tool or your fingers. Allow the pumpkin to dry and bisque fire before applying glaze. This method is particularly suited for smaller, more whimsical pumpkins.
4.Mold Casting:
Mold casting involves using a pre-made mold to shape the ceramic pumpkin. Start by preparing a plaster mold in the shape of a pumpkin or purchasing a commercially available mold. Prepare your clay by wedging it to remove air bubbles and ensure consistency. Press the clay into the mold, ensuring it fills all the cavities. Allow the clay to set slightly before removing it from the mold.
Clean up any rough edges and refine the pumpkin’s shape as needed. Once the clay is dry, bisque fire the pumpkin in the kiln. Mold casting is an efficient way to create multiple identical pumpkins and is ideal for production or decorative purposes.
5.Wheel Throwing:
For those with experience on the potter’s wheel, wheel throwing offers a method for creating a symmetrical pumpkin shape. Start by centering a ball of clay on the wheel and shaping it into a cylindrical form. Gradually shape the clay into a rounded, pumpkin-like shape, using your hands and tools to refine the form.
Once the basic shape is achieved, create the pumpkin’s ribs and texture by adding details with carving tools or ribs. After shaping, allow the pumpkin to dry and bisque fire. This method is ideal for creating pumpkins with smooth, even surfaces and precise shapes.
6.Slip Casting:
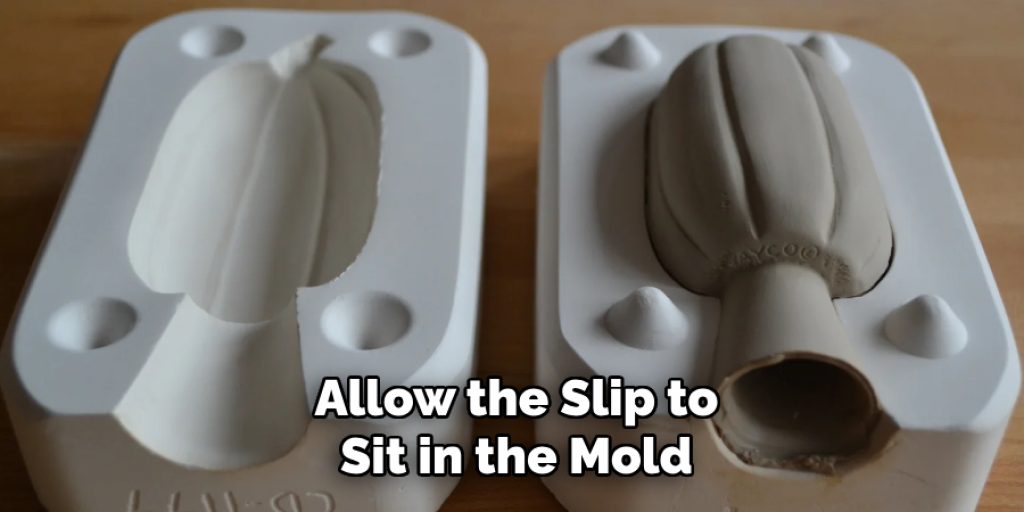
Slip casting is a technique that involves pouring liquid clay, or slip, into a mold. Prepare your slip according to the manufacturer’s instructions and pour it into a plaster mold of a pumpkin shape. Allow the slip to sit in the mold for a specified amount of time, then pour out the excess slip. Let the mold sit until the clay has formed a thin layer around the interior walls. Remove the pumpkin from the mold and refine its shape. Allow the pumpkin to dry thoroughly before bisque firing. Slip casting is particularly useful for producing consistent shapes and is ideal for creating detailed, intricate designs.
7.Sculpting with Air-Dry Clay:
Air-dry clay is an alternative to traditional ceramic clay that does not require kiln firing. Begin by sculpting the basic shape of the pumpkin using air-dry clay, following similar techniques to hand-building or pinch pots. Shape the pumpkin’s ridges and texture using your fingers or sculpting tools. Allow the pumpkin to dry completely in a well-ventilated area, following the manufacturer’s drying instructions. Once dry, you can paint and seal the pumpkin with acrylic paints and varnish. This method is suitable for creating decorative pumpkins without the need for kiln access.
8.Textured Rolling Pins:
Textured rolling pins can add interesting patterns and textures to your ceramic pumpkin. Roll out a slab of clay and use a textured rolling pin to imprint designs onto the surface. Cut and shape the textured slab into the pumpkin’s base and sides. Assemble the pieces by scoring and slipping the edges, and smooth out any seams. Add additional clay to create the pumpkin’s ridges and stem. Once assembled, allow the pumpkin to dry before bisque firing. This method enhances the visual appeal of your pumpkin with unique textures and patterns.
9.Hand-Carving Techniques:
Hand-carving techniques involve adding intricate details and designs to your ceramic pumpkin. Start with a basic shape using any of the aforementioned methods. Once the pumpkin is leather-hard (partially dry but still pliable), use carving tools to add details such as veins on the pumpkin’s surface or decorative patterns. Carve carefully to avoid cracking or damaging the clay. After carving, allow the pumpkin to dry completely before bisque firing. Hand-carving adds a personal touch and can transform a simple pumpkin into a work of art.
10.Glazing and Finishing:
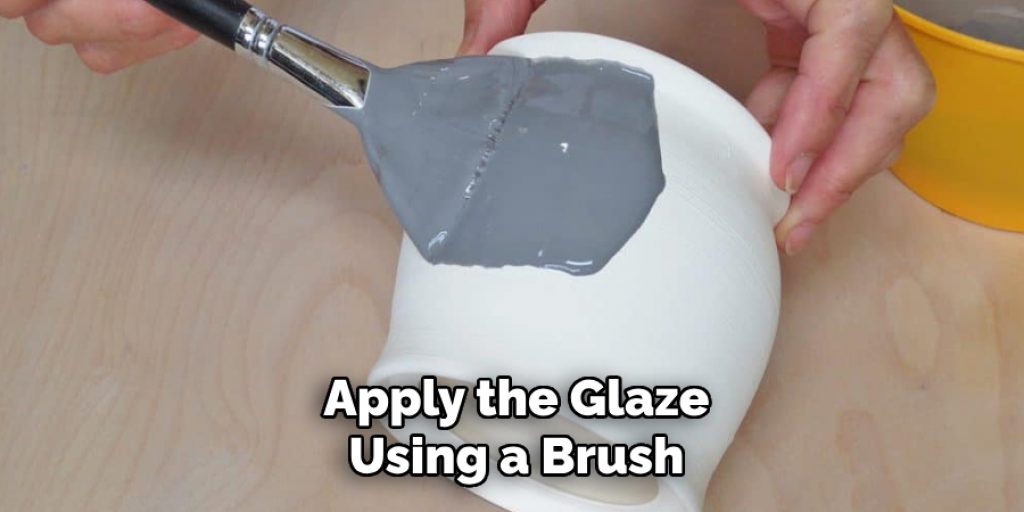
After shaping and firing your ceramic pumpkin, glazing is the final step to achieve a finished look. Select a glaze color and type that complements your design. Apply the glaze using a brush, dip, or spray method, ensuring even coverage. For a more polished appearance, you can also apply multiple glaze layers or use different glaze colors to create a layered effect.
After glazing, fire the pumpkin in the kiln according to the glaze manufacturer’s instructions. This final firing will melt the glaze, creating a smooth, glossy finish. Glazing enhances the pumpkin’s appearance and provides durability, making it suitable for both indoor and outdoor display.
Conclusion
Making a ceramic pumpkin involves various techniques, each offering a unique approach to achieving your desired result. From hand-building and slab construction to using molds and slip casting, each method allows for creativity and personal expression. Whether you’re aiming for a traditional pumpkin shape or experimenting with textures and finishes, these ten methods provide a comprehensive guide to crafting beautiful ceramic pumpkins. Thanks for reading our blog post on how to make a ceramic pumpkin! We hope you found it helpful and informative.
Elizabeth Davis
Elizabeth is a creative writer and digital editor based in the United States. She has a passion for the arts and crafts, which she developed from a young age. Elizabeth has always loved experimenting with new mediums and sharing her work with others. When she started blogging, she knew that DIYquickly would be the perfect platform to share her tutorials and tips. She's been writing for the blog from the beginning, and her readers love her helpful advice and easy-to-follow instructions. When she's not writing or editing, Elizabeth enjoys spending time with her family and friends.