How to Use Ceramic Molds?
Ceramics are generally made from slip castings; the best thing is that they don’t need any special equipment. You won’t even have to be an expert or need a studio to accomplish the entire process. But the number of objects you will make with your ceramic mold usually depends on how many molds you have. Anyway, slip casting has many other benefits. It allows you to make more complicated pieces like jugs, teapots, etc. But for that, you have to acquire the actual tactics. So, without any delay, let’s see how to use ceramic molds?
Check it out to learn to make a ceramic teapot.
Slip is a liquid mixture of clay or a liquid form of clay particles. It is a bit thinner than the original clay. When this liquid clay is poured into another plaster mold, it is called slip casting. The accurate ratio of clay and water is 75:25, which is the perfect ratio for craftworks. So, if you are about to start the process, you also have to maintain this ratio. Otherwise, it may break after completing the entire process.
Now that you know the perfect ratio of clay to water for slip casting let’s see how to make the slip.
How to Use Ceramic Molds- The Methods
How to Turn the Clay Body Into Slip?
This process where you will transform the clay into a slip is known as slaking. During this process, make sure to use the same types of clay because it will be helpful when you heat them up. Using the same type of clay will allow you to bake them at the same temperature.
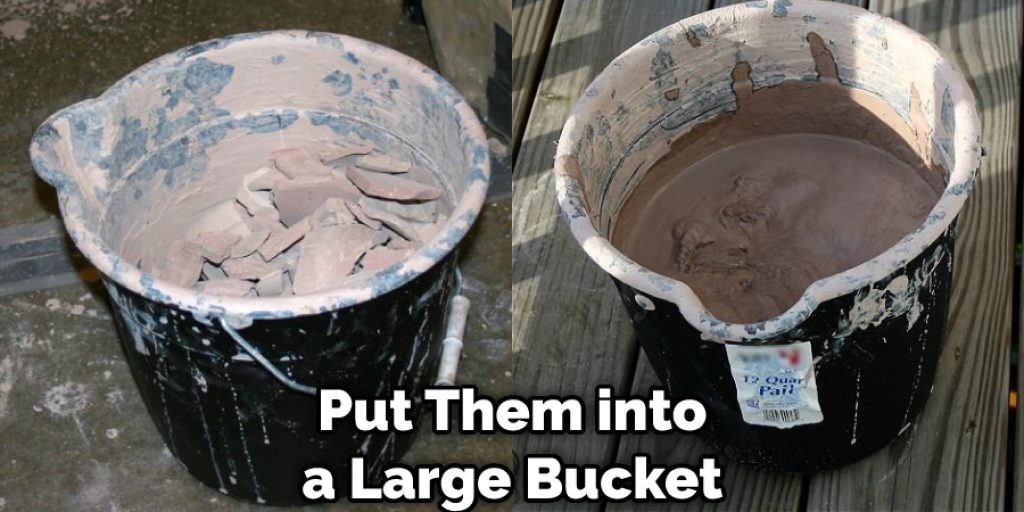
Now, take the required amount of clay. But ensure to maintain the above-mentioned quantity of clay and water, then mix them properly. Once you have done that, you have to put them into a large bucket. Okay, leave it for a while to slake appropriately. The slaking time differs based on different types of clays. So, it will depend on the type of clay you have chosen for the task. However, most of the clay takes 24 hours to dissolve into water. That’s why it is recommended to leave it for 24 hours at least.
Keep in mind that the clay should be bone dry. Now take a large stick and start to stir the mixture gently. You can also use a drill to increase consistency. You will need to add a mixing attachment with the drill.
You will need to place 100 ml of the clay slip in a weighing jug and measure it in grams to determine the particular gravity. Next, divide the weight by 100; your actual is that percentage.
An average of 1.80 is a reasonable working ratio. You would also have to ensure that the clay is deflocculated. Wait a minute! Do you know what deflocculation is? Okay, let’s see that now.
Deflocculation
Deflocculation is a process when a chemical is added to the slip. In this process, a few drops of sodium silicate are needed. If you want, you can also use Darvan; it is also a good option to be used as a liquid deflocculant. Its specialty of this deflocculant is that it doesn’t erode the plaster mold. As a result, you won’t have to face any obstacles while using this. However, no matter which defluccluant you use, wear a respirator mask during the entire process. Inhaling harmful chemicals may not be ideal.

How to Pour the Casting Slip Out?
Once you have reached the correct consistency of your mold, you have to make the plaster mold ready. Plaster molds can be easily bought from your nearest shop; they are readily available. The process of making them at home is quite lengthy. That’s why it will be better if you bring the ready-made ones.
After bringing your preferred plaster from the market, you must pour slip into the cavity mold. The plaster will absorb the water from the clay, and thus the drying process will begin. This time, the drying process depends on the size of the mold. If it is medium or small-sized, the drying process will take place for 10 minutes. If it has a larger shape, it will take more.
Anyway, once it starts to dry by maintaining its suitable thickness, you have to take the excessive clay out. Pour it back carefully into the bucket of your clay slip. Doing so will not waste any of the clay. When pouring it back, you can add two pieces of wood. And then put the plaster on these woods, facing upside down. It will slip the pours quickly and efficiently. According to some potters, pouring it through an angle can also accomplish the process faster. The benefit of this position is that it makes the inside smoother.
Once all of the additional slips are poured down, slice the excessive clay to give it a proper shape.
Tipping the Ware Out
If you have finished the above process, your mold is dry now. As we have said above, the drying time depends on the mold size, so you must wait until that time. Once it becomes dry, you can easily tip it out. First of all, you have to put a flat plate under the mold and turn it over with the utmost care. The piece will come out gently, and it’s the easiest way of tipping it out. It is ready for firing and glazing now.
Conclusion
How to use ceramic molds? Is the fact clear to you now? Hopefully, we have cleared it. If you still got any questions, feel free to ask us.