How to Make a Fireproof Box
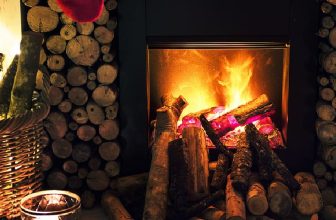
We would never have to worry about our belongings being damaged in a fire in a perfect world. But unfortunately, fires can happen anywhere, and at any time, so it’s important to take precautions to protect your possessions.
One way to do this is by creating a fireproof box. This box can be used to store important documents, jewelry, or other valuables. Here are the steps you need to follow how to make a fireproof box. So keep reading this blog post till the end!
What is a Fireproof Box?
A fireproof box is a container designed to protect its contents from the damaging effects of fire. These boxes are made with materials that can withstand high temperatures and prevent the spread of flames. This helps keep your belongings safe, even if a fire breaks out in your home or office.
You can purchase a fireproof box at most home improvement stores, office supply stores, or online. However, making your own fireproof box is not only cost-effective but also allows you to customize the box according to your specific needs.
Things You Will Need:
1. Wood Glue:
To make a fireproof box, you will need wood glue. This is used to bond the pieces of wood together to create the structure of the box.
2. Fire-Resistant Material:
For this project, you will need a fire-resistant material that can withstand high temperatures and prevent heat transfer. Some examples include fiberglass cloth, cement board, or fireproof insulation.
3. Plywood Sheets:
You will need plywood sheets to create the walls of the fireproof box. The thickness of the sheets will depend on the size of your box and how much protection you want it to provide.
4. Sharp Knife or Saw:
To cut the wood and fire-resistant material, you will need a sharp knife or saw. Make sure to use caution while handling these tools.
5. Fireproof Sealant:
To ensure that your box is completely sealed and protected, you will need a fireproof sealant. This will prevent any gaps or cracks where flames could potentially enter the box.
6. Hinges and Latches:
To complete the construction of your fireproof box, you will need hinges and latches to secure the lid in place. Make sure to choose high-quality, fire-resistant hardware for this purpose.
10 Effective Ways on How to Make a Fireproof Box:
1. Use an Old Metal Toolbox:
An old toolbox is a good starting point for a fireproof box, as it will already have a handle, flat surfaces, and a sturdy bottom. You can use a hand drill or screwdriver to make holes in the toolbox that match your lock’s cylinder (or cut out places for the hinges). You can then use caulk or another adhesive to attach a fire-resistant material, like cement board or fireproof insulation, inside the box.
You can also reinforce the seams with additional screws or bolts if desired. This is a quick and easy way to make a fireproof box without having to build one from scratch.
2. Use an Old Metal File Cabinet:
You can make a fireproof box out of an old metal file cabinet by using a screwdriver or drill to punch holes in the top (to build a handle) and the front (for the lock). The paint will need to be removed, but there is already likely no bottom. You can use a small drill bit to cut out holes for the lock. Apply fire-resistant material to the outside with adhesive/sealant. Screw in hinges and attach a handle, then caulk all around the seams.

It is recommended to use a larger file cabinet so that it can hold more items and provide better protection. You can also use an old safe with a lock and handle as a similar alternative.
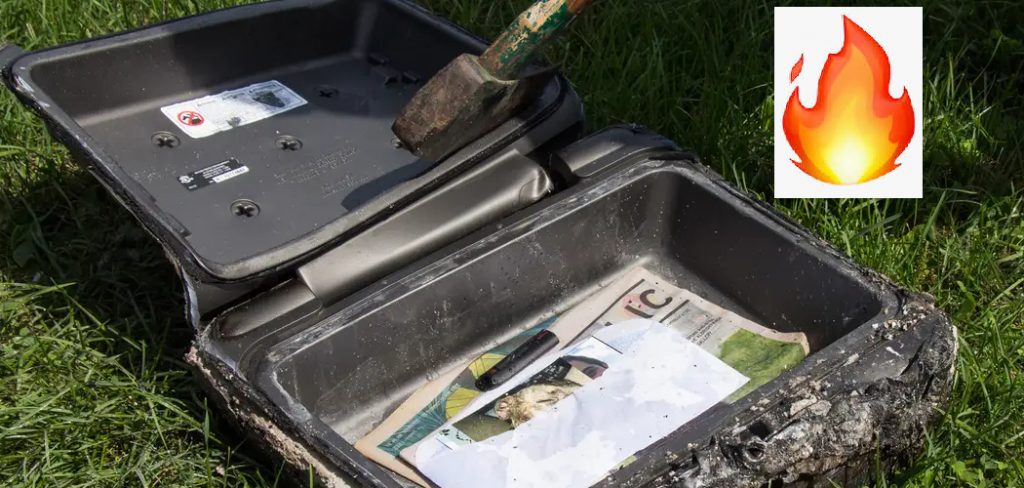
3. Use a Safe or Locked Ammunition Box:
These boxes are certified to meet certain fire safety standards, so they will be good for protecting paper products that may be sensitive to heat or water damage in case of a fire.
You can find these in many sportsman stores and online dealers, but you should double-check that they meet your requirements. In addition, some ammunition or gun boxes have been known to fail when tested, so it would be prudent to find out what materials were used in their construction.
4. Line the Inside With Sand:
By lining the inside of your metal fireproof box with sand, you will protect items from heat damage. Next, remove the paper tags from cloth products to prevent them from igniting, and put them in a metal box with a lid. Then, put the metal box into a plastic bag and seal it with some epoxy glue or heat-sealing tape.
It’s best to use sand that has been sifted so you can put a lot of space between the particles. You should cover everything in an even layer with enough left over for multiple layers.
5. Drill Holes for Air Circulation:
Drill holes in the bottom of your fireproof box to allow airflow, as paper products won’t burn without oxygen. Use a metal file or hand drill to avoid damaging the box’s integrity. Keep the number of holes to a minimum. One or two rows of holes are enough.
You can also use a metal tool to punch small holes in the side and lid of the box. The more air circulation you have, the less heat your items are exposed to. It is important to keep in mind that the holes should not be too big or numerous as they can also let in flames and sparks.
6. Use Silica Gel Packets:
If your fireproof box will be used to store metal objects, you can line the bottom with silica gel packets so that the gel will absorb any moisture. Keep changing the packets every few months to keep them dry and ready for use. You can find the packets at most hardware stores and online. You can also reuse them by drying them out in the oven.
It is important to note that silica gel packets are not effective in preventing heat damage. They only prevent moisture buildup. But they are still useful in protecting metal objects from corrosion.
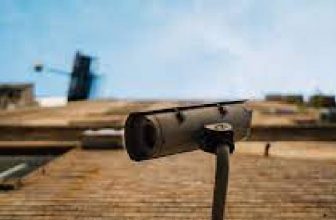
7. Use a Fireproof Safe:
You can find fireproof safes that will be good choices for your needs, as they meet many different requirements and come in various sizes. You should pay attention to the safe, as some are built to protect against water damage and others against heat damage. To ensure you get a safe that will work, make sure to check the specifications with the manufacturer. You should also consider the size and weight of the safe, as well as its rating for fire resistance.

If you want a more secure option, consider a safe with a digital lock, as it will be harder to bypass. You can also find fireproof safes with a key lock or combination lock.
8. Use Cinder Blocks:
Cinder blocks will provide excellent insulation as long as they are kept dry (they can be lined with sand or dry dirt). Ensure the blocks are clean and free of grease, oil, or other combustible substances. Attach the blocks using construction adhesive and allow them to dry for 24 hours.
You can also use bricks or concrete blocks instead of cinder blocks. Make sure to seal any openings in the top with caulk and make a fireproof lid out of metal or cement board. Otherwise, you can make a box out of cement board and line the bottom with fireproof insulation.
9. Use Bubble Wrap:
Bubble wrap can be used to protect documents in your fireproof box. It is effective because it will trap heat below it (keeping the paper products away from the heat) while allowing air to pass above it. You can get bubble wrap from your local post office, but be aware that the paper products you will want to protect must not have a slick finish or plastic coating.
But, bubble wrap is not recommended for sensitive documents as it is not airtight. It can also melt or catch fire when exposed to high temperatures. It is best used for less sensitive items, such as books or magazines.
10. Use Reinforced Fireboard Safes:
Fireboard safes are made with a fireproof material that is stronger than most commercial grades of plywood, and you can also apply a variety of finishes to it. You can purchase sheets or panels from your local hardware store for this purpose if needed. An example of a fireproof safe you may be able to make is a gun safe or jewelry box.
If you are using a fireboard for the exterior of your safe, it is recommended to use a different material for the interior. This can help prevent any residual heat from damaging your items. The interior can be lined with felt, velvet, or other soft materials to prevent scratches and damage to your items. Additionally, you can also consider adding a layer of fireproof insulation between the exterior and interior materials for added protection.
Following these tips on how to make a fireproof box can help ensure that your important documents and items are protected from fire damage. Remember to regularly check and maintain your fireproof box or safe, and make any necessary repairs or replacements as needed to keep it in top condition. Stay prepared for unexpected emergencies by having a properly equipped fireproof box or safe ready in your home or office.
Some Helpful Tips and Suggestions:
- Make sure the box doesn’t go under anything flammable.
- The more holes you make, the faster it will burn.
- A metal container will rust and blacken when exposed to high heat, but it is still fireproof.
- If using a plastic container, be careful because some plastics melt at a low temperature.
- A vermiculite material is fireproof, but it’s messy to work with because it’s dry and falls apart easily.
- Borax is fireproof, but it only works if no water comes into contact with the box or its contents.
- Do not keep this box in direct sunlight because it will damage the contents. Instead, store it in a cool, dry place.
- Consider adding a label or sticker on your fireproof box indicating its contents for easy identification.
- Keep a fire extinguisher nearby in case of emergencies.
- Remember to regularly check and maintain your fireproof box or safe to ensure its effectiveness.
- Consider having multiple fireproof boxes or safes for different types of items, such as one for documents and another for valuable objects.
- In case of a fire, remember to call emergency services first before trying to retrieve your fireproof box. Safety should always be the top priority. So, stay safe and be prepared!
- You can also consider making a digital backup of important documents and storing them in a cloud service for added protection.
- Make sure to regularly review the contents of your fireproof box or safe and remove any unnecessary items to make room for new ones.
- Don’t forget to update your insurance company about the existence of your fireproof box or safe, as it may affect your policy coverage. So, keep them informed to ensure full protection for your valuable belongings.
How Long Does it Take to Make a Fireproof Box?
How long it takes to make a fireproof box depends on how big you intend it to be. The box should be large enough to hold all your most essential items but not so large that it can’t be moved if necessary.
To make a safe object completely fireproof, waterproof, and able to withstand extremely harsh conditions it can take anywhere from six months to a few years. However, if you only want an object that will protect your items better than they would in their normal container, making a fireproof box should only take about five hours.
Frequently Asked Questions:
Q: Can I Make a Fireproof Box Out of Wood?
A: Wood is not recommended as the main material for a fireproof box, as it can easily catch fire. However, you can use reinforced fireboard or apply other fire-resistant finishes to wood to create a safer option. Keep in mind that this may not provide the same level of protection as a metal fireproof box.
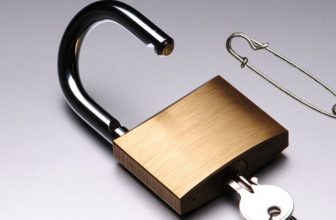
Q: Do I Need A Lock on My Fireproof Box?
A: It is always a good idea to have a lock on your fireproof box, especially if you are storing valuable or sensitive items. This will prevent anyone from having access to the contents and also add an extra layer of protection in case of a fire. You can use a simple padlock or opt for a more secure locking mechanism, depending on your needs and preferences.
Q: Can I Use My Fireproof Box for Documents Only?
A: No, you can use your fireproof box for any items that are important or valuable to you. This includes jewelry, cash, electronic devices, and other small items that may not withstand high temperatures. Just be sure to consider the weight limit of your fireproof box if you plan on storing heavier items.
Q: How Often Should I Check and Replace the Contents of My Fireproof Box?
A: It is recommended to check and replace the contents of your fireproof box every 6 months to ensure they are still in good condition. This includes items like silica gel packets, bubble wrap, and any documents or materials that may have become damaged over time. Regular maintenance will ensure that your fireproof box is always ready to protect your items in case of an emergency. So, make it a habit to regularly check and maintain your fireproof box for optimal protection.
Q: Can I Make My Own Fireproof Box or Should I Buy One?
A: You can make your own fireproof box using the tips and suggestions mentioned in this article, but it requires time, effort, and proper materials. If you are not confident in making one yourself, purchasing a commercially made fireproof box is a viable option. Just be sure to choose one that meets your needs and budget. So, weigh your options and decide what works best for you.
Conclusion:
This blog post has taught you how to make a fireproof box. Now, go ahead and get started! Remember, use the best materials for your project; if you’re storing documents or other items that are liable to catch on fire from heat exposure, then it is essential that you have a fireproof container with an airtight seal in place. If not, they could easily ignite while being stored inside the container.
Test out any new containers before using them for this purpose because different types may react differently when exposed to high temperatures. For example, some plastics will melt, whereas others will only become more brittle over time due to chemical reactions happening at their molecular level. If you have any questions about this topic or want to know more, then feel free to comment below!
Angela Ervin
Angela is the executive editor of DIY quickly. She began her career as an interior designer before applying her strategic and creative passion to lifestyle and home. She has close to 15 years of experience in creative writing and online content strategy for housekeeping, home decorations as well as other niche efforts. She loves her job and has the privilege of working with an extraordinary team. She lives with her husband, two sons, and daughter in Petersburg. When she's not busy working she spent time with her family.