
How to Make a Homemade Projector With Water
Introduction:
Projectors are devices that can project images to a screen or other surface. It is typically used for the display of movies, slideshows, and video games. There are two types of projectors: front-projection systems, which use an LCD screen with a lens system to shine light through it onto the projection surface, and rear-projection systems, which utilize one or more CRT screens to produce their images.
Projectors have many uses, including education, business presentations, movie showings at home on televisions or computers, etc. The following article will discuss how to make a homemade projector with water. So let us dive into the topic.
A Detailed Stepwise Guide on How to Make a Homemade Projector With Water:
Materials needed are:
- A fish tank or any water-resistant box with a lid large enough to hold your phone.
- Plaster of Paris (sometimes called DAP).
- Eyedropper/ syringe/ turkey baster/ or another small tube for dispensing a small amount of the mix into the mold.
- Pencil, chopstick, popsicle stick, skinny paintbrush, anything that can be used to apply plaster mixture inside the mold.
- Oatmeal – the old-fashioned kind, not quick-cooking oats- cooked, not instant oatmeal, works best but boiled will work if mixed with uncooked oats
- Water 7. 1 Tbsp vinegar 8. Container for mixing the plaster
- Gloves and eye protection.
- Newspaper to cover the area you’re working on – plastered items can be slippery when wet so take caution.
- Cardboard for the base of your projector box.
- Ruler or tape measure 13. Popsicle stick or spoon
- Scissors 15. Craft glue 16. Ruler/ flexible measuring tape
- Strong light source setup in a dark room
- Smartphone with a flashlight app, video camera, webcam, dedicated video projector
- Fine-tip permanent marker
- Paper towels/ napkins/ toilet paper
- A stand for holding your phone… if you have an Olloclip, it will fit right into the fish tank as is!
- Wrench or pliers
- Tarp to protect your working surface from plaster splashes
- Clear packing tape
- Paper-towel tube
- A tub or sink for washing out the mold
- Scissors
- Tape measure
- Spare phone battery
- 3/4 cup of water 31. Yellow food coloring
- Yellow construction paper
- White office paper
- Pencil
- Empty Pringles can
- Xacto knife
- Gravel, aquarium rocks or marbles for weight
- Wire twist ties – like baggie ties
- Plaster of Paris
- Water
- 1 1/2 Tbsp vinegar
- Measuring cups
- Fine-tip permanent marker
- Bowl
- Spoon
- Piece of Plexiglass or a large glass mirror
- A white light source – either a lamp or a bright smartphone flashlight
- Wire clippers
- Sponge
- Newspaper
- Water
- Resealable container
- Dishwashing soap
- Toothbrush
- Ruler
- Paper
- Masking tape
- Plastic wraps
- Bottle
- White paint
- Measuring cups
- Glow-in-the-dark Mod Podge
- Paintbrush
- Scissors
- Clothespins
- Clear packing tape
- 2 oz measuring cup
- Flashlight
- Piece of paper
- Dishwashing liquid
- Six 12 ounce plastic soda bottles
- Craft knife
- Duct tape
- Razorblade
- Black construction paper
- Handheld mirror
- Sharpie
- Pringles can
- Waxed paper
- Rubberband
- Mailing tube
- Water
To create your projector, follow these steps:

Step 1:
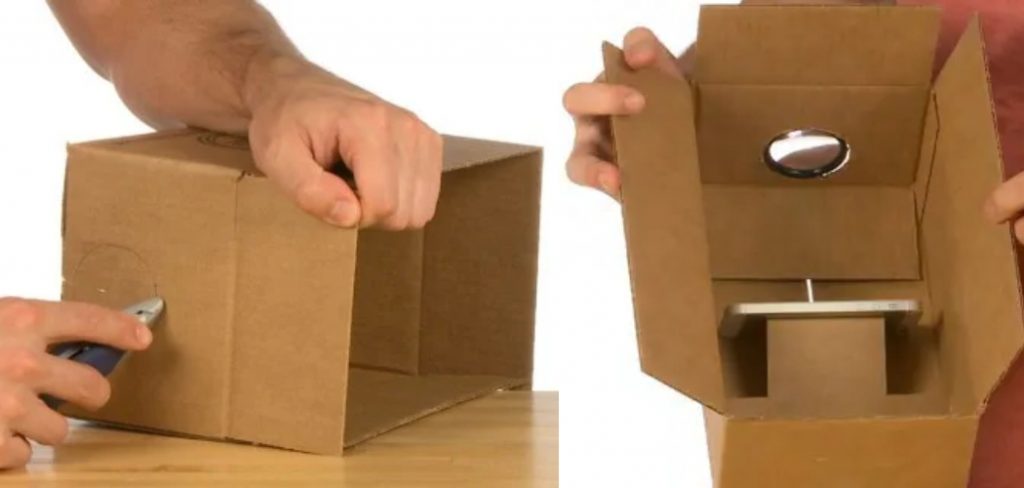
Cover the inside of the fish tank with a layer of paper towels or newspaper. This will soak up any leakage from your makeshift mold and provide a padded surface for you to rest your project on later. Next, cover the outside of the fish tank with duct tape.
Step 2:
Cut out a hole in one end of another plastic soda bottle that is about the same size as your phone’s screen (see diagram). The bottom part will become our “water prism.” Pour some water into it and close it tightly with rubber bands. Next, remove the cap and fill up the bottle 3/4th of its way with water before screwing it back securely onto itself.
Insert the Pringles can tube through the hole in the bottle and make sure it is tightly sealed. Next, pour 9 oz of water into an empty Pringles can and carefully place the soda bottle-phone screen gadget over it, centered and tight against its bottom. You’ve just made your own “water prism.”
Step 3:
Mix 1 cup of plaster with two tablespoons of water in a large bowl (use half a cup for this if you’re doing a smaller version). Stir until there are no lumps to avoid any bumps on your phone’s screen later. Add 1/2 tablespoon vinegar and stir well (this makes it stick together better once dried). The mixture should be thick but pourable like cake batter at this point.
Add a few drops of food coloring until you achieve your desired color. Pour the mixture into your mold, shaking it gently to ensure no air bubbles are stuck in the bottom corners. Check for bumps and smooth out with a spoon or popsicle stick if necessary until altogether level on both top and bottom surfaces.
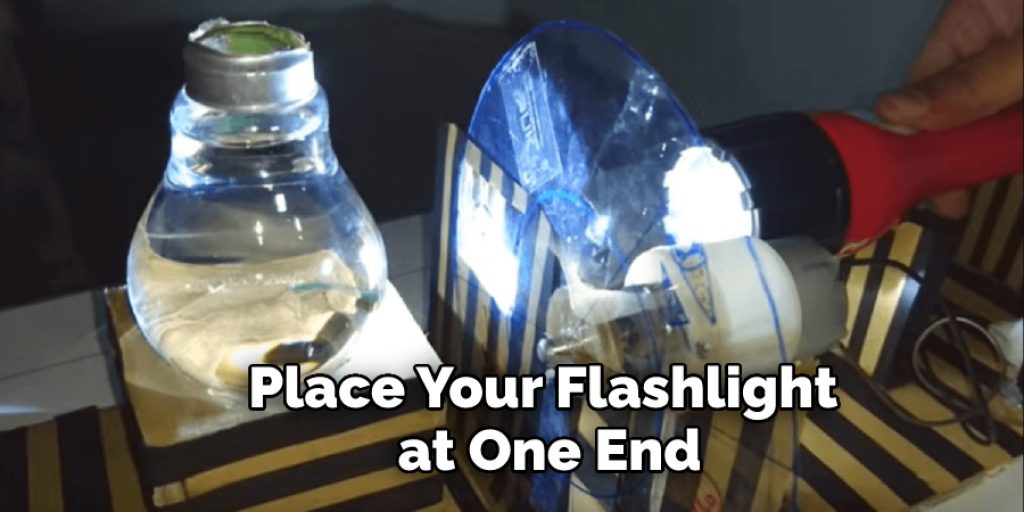
Step 4:
After the layer is dry, turn off all lights and cover any windows in the room to create a pitch-black environment. Place your flashlight at one end, pointing directly at the projector from behind (make sure not to block any part of the screen). Hold up your phone with its flashlight app next to it and slowly move it back and forth while angling your homemade projector up towards it – you should see your projected image appear on the other side.
Precautions While Making a Homemade Projector With Water:
-Since water is used, you should take care not to break the mirror.
Since the light from an LED will be projected toward your eyes, it is recommended that you wear sunglasses while assembling this projector for safety reasons. You can also apply some Vaseline on the edge of the eyeglasses to avert any damage to your eyesight due to concentrated light.
-If you wish, after making this DIY Projector, you can use it as a box for small animals like hamsters and rabbits by cutting a hole in the front through which they can enter and exit. Please make sure these animals do not stay inside for too long, though, as they may suffocate.
Conclusion:
I hope you have obtained a clear idea of how to make a homemade projector with water. Ensure all the precautions are correct. Thank you and have a nice day!


