
How to Make a Tissue Paper Lantern
Tissue paper lanterns are an excellent decoration for all types of events, from weddings to birthday parties. They can be made in any color and add a vibrant touch to the room. In addition, they’re easy to make with just a few simple steps!
Tissue Paper Lanterns are an inexpensive way to decorate for any event. These DIY decorations can transform your next party into something special and memorable by adding a pop of color and flair without much effort or money involved at all! This blog post will show you how to make a tissue paper lantern.
Step to Follow on How to Make a Tissue Paper Lantern
Step One: Determine
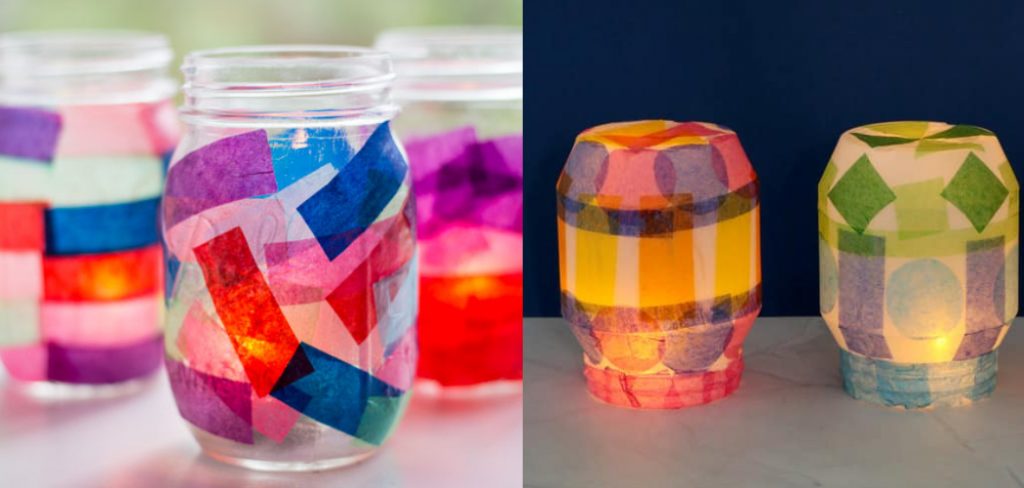
First, you must determine what type of tissue paper lantern you want to make. Two different materials can be used for this craft, regular tissue paper or foil-lined tissue paper. Regular tissue paper is not shiny, producing a more subtle look, but the bonus is that it does not tear as easily as foil-lined tissue paper.
Foil-lined tissue paper is shiny, and it is the more common type of tissue paper that people use for this craft, but it is much more likely to tear. The good thing about foil-lined tissue paper is that the finished product looks really nice because of the added shine.
Step Two: Preparation
You will need to decide how big you would like the finished product to be, and then cut out two circles that are that size from your chosen type of tissue paper. You can make these circles in different sizes if you want, but most people choose to make them about 18 inches in diameter because it creates a nice size lantern.
You will also need to prepare a string or rope that is long enough to suspend the finished product when it is hung. You can use a thin rope or very thin line for this, and you will need to tie a knot at each end of it so that it doesn’t slip through the hole in your tissue paper circles when you are preparing to suspend them.
Step Three: Damage Control
Before you begin crumpling up your circles, make sure that you lay out a large, clean workspace that will give you plenty of room to work. It is not necessary to damage your walls or tables with this craft because it won’t be as messy as most crafts tend to be, but you should still always keep that in mind.
If you use regular tissue paper, you may notice that it does not crumble as easily as foil-lined tissue paper. This is because of the different textures of the materials; regular tissue paper is much thicker and more durable than foil-lined tissue paper. As a result, you will likely need to use your hands to tear small holes in the paper before you can get it to crumple up properly.
Step Four: Crumpling
Begin to crumple your tissue paper by making small, tight folds in a circular motion all over your circle. If you are using regular tissue paper, you will need to make sure that the holes in the tissue paper are big enough for you to get your fingers through because they can tear very easily.
If you are using foil-lined tissue paper, you will need to be more careful because it is much more likely to tear than regular tissue paper. As a result, you should take your time and carefully crumple the circles so that they do not become ripped and ruined. These steps should help you in learning how to make a tissue paper lantern.
You Can Check It Out to Make a Willow Lantern

Step Five: Suspending
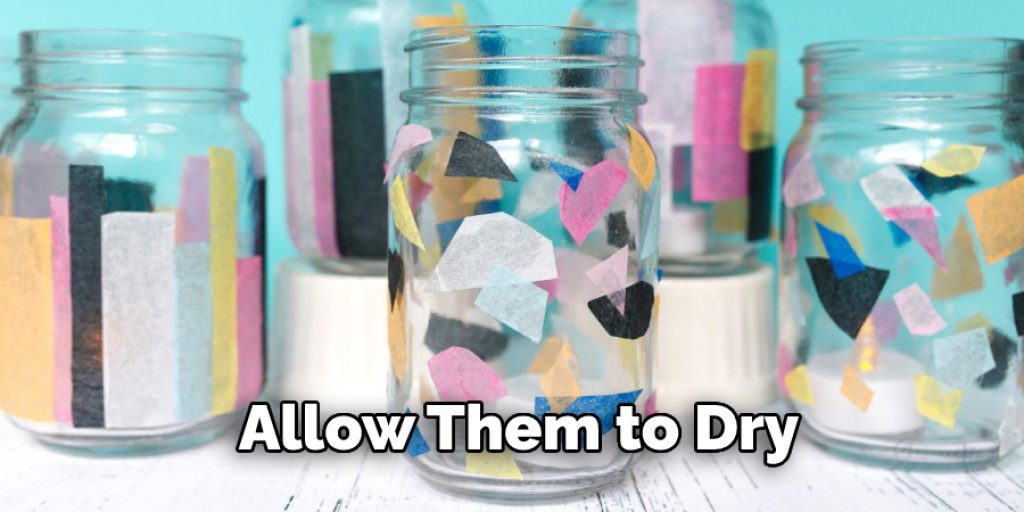
After you have crumpled your tissue paper into the desired look, use the string to tie it up. Make sure that you suspend the lantern to be even on both sides before you leave it alone to dry. You can place this in sunlight or near a light source if possible, but do not hang it over anything valuable because the heat from the sunlight may damage it.
Then, leave it alone to dry for about 24 hours. The drying time is significant because the lantern must be completely dry before you use it or risk damaging it. Allow yourself ample time to let this happen because you will need the lantern for your party in one day, and that probably won’t be enough time for it to dry properly.
Step Six: Final Touches
After your lantern has dried completely, you can add embellishments to it if you want. This is a personal decision, so feel free to skip this step if you would like. You will not need any extra materials for this part of the process. After adding decorations, allow yourself more drying time so that they do not get damaged.
Your lantern is now ready for use, and you can either hang it or place it on a table. It is important to note that kite paper should not be used if you add light inside your finished product because the light will get very hot and may damage the paper.
Step Seven: Placing the Tissue Paper
After completing this, continue to crumple your tissue paper, but make sure that each fold is larger than the previous one. Continue doing this until you get to the desired look. You can also add embellishments to your finished product if desired.
Your decoration should not cover up the hole in the center of your lantern because this is how you will place the light inside of it. After you have finished adding decorations and allowing them to dry, you can use your paper decoration as a lantern by placing a light source inside of it and hanging it up.
Step Eight: Decorating
If you are using regular tissue paper, there are two ways to do this. The first is to use your hands to crumble the tissue paper into balls of varying sizes all around your lantern until you have covered it entirely. You can also drape the tissue paper over the edges of the lantern and down the sides if desired.
The second option is to crumple your tissue paper into tight balls, but do not let them touch. Continue until you have covered the lantern in this manner, using the string to tie off one end of the tissue paper after successfully wrapping it around the lantern. This will help in how to make a tissue paper lantern.
Step Nine: Maintain Your Lantern
If you are using foil-lined tissue paper, the method of adding embellishments is slightly different. After you have crumpled your tissue paper into small balls and let them sit for a while to become flat, add pieces of cut-out tissue paper over the foil on one side at a time and allow it to dry before moving on.
You should then add tissues to the other side in the same manner. After adding all of your embellishments, allow them to dry and enjoy your new decoration fully! If you would like, you can hang it up or place it on a table after drying is complete. This will be a great addition to any party!
Conclusion
To make a tissue paper lantern, the first thing you need to do is cut out a circle of paper. Next, you will fold up all four corners and crease them by folding over the top edge until it meets with the bottom corner. Now take your thumb or index finger and pinch one side of two adjacent folds so that they meet in the middle, then push together to create another crease.
Repeat this process on each set of opposite sides; one left-hand side should be pinched into place. Finally, spread apart those sets of flaps that are now touching each other at their central point, creating an open-ended cone shape. We hope you enjoyed this article on how to make a tissue paper lantern.


