How to Make a Tricorn Hat Out Of Paper
Tricorn hats are one of the most famous attire of the eighteenth century. People used to wear it widely with their outfits. Especially in the Mexican region, these hats were used by most of the people. Still, people get fascinated by these hats. And you can also use these hats for your children to wear at costume parties or dress as you like in competitions. This tricorn hat will definitely be a perfect addition to your collection. As it is made of soft, comfortable and a durable fabric. It can be adjusted according to the size of the head.
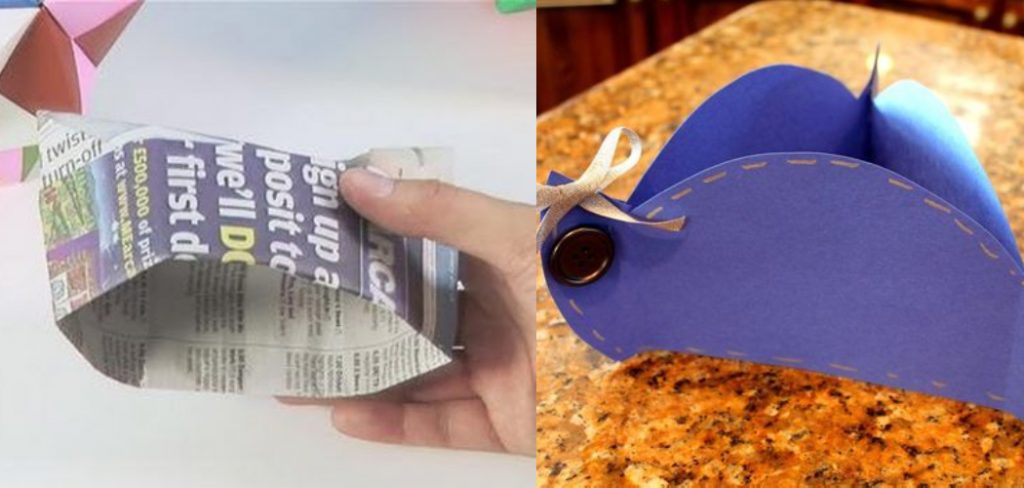
Today we will discuss an easy technique that will allow you to learn the process of making a tricorn hat. For this process, you will need some items, and these include cardboard papers. These papers are slightly heavier in thickness than the usual papers. You will need a pair of scissors and glue. You will also need some decorating items like paint, glitter, and laces. The first step is to take the cardboard papers and cut them into a shape of a triangle. The dimensions can be 17″ by 20″ long. Now you will have to roll the cardboard paper and make it look like a cone.
After you have gathered all the necessary items, you can begin the hat-making process. Start by printing a template, or use freehand drawing to create three different templates. These templates will help you join the pieces of the hat together to form the Tricorn hat.
After you have obtained the template, you can use a pair of scissors and carve them from the original paper. Next, you have to design the different parts of the hat. For this, you can use laces. It will be suitable if you use black colored paper and then apply silver or golden laces to decorate them.
You can add paper-made stars to the hat using glue, and you can also add glitters to make it look beautiful. After you have decorated the cap, you have to join the different parts. For this, you will need a strong adhesive. It will be better to use the liquid glue gun. You have to measure the head in which the hat will be suited and then connect the three parts using a glue gun. Your hat is ready to be worn.
Materials and Supplies Needed:
- Smooth Paper
- Pencil
- Scissors
- Tape (optional)
- Glue (optional)
Directions: How to Make a Tricorn Hat Out Of Paper
Step 1: Fold the Paper in Half
Fold the paper from corner to corner, making a triangle. Next, flip your paper over and fold it from one corner to the other, at least twice more. Make sure that you hold your paper with all of its fold-lines pressed together as you fold.
Step 2: Cut a Triangle Out of the Paper
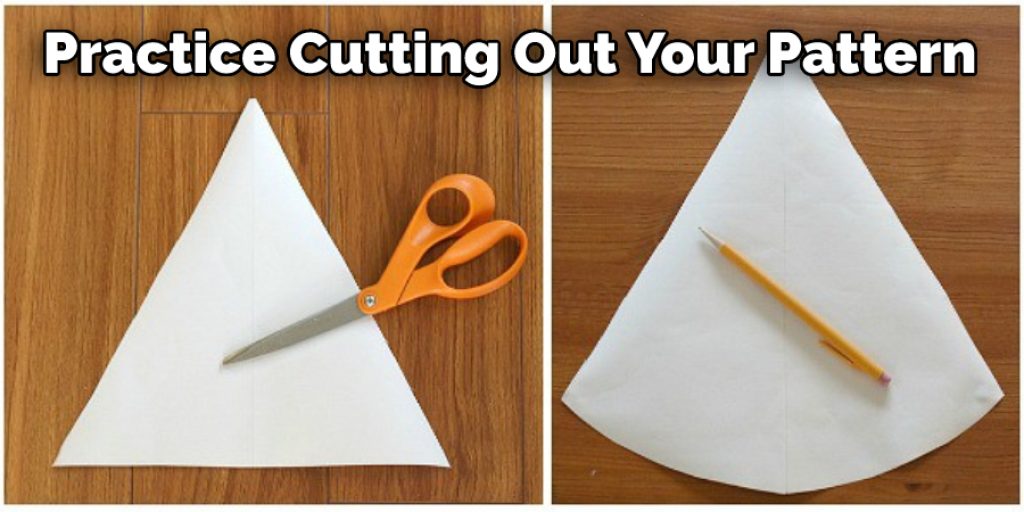
Cut a triangle out of the folded sheet of paper. The point should be about one inch from the fold, and each side should be about two inches long. Unfold the paper carefully to make sure it didn’t tear. If it was torn, try again. If not, you should have a triangle-shaped piece of paper with one corner missing. This corner is called the “apex” of the triangle.
Step 3: Make the Frill
Cut a small strip out off the side of the paper that doesn’t have a point at the end. Repeat this on the other side to make a total of four strips.
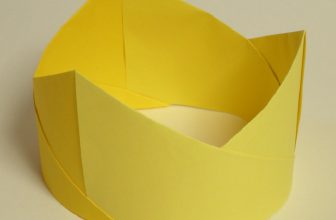
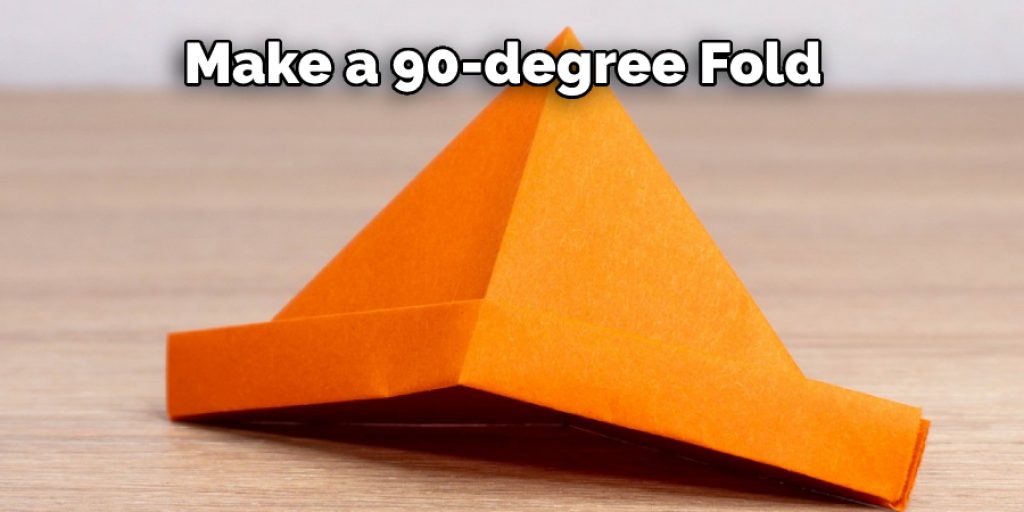
Step 4: Make the Brim
Take two of your strips, and make a 90 degree fold in the middle of one end of each strip. Tape them together if you plan to wear your tricorn hat later, or use glue/tape if you are making it for decoration only.
Step 5: Measure the Paper
Please measure the circumference of your head using a measuring tape (wrap it around your head, like you measure for a hat.) Mark off where it hits in three different places, one at your forehead and two at the back of your ears. These will be stopping points for the brim’s edges.
Step 6: Mark the Strip
Place a strip on your forehead and mark where it hits on the strip. Then, do the same with the next strip, placing it at your back ear and marking on that strip where it meets your forehead marker. Make sure to follow this pattern for all four of the strips.

Step 7: Connect Your Markings
Connect your markings with a light pencil line to know where to glue/tape the strips. If you like, you can make a triangular-shaped design inside the bottom of your hat to offer extra decoration.
Step 8: Cut Around Your Markings
Cut along the lines that connect your markings, just outside them. Once this is done, you should have four long strips with triangle shapes at their bottom and lines connecting where they meet.
Step 9: Tape or Glue the Strips Together
Tape or glue the strips together along their edges to form two larger triangles that fit perpendicularly. Make sure that all of your markings face the inside of the hat, not facing out through a seam. You can cut off extra paper around the edges to give it a cleaner look.
Step 10: Fit the Brim Around Your Head
Fit your hat around your head, and make sure that the brim of your hat covers your temples. If it doesn’t fit right, you might need to start over or use smaller paper strips. You can also use tape or glue to alter your hat if necessary. Once you have the brim in the right size, wear it!
Some Helpful Tips and Suggestions:
1. Practice cutting out your pattern.
2. Use the hole punch to make holes on each end of the strip where indicated on the pattern.
3. Cut one set of strips longer than you need; this will be the backside glued together, then cut another set to be your front which will have a smaller brim and larger crown area.
4. When assembling your hat, I suggested gluing the backside first then using a paperclip to hold it in place while you add the front set on top
5. You will notice that where you glued the backside together will be thicker than the crown part of your tricorn hat, which is my suggestion for how to maintain the shape of your hat.
6. Make sure you glue the very top of your tricorn hat together because it will no longer be see-through after you add all of your embellishments.
7. Once you have gone around the entire crown area, then glued down both sides, leave it open to dry.
How is a Tricorn Hat Made?
A tricorn hat is an iconic three-cornered hat that was popular in the 18th century. It is still used today for special occasions such as military ceremonies and other formal events. The making of a tricorn hat involves several steps, starting with selecting the right materials. Felt or wool is usually the preferred fabric for this type of project, although some versions are made with leather or velvet.
The sides are then folded up in triangular shapes and stitched together to create a peak at the crown. Once all pieces have been joined together, they are then reinforced around each stitch line with a cord or stitches to give it extra durability and structure. Finally, decorative accents such as ribbon, feathers, buttons, or braid can be added to complete the look of your unique tricorn hat!
Frequently Asked Questions
Who wore tricorn hats?
Tricorn hats were worn by the officers of the British Army during the 18th century. They were known as tricorn hats because they had a triangular shape. The hat was made of felt and was very warm and comfortable to wear.
Why did pirates wear tricorn hats?
Pirates wore tricorn hats because it made them look more intimidating. The triangular shape of the hat made it harder for enemies to hit them with their swords.
Conclusion:
Now that you know how to make a tricorn hat out of paper, it’s time to put your new skills to the test! Whether you’re dressing up for a pirate party or want to have some fun, this is a project that everyone can enjoy. All you need is some printer paper, scissors, tape, and a little bit of creativity.
With these simple instructions, you’ll be able to make a stylish tricorn in no time. So put on your best buccaneer attitude and get crafting! We hope you enjoyed learning how to make this fun and festive hat. Be sure to share your photos with us on social media.
You may read also –
Elizabeth Davis
Elizabeth is a creative writer and digital editor based in the United States. She has a passion for the arts and crafts, which she developed from a young age. Elizabeth has always loved experimenting with new mediums and sharing her work with others. When she started blogging, she knew that DIYquickly would be the perfect platform to share her tutorials and tips. She's been writing for the blog from the beginning, and her readers love her helpful advice and easy-to-follow instructions. When she's not writing or editing, Elizabeth enjoys spending time with her family and friends.