How to Make a Wooden Photo Album
The very first move is a ride to an artwork or desk-supply shop. Pick the scale of the picture display you’d like to operate with. Any sheets are just blank pages placed through secure plates of transparent plastic. In exchange, the protectors are typically pushed into a 3-ring binder to be used for post wrapping and “hinged” the papers.
Instructions:
I provide gap punching, indicating every paper was designed to bend at a specific system, all alongside where it will be sealed into the album. I picked a sheet size that was 12′′ x 12′′. Then, I purchased my post-binding hooks and pivot. “In the catalog, the bolts come in varying sizes, with each length changing to 1⁄4”. The brass hinge is three ′ long and straightforward to cut.
A Choice Term about Timber
My album covers are produced using feather-figured walnut, which was resawn and books matched. It emerged from a wood in my area that had been cut down years ago into the timber. But it has been air-dried this whole period; after resawing and gluing up, I was worried as a cat regarding my parts reshaping. Extremely considered timber also has its purpose.
I recognize walnut, including mahogany, which is reasonably sturdy, but I held my pieces on a smooth surface with such an entire weight until I could complete them off. I became good at the small 1⁄4′ scale because both parts stayed utterly smooth. The purpose of this call is to inform you to be careful regarding your choice and treating wood. Continue using a healthy species. Less dangerous will be a smaller album.
Configuration & Completing Components
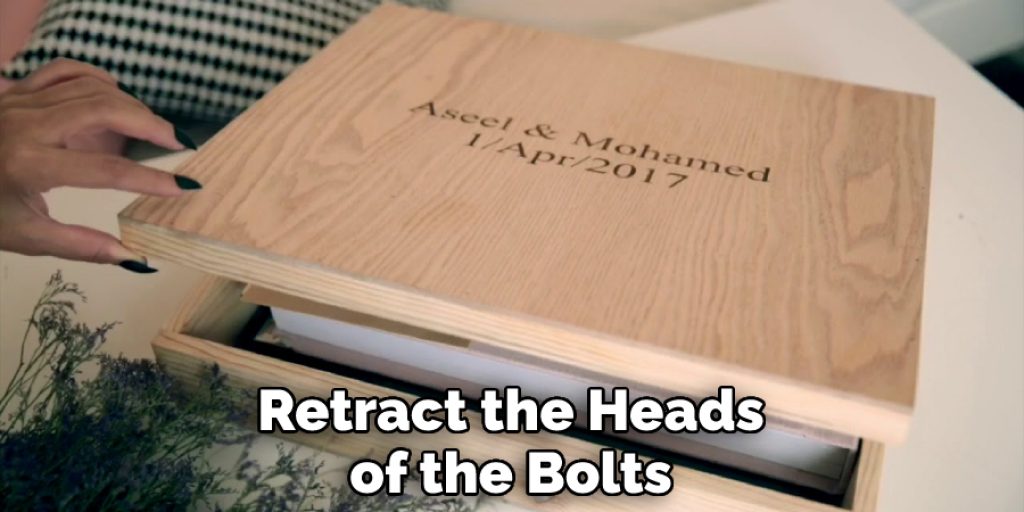
I adopted the gap designs, which were all in the album papers for the post binding hooks. “My whole core for the hooks was 2-9⁄16” from the upper part to enable the upper and bottom roofline. “I named a gapped core of 1⁄2” from the critical point. To retract the heads of the bolts significantly, the issues needed a 1⁄4′′ gap with a 1⁄2′′-diameter counterbore.
In the power drill, I was using the Forstner key for digging. Front and rear banding strips ought to be drilled precisely the same. I gradually dusted to # 220 gritty at this stage, rounding exterior edges to a radius of 3⁄16 “and significantly improved the sides, except the sides where the hinge was to be mounted.
The process of making this walnut model was complicated and required a lot of time and effort. The model was filled with a paste wood filling, and then an oil-based walnut polish was applied. The model required 24 hours to settle after the filling was added.
I used the lacquer, which arrives with an aerosol spray container for a transparent coating. The object is the finest lacquer I have in a jar. Attach the post portion with the post binding hooks and fill in the slots for your picture link. I noticed that, with a standard paper push, this was possible to widen the gaps in the papers moderately.
Place its other covering over the post once finished, and install the bolt. Placed a felt bumper patch on either side of the cover page if you think of leaving the photo on a cafe table, but if you’d like to shield the back cover from scratch.
You may also read – How to Make a Wooden Fidget Spinner
Elizabeth Davis
Elizabeth is a creative writer and digital editor based in the United States. She has a passion for the arts and crafts, which she developed from a young age. Elizabeth has always loved experimenting with new mediums and sharing her work with others. When she started blogging, she knew that DIYquickly would be the perfect platform to share her tutorials and tips. She's been writing for the blog from the beginning, and her readers love her helpful advice and easy-to-follow instructions. When she's not writing or editing, Elizabeth enjoys spending time with her family and friends.