
How to Make an Acrylic Led Picture
I’ll teach you how to make a colorful LED side illuminated symbol in this instructable. The emblem is polished on a transparent acrylic sheet that used a Dremel rotary device and a flex shaft adapter. This would be my first effort to etch the sheet metal, so I was delighted with the final product.
I was using a colorful RGB LED bar together with its transmitter to give a display of colors. This approach enables me to accomplish dye range and lighting effects. That’s the best way to customize the office of someone at home and work. It may even be used to promote the company and goods.
Instructions
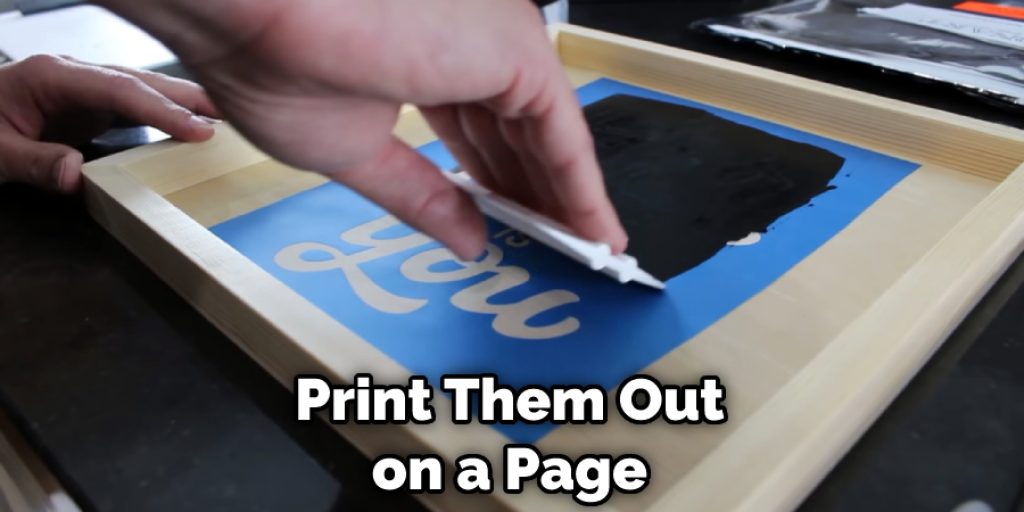
I bought an A5 acrylic sheet and afterward drew a 180 mm x 150 millimeters shape onto the secure layer and cutting this out. I utilized my Rockwell Blade Runner and Jig Saw Blade to slice the test specimen. So I cut the edge with the form of a curve (4 cm filet), so it can appear quite appealing. Install the stencils of your choosing from the web and print them out on a page.
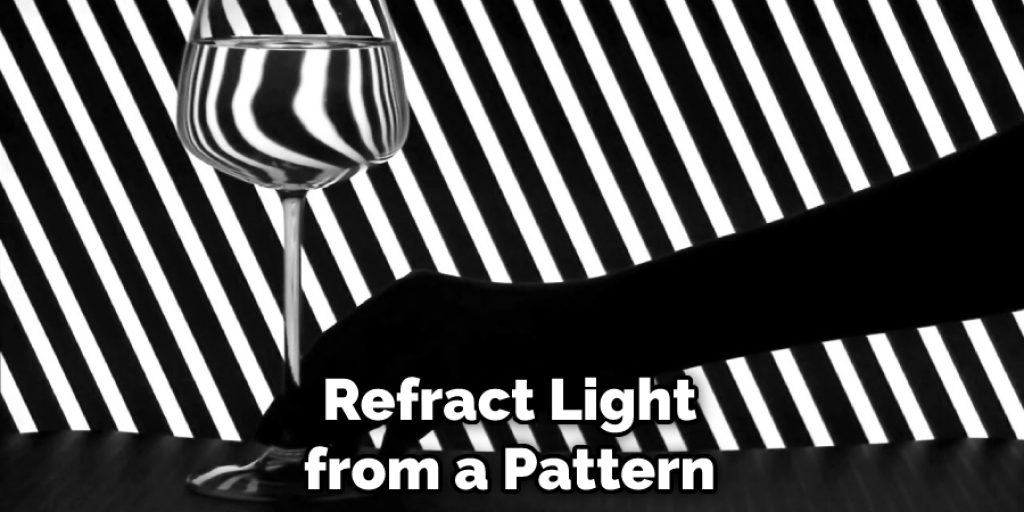
You can create your own stencils with some programs. My friend, who is now an art enthusiast, designs beautiful stencils. The concept behind many of the symbols is to refract light from a pattern carved into a translucent surface. This creates a shimmering effect in some places and a translucent effect in others.
Action shots look best when taken with a laser-etched acrylic surface and Lights. The light that passes through the surface is diffracted by the etching, making the print look like it’s glowing. The majority of the surface stays translucent, making it look like the subject is suspended in midair.
Erase all ends of the protective films. Instead, by holding a certain margin, split the stencils, and fixed it to the tape with acrylic paper. Please remember to allow several gaps at the base (25 mm), which would be obscured within the foundation. It is the most challenging phase of this task.
To etch acrylic, you will need a Dremel 3000 rotational device, Flex tube attachment, and gravure bit. First, test with a scratch piece of paper. Then, pursue the stencil design that used a finer gravure bit. Next, etch the middle section and use a coarse gravure piece. Finally, choose a gentle cloth to wipe the powder generated throughout etching.
I would use Autodesk Fusion 360 to lay out the LED sign core. After that, I assessed the part measurements with a digital vernier; as a result, the same was regarded throughout my project. The framework has two aspects: Top and Bottom. The upper portion is the primary point that is constructed primarily to conform to all the elements such as the Acrylic Sheet.
The lower part is for placing the LED scrape and providing the Acrylic Sheet assistance. This is time to publish the Base 3D after finishing of the project. In Fusion 360, you could even select on start making and piece the template using slicer apps. To print the pieces, I required my Creality CR-10 3d printing and 1.75 millimeters of wooden fiber.
Printing the upper section pf the foundation taking me about 5 hours and publishing the lower portion around 2.5 hours. It’s necessary to complete it after 3D printing the frame. The wooden fibers are usually quite susceptible to stringing, and we have to polish them down. I was using 120 grit sandpaper to begin and work higher to the smoother 320 grits.
The effect is a rather clean and quiet final draft that strongly matches freshly sanded wood. Yet you may find the PLA’s chalky white features are pulled out by sanding. It would help if you did not care about it because until we spray the dye, it must be darkened—Wash fabric with all the particulates from the top of the document.
I chose Varthane Premium Quick Dry Wood Stain (authentic Cherry coloring) to offer a real wood plank appearance. There seem to be several options; you may select your favorite. Until staining, altogether remove the materials. Most stain paint may end up at the base rim of the glass, and it’s necessary to scrub carefully, much like you want to with any coating.
Then, spread it with a cleaner or smooth, lint-free rag and quickly rub the extra stain off the surface until it hardens out. Consider leaving it to be dried out for 4 hours. The result is very cool; I am pleased with the result. This would be my first experiment of 3d printers in wooden fiber; I think I can do more in the upcoming.
Protection: Wearing nose musk and hand protection throughout staining. Because I was so eager that moment, I did not carry the gloves, so you must not make the same error. You will continue to add the pieces after drying the 3D printed foundation.
Place the push button and the DC Jack into their corresponding positions.
While using a glue gun, install the RGB LED transmitter, make sure that the IR LED is a noticeable external source. This LED stripe and guide I bought individually. But you can also purchase the RGB bar, controller, and power source in a pack if you like. Break the Lighting stripe in the right place, as indicated by the distributor.
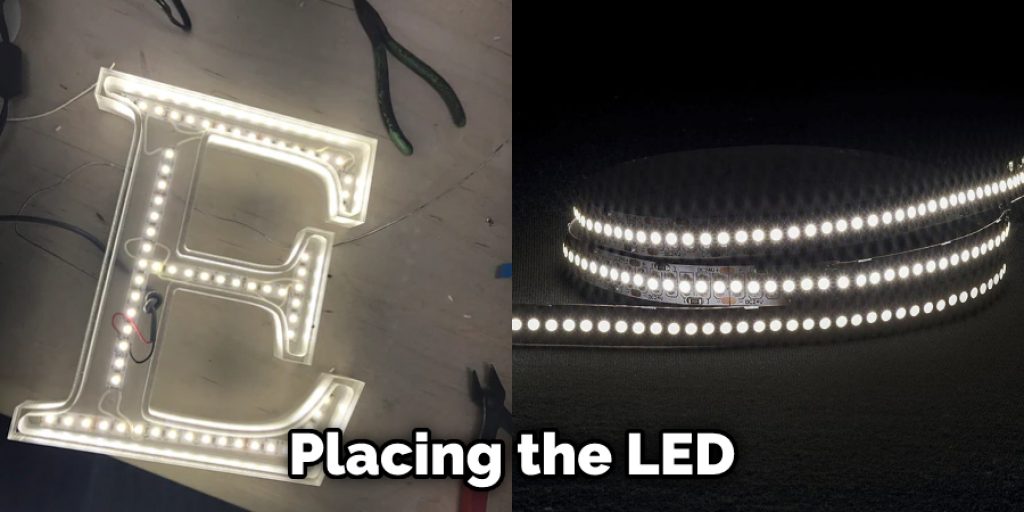
Instead, eliminate the self-stick stripe from the safe headrest. Place the lighting strips on the planned section of the base’s rim. You should add a piece of paste at the top to seal it securely. Quite a straightforward cabling. The 12V power comes from the DC Socket, goes via the power button, and attaches to the RGB control utilizing the DC jack with the screw connector.
You should obey all instructions. I utilized 22 AWG cable for the power cables. Help shield the soldering connections using heat shrink tubing. Lastly, attach the LED strips to the connector and make sure that the indicator label on the cable fits. Protect the lower part by aligning gaps with the upper layer. I required M3 x12 bolts to lock it.
Then use a cool gentle cloth to tidy the acrylic board, then place it into the position on the edge of the foundation. Attach the 12V power cable and turn the push button at the rear to ON. This should glow up, please use the remote control to adjust tone and display with various modes. Be sure that the acrylic’s lowest part is flat and transparent so that the LED light will glow easily. Applaud yours very much for reviewing my article.


