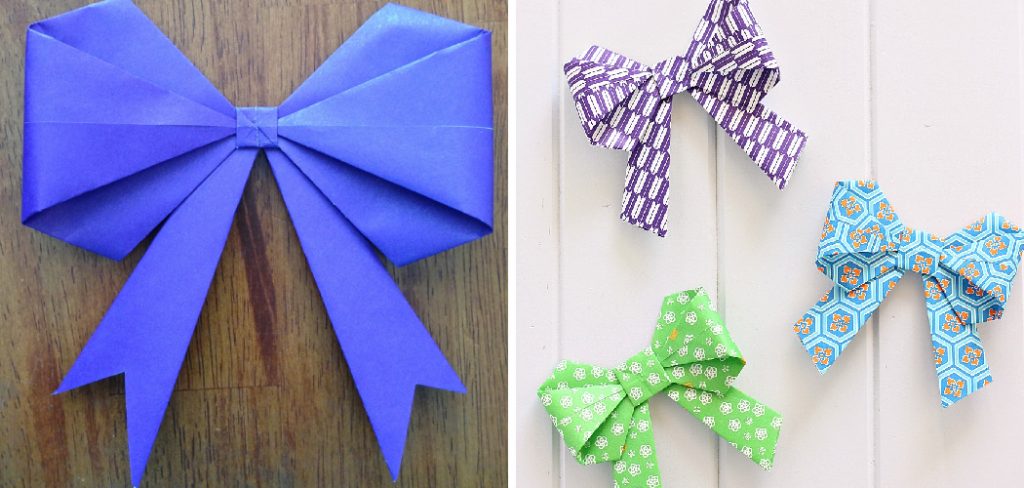
How to Make an Origami Bow
For centuries, origami has been an admired art form cherished by many. But with the simplicity of just a few folds and creases, you can create a bow more beautiful than any store-bought ribbon could ever offer! With a little patience and practice, anyone can become an origami master in no time at all.
Whether you’re crafting a gift for someone special or decorating a party, here is the step-by-step guide on how to make an origami bow.
In this blog post, we’ll be walking through step-by-step instructions on making the intricate paper bow that will make you feel like a professional Origami artist in no time. So, if you’ve ever wanted to learn how to make one yourself or are looking for inspiration for your next creative project — you’ve come to the right place!
What Will You Need?
- A sheet of plain paper (preferably square)
- A pair of scissors
- A glue stick or tape to secure the bow together
Once you have gathered your materials, you can begin!
10 Easy Steps on How to Make an Origami Bow
Step 1. Choose the Paper:
Start by selecting a piece of square paper (no need for fancy origami paper; regular printing paper works just fine). Try to make sure the paper is a similar size if using more than one sheet, as this will ensure that your bow looks uniform. You can pick any color you like, but opt for something that will stand out against your background for the best results.
Step 2. Fold the Paper:
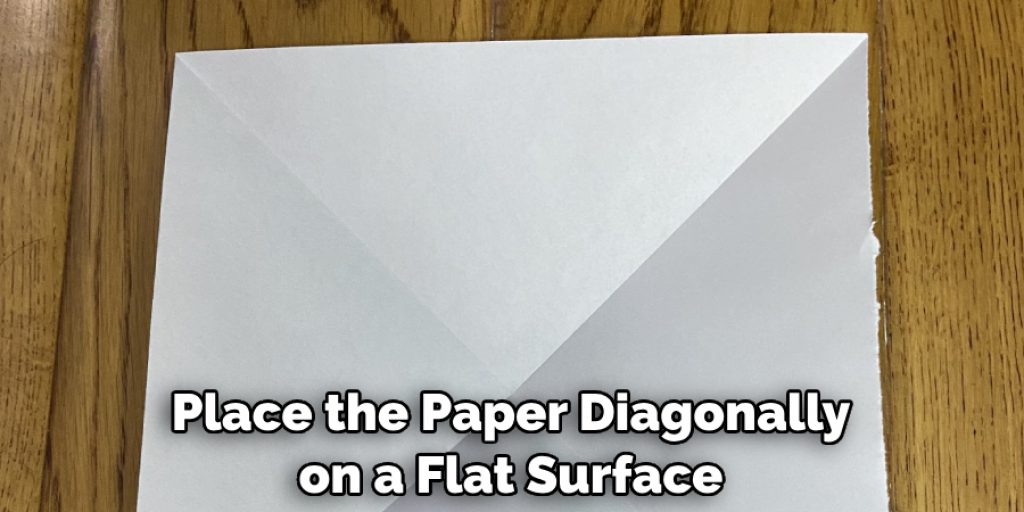
Place the paper diagonally on a flat surface so it looks like a diamond. Fold it in half by joining the top corner to the bottom corner to create a triangle. Unfold it back to a diamond, then fold it in half again by joining the left and right corners to create another triangle. When you unfold it, you should have crease lines forming an ‘X’. These lines will serve as guides for the following steps.
Step 3. Create a Square:
Now, fold the paper in half horizontally so the bottom edge meets the top edge, creating a rectangle. Unfold it, then fold it vertically in half so the left edge meets the right one. Unfold it again, and you should see crease lines forming a ‘+’ across your ‘X.’ This will leave you with a square shape in the center of your paper. Next, fold the four corners of the paper towards the center of the square. Your paper should now look like a smaller square.
Step 4. Shape the Bow:
Take the folded edges of the square (those pointing towards the center) and fold them outwards so they point towards the corners of the paper. You will notice that your paper starts to resemble a bow shape. Make sure to crease these folds well. You should now have a small square in the middle with four triangles pointing outwards. This forms the base of your origami bow.
Step 5. From the Bow Loops:
Now, let’s give your bow some volume. Pick up one of the triangles and fold it in half, bringing the outer point towards the center square. Repeat this step for the remaining three triangles. These triangles will act as the loops of your bow. Make sure the creases are sharp and the loops are evenly shaped to give your bow a neat appearance. Now, you should have a square surrounded by four folded triangles (the loops of your bow).
Step 6. Secure the Bow Loops:
You need to secure the loops to give your origami bow a finished look. For this, fold the bottom corner of each loop upwards, tucking it under the center square. Ensure these tabs are well-creased and snugly tucked under the center square to prevent them from unfolding. This step secures the loops of your bow in place, giving it a neat, complete appearance.
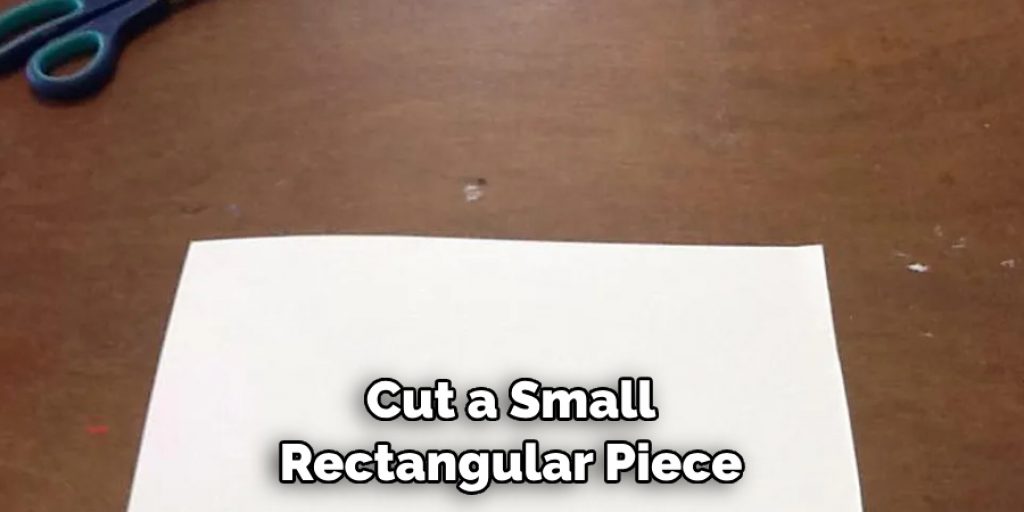
Step 7. Cut a Small Rectangle:
Now, you need to create the center and tail of the bow. For this, cut a small rectangular piece from your leftover paper. The size of the rectangle should be proportional to the size of your bow. For reference, the length of the rectangle should be approximately the diagonal length of the square in the middle of the bow and the width approximately one-third of one of the bow’s sides.
Step 8. Create the Tail:
To create the tail of the bow, fold the rectangle in half lengthwise, creasing it well. Unfold it, then fold each edge towards the center crease, creating a thinner, longer rectangle. This forms the tail of your bow.
Step 9. Attach the Tail to the Bow:
Attach the tail to the bow by tucking one end under the center square of the bow. Make sure it is centered and secure. You can use a small piece of tape or a dab of glue to ensure it stays in place. Be careful not to use too much glue, making the paper look lumpy.
Step 10. Finish Your Origami Bow:
Finally, to finish your origami bow, take the other end of your tail and fold it back over the center of the bow, securing it underneath. This creates a band around the center of the bow and covers the base of the tail, giving your bow a polished, finished look. Congratulations on your beautiful origami bow! Feel free to experiment with different colors and sizes to create a variety of bows for your gifts or decorations.
By following these simple steps, you can now create an origami bow of your own. With a little bit of practice and patience, you can create even more intricate paper designs that will bring joy to any occasion!
5 Additional Tips and Tricks
- For a more realistic origami bow, you can use colored paper to give your bow an extra pop.
- You can always add some sparkling sequins or rhinestones to the center of your bow for added detail and sparkle.
- When folding the two sides of your bow, press down firmly with your fingers to help secure it.
- For a fuller bow, you can cut the edges of the paper to give it an angled shape.
- Finally, use double-sided tape or glue to adhere your origami bow to your chosen surface.
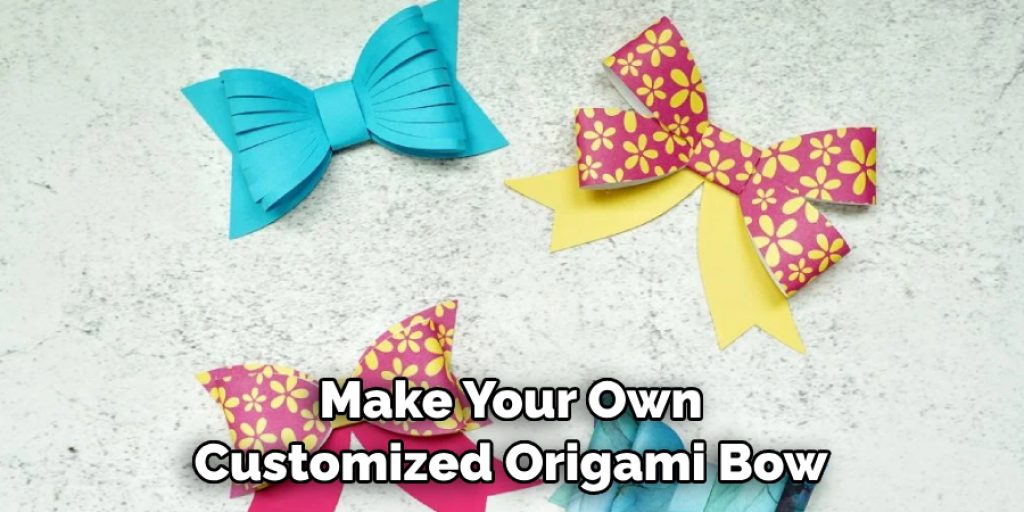
These five tips and tricks should help take your origami bow from basic to beautiful quickly! With a little effort and creativity, you can make your own customized origami bow that will look amazing.
5 Things You Should Avoid
- Avoid using too much glue or tape when attaching your origami bow to a surface, as this can cause it to become soggy and unravel.
- Do not use thick paper for your origami bow since it will make the folds difficult to manipulate into shape.
- Avoid using only one color of paper for your origami bow, as this will make it look rather dull and uninteresting.
- Do not use too much pressure when folding the paper for your origami bow, as this can cause it to crease or tear.
- Finally, try to avoid using extra decorations such as glitter or ribbon on your origami bow, as these can make it appear heavy and gaudy.
By following these five tips and tricks, you can ensure your origami bow looks perfect every time!
5 Different Design Ideas
- For a classic look, use two colored papers and make an origami bow with one of the colors in the center.
- Make a brightly-colored origami bow using multiple kinds of paper to create interesting patterns and shapes.
- To give your origami bow a more stylish look, glue tiny beads or other embellishments around the edges of the paper.
- For a more unique design, try making an origami bow with two pieces of paper in different sizes and then intertwining them together for a bolder look.
- Finally, you can use textured or patterned paper to create a more eye-catching origami bow that will stand out.
By trying out different design ideas, you can create a unique origami bow that will impress everyone who sees it!
What Kind of Paper Should You Use?
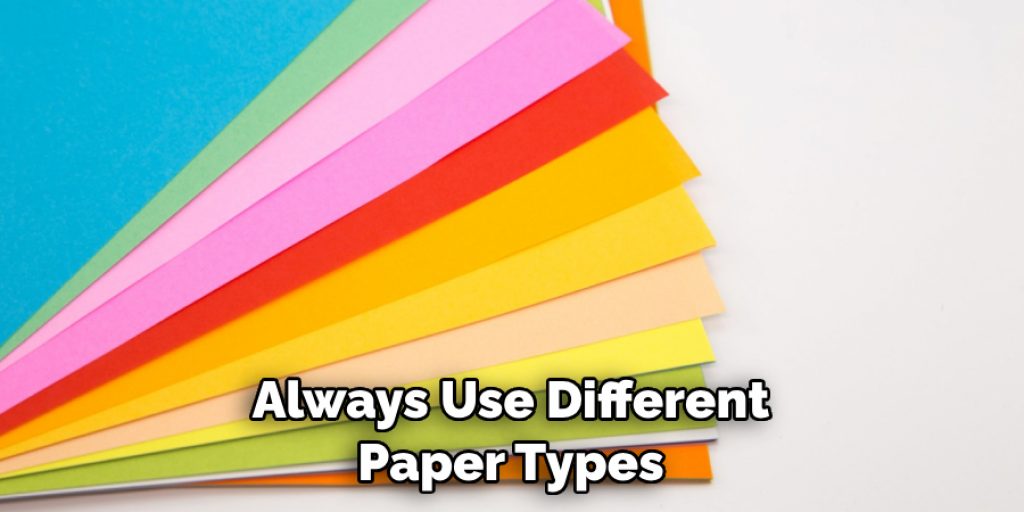
The best type of paper for making an origami bow is a thin, lightweight paper that is not too thick. This type of paper will be easier to fold and manipulate into the desired shape. Choosing sturdy paper that won’t tear easily is also important so your origami bow can maintain its shape. For added texture or color, you can always use different paper types, such as patterned or textured paper.
No matter what type of paper you choose, make sure it has enough weight and thickness to hold the shape of your origami bow without tearing or creasing. With the right type of paper, you can easily make a beautiful and unique origami bow that will impress you.
Conclusion
As you can see, making an origami bow is fun and easy. Not only will it keep your children entertained with a unique activity, but it also builds creativity and fine motor skills quickly. Plus, with every origami bow, you’ll get a unique design that’s just as much of an accomplishment as getting the perfect fold the first time.
Hopefully, the article “How to Make an Origami Bow” has provided you with the knowledge and tips to make a beautiful origami bow quickly and easily.
So get your hands on some paper, put your skills to the test, and create something special that you’ll be proud of! Good luck!
You Can Also Check This Out to Hang Party Decorations Without Damaging Walls
Angela Ervin
Angela is the executive editor of DIY quickly. She began her career as an interior designer before applying her strategic and creative passion to lifestyle and home. She has close to 15 years of experience in creative writing and online content strategy for housekeeping, home decorations as well as other niche efforts. She loves her job and has the privilege of working with an extraordinary team. She lives with her husband, two sons, and daughter in Petersburg. When she's not busy working she spent time with her family.