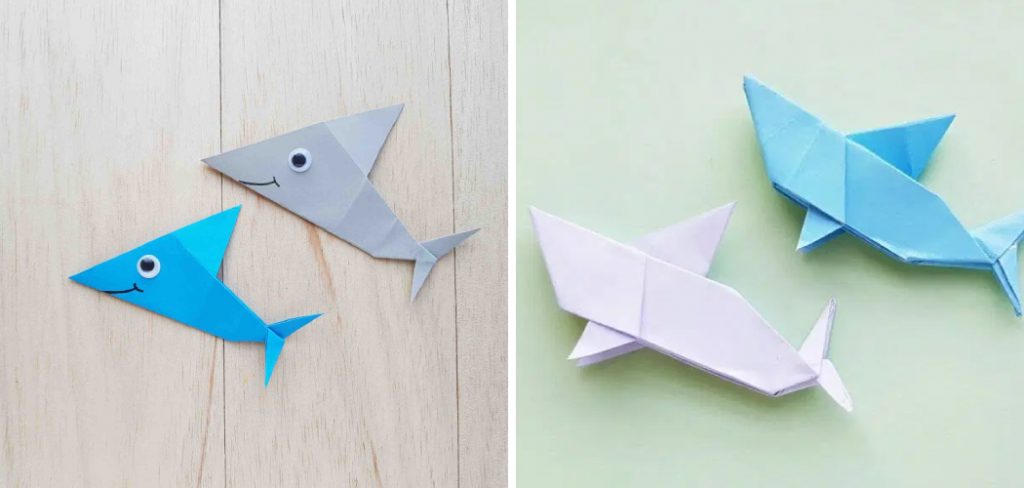
How to Make an Origami Shark
Do you love the ocean and all its amazing inhabitants? Are you looking to create something special to make your ocean decor stand out? If so, then learning how to make an origami shark is the perfect activity for you! You can bring this beloved sea creature into your home with a few simple folds and supplies. Not only is it fun making an origami shark, but it is also gratifying with the result – not to mention, no two sharks ever look alike, which makes them even more unique.
If you are ready to start, you only need some origami paper and a few simple folds. Follow the instructions below, and you will be well on making an origami shark.
Get ready for some creative paper-folding adventure while learning a new skill from beginning to finish!
What Will You Need?
- Origami paper
- Shark template (optional, but recommended for younger kids)
- Scissors (for cutting the paper)
- Glue (to hold it all together)
Once you have all the needed supplies, it is time to start folding.
10 Easy Steps on How to Make an Origami Shark
Step 1: Preliminary Folds
Begin by laying the origami paper on a flat surface with the color side facing downwards. Fold the paper in half diagonally to form a triangle. Unfold this, and then fold it diagonally again, but this time in the other direction. When you unfold it again, you should have an X-shaped crease in the middle. These preliminary folds are important as they will guide the subsequent steps in making your origami shark.
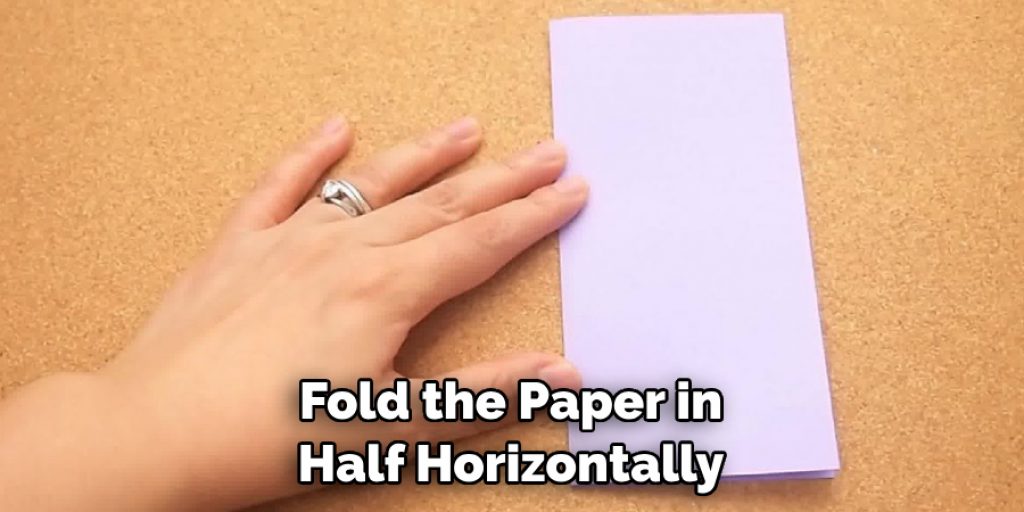
Step 2: Forming the Base
Now that you have the preliminary folds, the next step is to form the base of the shark. Fold the paper in half horizontally so that the color side is inside. Crease well and unfold. Fold the top corner down to the center crease and the bottom corner up to meet it, forming a square shape. This is known as the origami bird base, commonly used in many origami projects.
Your paper should now look like a folded square with a split down the middle. This will form the base from which the rest of the shark will be shaped.
Step 3: Shaping the Shark’s Body
Next, we’re going to start shaping the shark’s body. Hold the square base so that the open ends are at the top. Fold the top layer of the right side over to the left, aligning it with the center crease. Do the same with the left side, folding it to the right. Flip the paper over and repeat this process on the other side. You’ll end with a narrower, elongated diamond shape. This forms the basic body of the shark, establishing the foundation for the more detailed features to come.
Step 4: Creating the Fins
To create the shark’s fins, we will work on the narrow ends of the diamond-shaped body. First, fold the right side’s top layer upwards, aligning the edge with the central crease. Repeat on the left side. Flip the model over and do the same with the other side. You should now have a structure that resembles a diamond with two protruding triangles at the top and bottom. These will become the fins of your origami shark.
Step 5: Shaping the Head and Tail
Now, it’s time to form the shark’s head and tail. Take the top triangle (which will become the tail) and fold it down so that its tip meets the bottom edge of the model. Fold the bottom triangle (which will become the head) upwards, leaving a small space between the head and the body. This gives our origami shark a more realistic shape.
Step 6: Detailing the Fins
Next, we’ll add detail to the fins. Fold the top layer of the top triangle (the tail) down so that its edge aligns with the bottom edge of the model. Fold the top layer of the bottom triangle (the head) upwards, aligning the edge with the model’s top. This will create a smaller triangle within the larger one, giving the impression of a detailed fin. Repeat this process on the other side of the model to ensure symmetry.
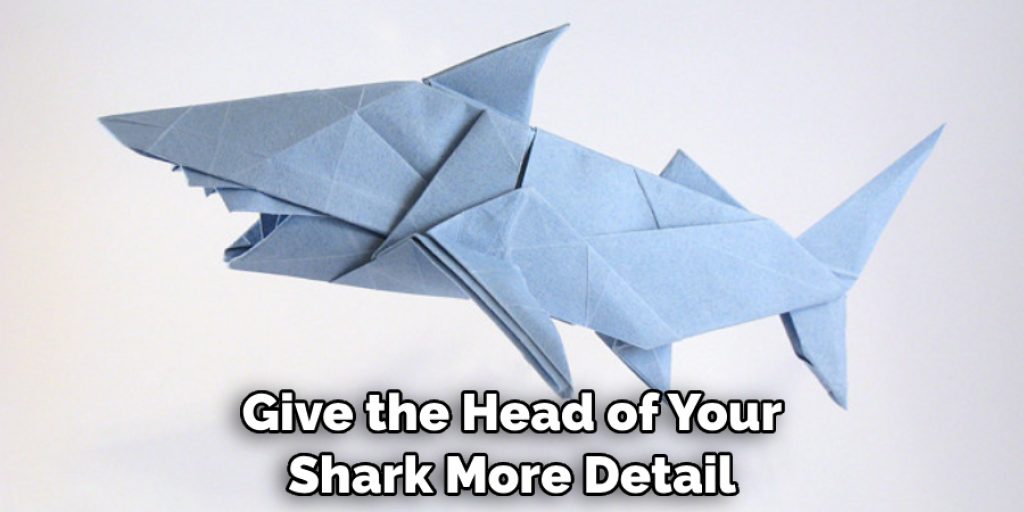
Step 7: Detailing the Head
To give the head of your shark more detail, make a smaller inner fold on the bottom triangle. This will create the illusion of the shark’s snout. At the same time, fold a small portion of the top of the triangle backward, creating a “fin” at the top of the shark’s head.
Step 8: Creating the Tail
To create the shark’s tail, start by folding the top triangle downwards along its center. Then, fold the two sides of the triangle back upwards, creating a split in the tail. This will give your origami shark a more realistic, dynamic appearance.
Step 9: Final Adjustments
Now, it’s time to make some final adjustments to enhance the realism of your origami shark. Adjust the fins, head, and tail folds to create a 3D effect. You can gently pull apart the layers or make additional minor folds to give your shark a more lifelike shape. Remember, it’s your creation, so don’t be afraid to experiment with different angles and positions to achieve the look you want.
Step 10: Finishing Up
Finally, to add personality to your shark, you can draw on eyes, teeth, or any other details using a fine-tip marker. Congratulations! You’ve just completed your origami shark. This can be a great addition to your ocean-themed decorations, a cool gift, or a fun activity with kids. Remember, practice makes perfect, so don’t be discouraged if your first few attempts don’t turn out exactly as you envisioned. Keep folding, and you’ll be a pro in no time.
By following these ten simple steps, you can easily make your origami shark. Have fun exploring the creative possibilities and making unique designs!
5 Additional Tips and Tricks
- To make your origami shark look more realistic, you can use different colored paper. For example, you could use bright blue and white paper to create a realistic ocean scene.
- You can also add some detailing to your origami shark by cutting out small triangles and adding them as fins or teeth.
- If the corners of the origami shark are not meeting how you’d like them to, try using double-sided tape to keep them in place.
- Use thicker paper, such as cardstock or construction paper to ensure your origami shark is sturdy and able to stand up independently.
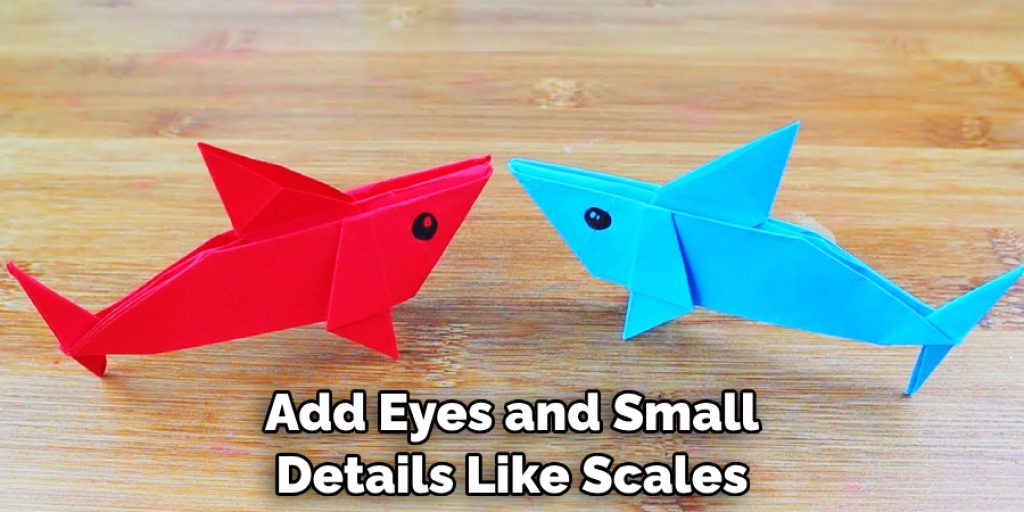
- If you want to take your origami shark one step further, add eyes and small details like scales or patterns. This will make your origami shark look more realistic and unique!
Following these tips and tricks, you can easily create a beautiful origami shark that will impress everyone who sees it! Have fun with this project, and remember to share your creations with us!
5 Things You Should Avoid
- Try to use paper that is too thin or flimsy for your origami project. This may cause the origami shark to be distorted and not look as good as it could.
- Adding too much detail to the origami shark – can make your creation look more relaxed and visually appealing.
- Cutting out shapes with scissors can cause the paper to tear or look uneven.
- Not using enough glue or not allowing enough time to dry before moving your origami shark. This could result in the pieces becoming loose and falling apart.
- Trying to rush through the project – Take your time and enjoy creating your origami shark! It will be worth it when you see the final result.
By avoiding these common pitfalls, you can ensure that your origami shark looks great and is sturdy enough to last for years to come!
Which Type of Paper Do You Need?
When it comes to creating an origami shark, you should use thicker paper, such as cardstock or construction paper. This will help the pieces stay together better and make sure your origami shark is sturdy enough to stand up on its own. It will also help with adding detailing and making sure the corners are meeting in the right way.
Foil-backed paper is another type of paper that can be used to make an origami shark. This type of paper has a shiny finish and will create a really unique look for your creation. If you’re looking for something extra special, this could be the perfect option for you!
Finally, if you want to add even more realism to your origami shark, you can use different colored paper. Blues and greys are often used to create a realistic ocean scene, while brighter colors can make the origami shark stand out even more.
No matter which type of paper you choose, you can make an amazing origami shark by following these steps in no time!
Conclusion
Overall, how to make an origami shark is a rewarding activity that can be enjoyed by everyone. Whether you’re making it for a child or yourself, it will surely bring everyone a smile. In no time, you’ll be able to add this delightful creation to your repertoire of paper crafts.
So why grab some paper and get folding? You might find yourself hooked on this incredible art. And who knows —maybe soon enough, you’ll even be able to make some of the more sophisticated origami designs out there!
So don’t let anything stand in the way of your origami creations—you have everything you need to start immediately.
Angela Ervin
Angela is the executive editor of DIY quickly. She began her career as an interior designer before applying her strategic and creative passion to lifestyle and home. She has close to 15 years of experience in creative writing and online content strategy for housekeeping, home decorations as well as other niche efforts. She loves her job and has the privilege of working with an extraordinary team. She lives with her husband, two sons, and daughter in Petersburg. When she's not busy working she spent time with her family.