
How to Make Personalized Chip Bags?
Chips are always a favorite item for the younger persons. My boys aren’t the exception to that. If I provide them with the numerous amounts of chips, they will love to eat them all day long. But I only allow them as an essential item for the parties and, in the snack time, need to focus on their health issues too.
Anyway, chips are mostly used in every celebrating moments like different sports events or something like that, so why not make their bags more interesting. So, I took a step forward and tried to build a customized chips bag and guess what, I was able to make with a first try. That’s why I have intended to share my experience with all of you, so ask me how to make personalized chip bags?
By the way, I have made the chip bag for cheering my son’s early baseball match. That’s why I have selected the following design. You can pick any design that suits you or your son, or you can choose mine. It is up to you. So, without any delay, let’s dive in!
What Are You Going to Need for Making Personalized Chip Bags?
As always, you are going to need some essential items. So, first of all, start gathering them in one place. These items are:
- Paper
- Printer
- Paper Crimper
- Paper Adhesive
- Decorative Scissors
- Bag of Chips

How to Make Personalized Chip Bags?
What do you think? Is it going to be easy or hard? Naah! It is not hard. It is the easiest thing you may have ever done. Okay, just follow the simple steps below:
Step 1
To begin with, you’ll need a design. Will you create it? Of course, you can make your own design, but that will take some time. None of us are artists, so the simplest way to get a design is to download it from a source.
Download a zipped file through your computer (doing that won’t reduce its resolution). Once you have downloaded it, keep it in a specific folder and make sure to unzip it when you open it. For unzipping it, right-click on the mouse and then select Extract all. It will open the file for you.
After opening the file, make it ready for printing. In this case, print it according to the packet’s size. Keep in mind that every packet will require each of the pages. So, if you make 15 covers, you must print them 15 times. See told you; it’s easy.
In the case of the papers, I used the normal papers, nothing special, and I was pleased with the print quality. It gave me a matt finish, which offered a superb look. You can also give it a try, or you can also use glossy photo papers. Those are also ideal and provide a realistic look on the chip bags.
Step 2
Once you have finished designing the pages, you must move forward and prepare the packages. Take the printed pages, and apply adhesive on both the top and side areas. Then apply on the backside of the along with the blue line. This portion will fit on the top of your packet, and when you put it appropriately, it will offer a seamless look on the closure. Don’t need to waste time; start applying now. After applying it, end the process by properly sealing the tops and bottom.
Step 3
There will be a residual part of the paper that is needed to be cut down. It is needed for the perfect finish. In this case, you can use a plain or decorative scissor. Both of them are going to work as well as needed. Use them to cut the top and bottom space where it is completely white.
There is a huge chance of cutting the part that contains adhesive. I also cut one of the packets. So, you can use some sort of protection. For that, I especially sealed the adhesive part; it will be better if you also use that. You can also mark the adhesive part to stop at the exact place.
Step 4
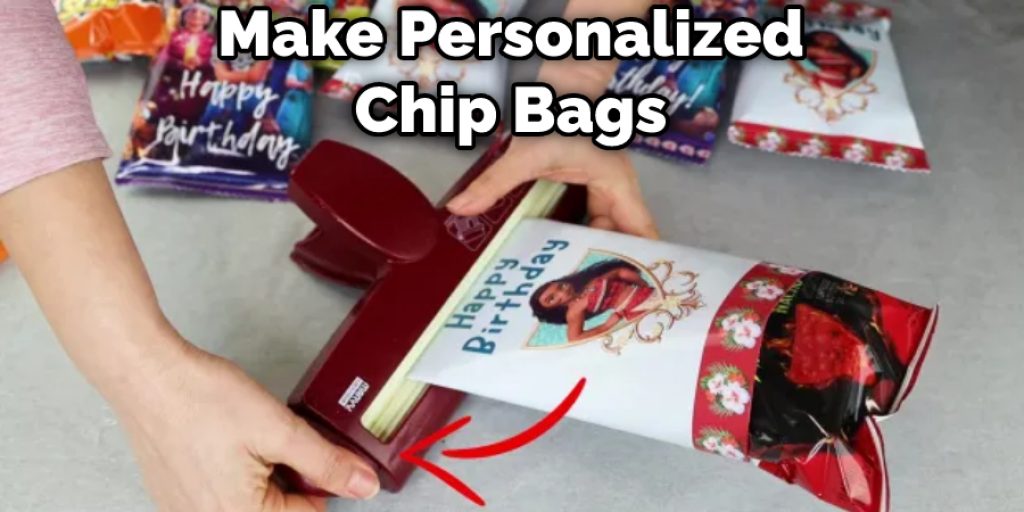
Now, it is time for the final touch-up. You need to be very careful in this position. This time you will need the crimper. Take the crimper and place the top of the bag into it. And then pull the crimper by keeping its handle closed. After that, turn the wheel, which will make the gears move.
If you’re making a project requiring a seal, you need to ensure the edge is sealed properly. To do this, you can turn the project back a fourth and continue the process for a few more. Just make sure to check if everything is okay or not. If you think it needs more creep, do that according to your need.
By the way, do this for the top and bottom too. That’s all you are done. Your very own personalized chip bag is ready.
Conclusion
Well, that was my experience. From now on, I make several new designs for every new occasion. And with the above guidelines, you will also make your own chip bags. I have tried to cover everything through my writings, but you know there is always lackings. Hopefully, you won’t have to ask anyone how to make personalized chip bags anymore. But if you still have any questions feel free to ask it through the comment section.
You May Read Also How to Make Bird Seed Bags for Weddings
Elizabeth Davis
Elizabeth is a creative writer and digital editor based in the United States. She has a passion for the arts and crafts, which she developed from a young age. Elizabeth has always loved experimenting with new mediums and sharing her work with others. When she started blogging, she knew that DIYquickly would be the perfect platform to share her tutorials and tips. She's been writing for the blog from the beginning, and her readers love her helpful advice and easy-to-follow instructions. When she's not writing or editing, Elizabeth enjoys spending time with her family and friends.


