
How to Make Wood Countertops Waterproof
All those among the most exquisite decor, paneling, and trim function are made from woods, the biggest and longest-loved construction material on the planet. Even so, lacking safety, much wood can damage from water infiltration and humidity levels, causing swelling, warping, or perhaps even decaying.
Luckily, you could take the benefit of items that maintain wood when improving its unique features. While selecting the best solution for you, note that specific waterproofing approaches are perfectly adapted for internal or outdoor artifacts, whereas others are directed for medium- or light-grained material.
Instructions:
I need to maintain the wood’s colors constant, and when our Woodworking wood countertop was completed, the exact techniques — wax, oil — have been out because they’d have made the countertop too bright in color. I tried all kinds of stain before discovering one that fit as similar as close to the real hardware. I found the solution, however, and it is an easy one that I never even thought about. And why not? Why worry with stain when you can get a much more constant result using paint to maintain the wood’s colors constant over time.
Countertop, I covered the cabinet in protective dropping garments to protect our lovely white appliances and go through the woods with a brush to freshen up any dirt and pieces that could mess with the surface. I have used the generic brush-on method for staining, let it stay on, wash it off. It worked. I used an old paintbrush to apply the stain, I was surprised that it did not absorb into the wood as much as I thought it would have. What’s the best way to remove stain from a countertop without damaging the laminate?
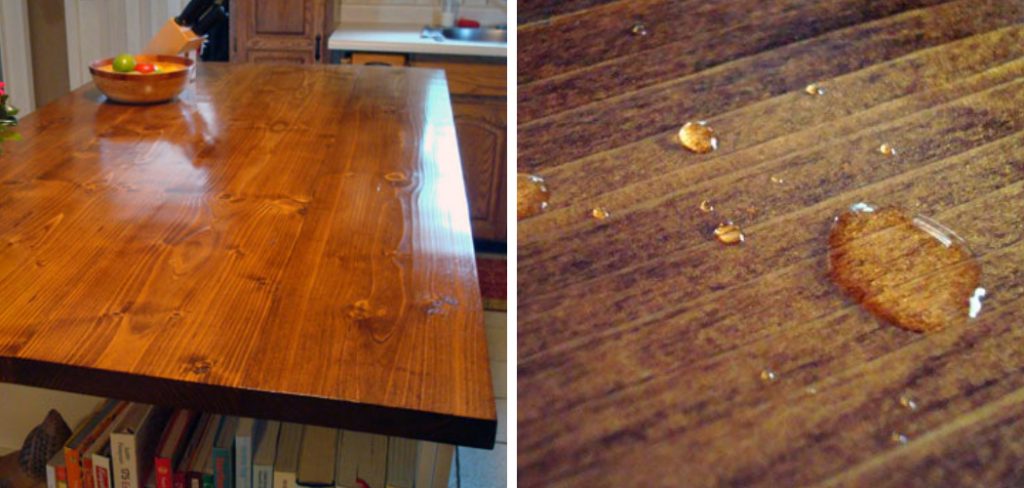
It’s on to the water-resistant point, after having the stain recover. Since I worked on a countertop, I needed one which was very sturdy and, of course, meal secure. After finding an excellent feedback web, I opted to go along with Water lox. I implemented their quite thorough advice on their site to increase that I received the finishing that I was aiming for. Water lox was very user friendly. And, it had been also good to work with. It dried really quickly, and yet it had a lot of time for me to apply the 3 coatings that I needed.
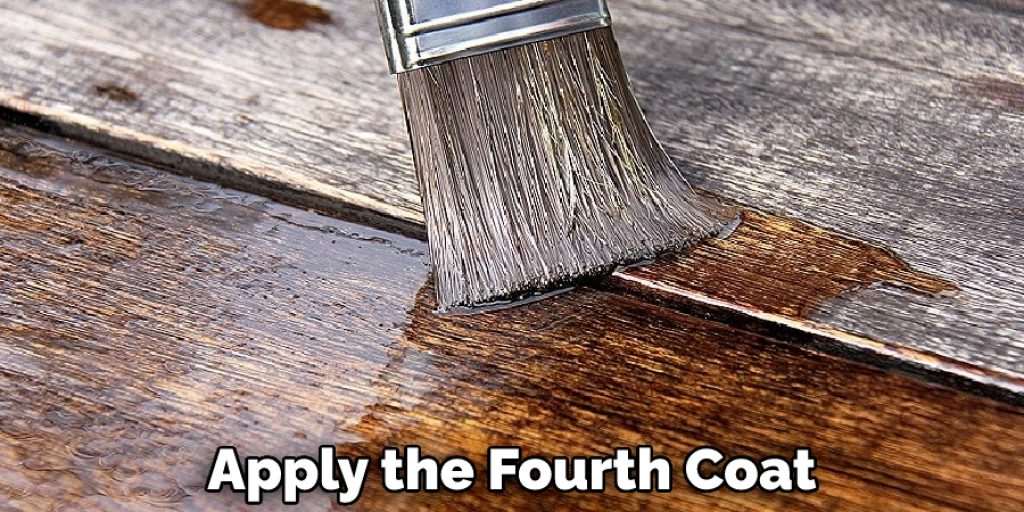
I made four layers, rubbing it with a naturally stiff brush on generously and making it dry in each layer for 24hrs. Here are a few benefits, drawbacks, and learning experiences. Then, whenever it’s damp, Waterlox smells terrible. We formed a pattern after the first coating of placing the Waterlox on the rights until we went to bed. Waterlox will get you a beautiful high gloss finish and can be buffed to a higher sheen if desired. Waterlox is not a water-based product. By the time we were ready to apply the fourth coat, it was late in the evening.
We unlocked the curtains, switched fans on, shut off the heating (because we had windows open), and locked the door. Since it was March, keeping doors unlocked was not precisely the best climate, although it was essential to dry and heal the polish for both the smell and the air circulation. After several hours, luckily, the worst smell could lessen.
Second, Waterlox also isn’t advised to sand between those layers. Instead, the guidance suggests you clean off the worktop with mineral oil to even get away from every dirt during every coating. I did that, and I still find the finishing is not as flawless as I want it to be. Third, I also don’t think I’m using the right kind of sandpaper to begin with. The Waterlox guidance suggests you use a 180-grit paper as your first set, then follow it up with a 220-grit later.
I’m used to seeing that I have a very smooth texture and sand from every coating. The Waterlox guidance suggested using significantly more delicate steel wool to smooth off some difficult spots here between the second-to-last and third layer of paint, which I chose, but it is not super flat.
Fourth, it is quite a polished finishing board. I used the leading Waterlox Sealer/coating, which is suggested for the first several layers (or all coats, if you select) and is described as having a medium texture. There is a satin coating, but frankly, I was too inexpensive to manufacture one again, so I made all four paintings with the Original.
You May Also Read – How to Build a Raised Bar Countertop
Elizabeth Davis
Elizabeth is a creative writer and digital editor based in the United States. She has a passion for the arts and crafts, which she developed from a young age. Elizabeth has always loved experimenting with new mediums and sharing her work with others. When she started blogging, she knew that DIYquickly would be the perfect platform to share her tutorials and tips. She's been writing for the blog from the beginning, and her readers love her helpful advice and easy-to-follow instructions. When she's not writing or editing, Elizabeth enjoys spending time with her family and friends.


