
How to Open Led Light Remote
Opening a LED light remote is an essential task for anyone who wants to access the settings on their LED lights. By opening the remote, you can change how your LED lights operate and how they look. You may be able to customize certain brightness levels or adjust how quickly the lights react when they are switched on or off. Full control over how your LED lights look and perform is essential for anyone looking to create the perfect lighting atmosphere, regardless of the occasion.
The biggest advantage of opening a led light remote is that it allows you to control the lighting in your space without having to switch them on or off physically. This means you can adjust your lights’ brightness, color, and intensity without having to access a wall switch or move around furniture. In addition, this type of remote offers a variety of options to customize your lighting needs, allowing you to choose from pre-programmed settings or create your own. In this blog post, You will learn in detail how to open led light remote.
Step by Step Processes for How to Open Led Light Remote
Step 1: Inspect the Remote
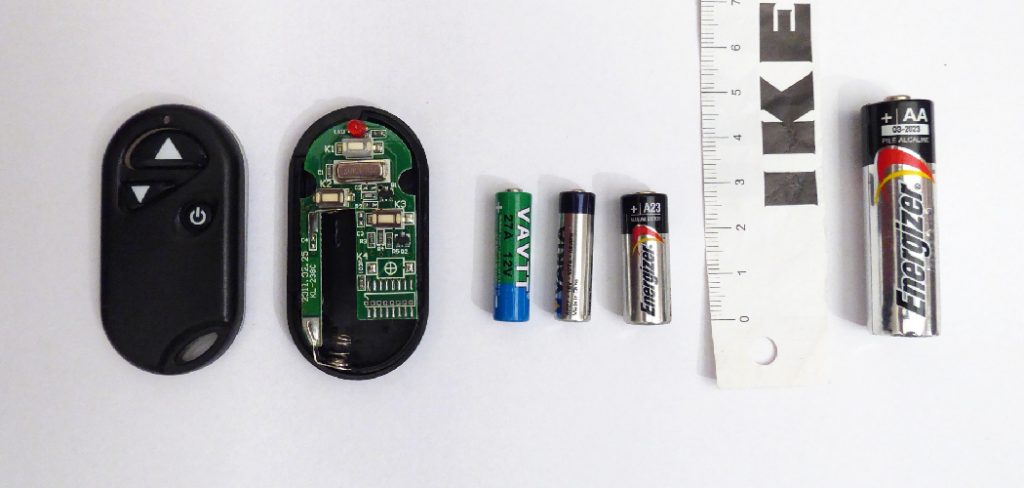
Look for the proper make and model of the remote that matches your LED light. This will help you identify how to open it up properly. Depending on how old your remote is, you’ll need to remove the batteries before doing anything else. It’s important to do this as a safety precaution, so be sure to do this first.
Step 2: Remove Screws/Clips
Once you have the correct remote, there may be a few screws that need to be removed. Some models use clips instead of screws to hold the case together, so look for those as well. Using a small screwdriver or a butter knife, carefully remove any clips or screws that are blocking access to the inside of the remote and set them aside.
Step 3: Open Up the Remote
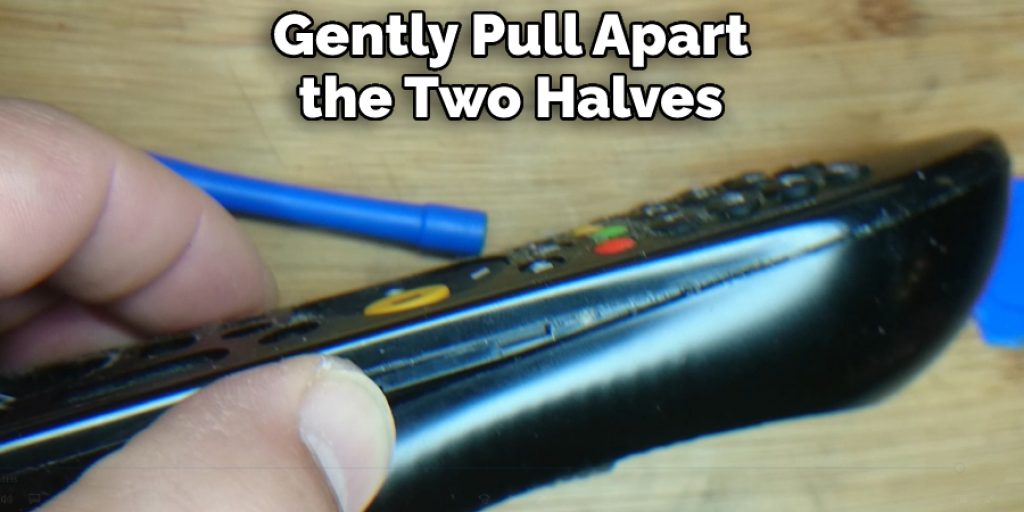
Using your fingers or a pry tool, gently pull apart the two halves of the case. Do this slowly and carefully so as not to damage any delicate wiring that may be present within. Be sure to note how the pieces fit together for when you have to put it back together.
Step 4: Inspect the Inside
Once you have the remote open, inspect the inside carefully. Make sure that all of the wires are in good condition and that there aren’t any loose parts or burnt-out components. If everything looks okay, then proceed to step five. Next, reconnect the batteries to the remote and ensure they are properly installed. Make sure that all of the contacts are clean and free of debris before putting them back in.
Step 5: Reassemble the Remote
Once your batteries are replaced, it’s time to reassemble the remote. Put the two halves back together and reconnect any clips or screws you removed earlier. Make sure everything is tight and secure before moving on to the next step.
Step 6: Test the Remote
Now that your remote is put back together, it’s time to test it out. Turn on your LED light and press the buttons on your remote. Make sure they all work properly before moving on to the next step.
Step 7: Clean Battery Contacts
If you notice that some of the buttons aren’t responding, it may mean that there is a problem with how the batteries are connecting inside. Remove the batteries and clean the contacts with a cotton swab to fix this. Make sure that they are completely free of any debris before replacing them. Once you’ve cleaned the contacts, put the batteries back in and test your remote again. If everything works as expected, you’re ready to move on to the last step.
Step 8: Put Away the Remote
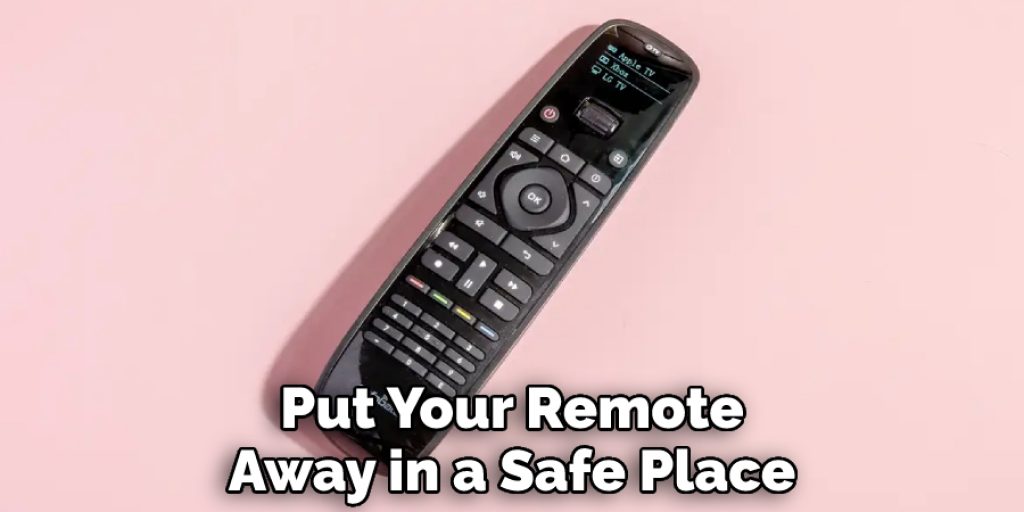
Finally, put your remote away in a safe place, so you don’t risk losing it or damaging it. Congratulations, now you know how to open and close an LED light remote. With this knowledge, you can easily install and operate any type of LED light in the future.
Tips for How to Open Led Light Remote
- Ensure the power is turned off before opening your LED light remote.
- Wear protective gloves and goggles to protect your hands and eyes from potential debris or sharp edges when your LED light remote opens.
- Use a flathead screwdriver to pry open the plastic casing of an LED light remote gently, so as not to damage any internal components.
- Use a spudger to carefully remove the circuit board from your LED light remote if needed.
- Unscrew and disconnect any necessary wires and external components before further opening the LED light remote.
- Be mindful of how you handle the fragile parts within and how you place them when taking apart the LED light remote.
- Organize parts and components into labeled, safe storage containers for easy reassembly.
- Reassemble your LED light remote in the reverse order of how it was taken apart to ensure everything is placed correctly.
With these tips, you should have no problem opening up your LED light remote. If at any point while the process you feel uncomfortable or unsure how to proceed, it is best to seek help from a professional electrician before continuing.
How Do You Program the Remote for Your Led Lights?
If you have LED lights with remote control, you may need to program the remote to get it working correctly. The steps for an open led light remote will vary by make and model, but the general process is usually similar. First, find your user manual for the specific LED lights you have – this should include information on how to open the remote and program it. The user manual might also include a code that needs to be entered for the remote to work with your LED lights.
If you have lost or misplaced the user manual, try searching online for the make and model of your LED lights. You may be able to find the user manual and any codes needed to program the remote.
Once you have a code, press and hold the ‘program’ button on your remote for several seconds, then enter the code into the remote by typing it in using buttons or a keypad. If your remote doesn’t have a keypad, use other buttons to enter the code. After entering the code, press and hold the ‘program’ button again until you hear a beep, indicating that your remote has been successfully programmed.
Why Should You Disconnect the Power Before Attempting to Open Your Led Light With a Remote?
It is important to disconnect the power before attempting to open your led light with a remote. This will prevent any damage from occurring either to you or your equipment, as most remotes use low-voltage electrical circuits, which could cause electrocution if not handled carefully. Additionally, it can prevent any accidental changes or disruptions that may occur while opening the device, which could potentially cause further issues. By disconnecting the power, you can also be sure that it is safe to open and manipulate the device without fear of any damage occurring to you or your equipment.
Once the power has been disconnected, use a flathead screwdriver to pry the remote away from its housing gently. Take caution not to damage the housing, as this will make it difficult to reassemble and could cause further issues. Once the remote is open, you should be able to easily identify any broken or loose components that may need attention.
How Do You Check if the Remote is Working With Your Led Lights?
To check if a remote is working with your LED lights, you can either use an infrared (IR) remote tester or test it manually. If you use an IR remote tester, point the remote towards the tester and press any buttons. If the signal is detected, your remote is working correctly.
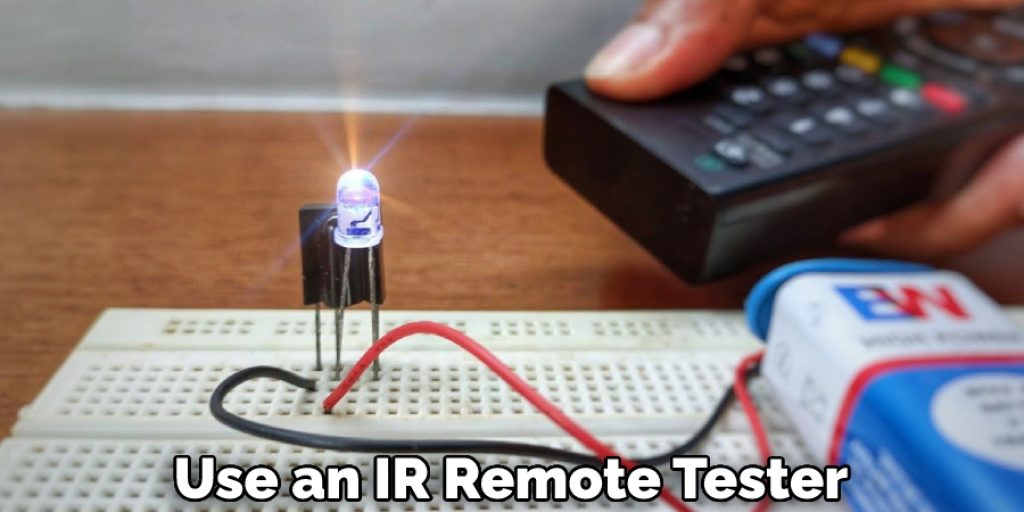
Alternatively, you can test the remote manually. First, turn on the LED lights and point them away from you. Then press any buttons on the remote and observe how the light changes or if it responds to your commands. If there are no changes in the light then this could indicate that the remote is not working correctly.
Are There Any Additional Accessories You Need to Be Able to Open Your Led Light With a Remote?
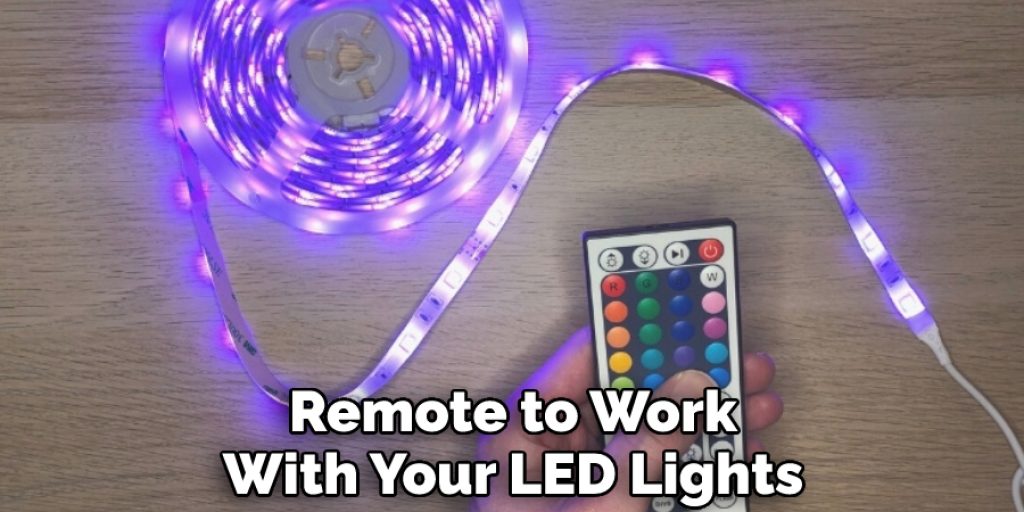
You will need to purchase a compatible LED light remote to control your LED lights remotely. The type of remote that you’ll need depends on the specific type of LED light you have. Generally speaking, most modern models come with a wireless handheld device that can dim and switch off your lights from anywhere in the room. Some remotes may also include additional features, such as changing the color of your lights or even controlling multiple lights with just one device.
Before purchasing a remote, it’s important to ensure that it is compatible with your particular LED light model. Read through the instruction manual for your light to find out what type of remote you will need. Once you have the correct remote, follow the instructions included with it to pair it with your LED light. This should include how to open up the battery compartment of your LED remote and how to program it for use with your LED lights. Once set up correctly, you should be able to easily change settings on your lights from anywhere in the room.
How Often Should You Change the Batteries in Your Led Light Remote?
If you want your LED light remote to remain in proper working order, it’s important to know how often you should change the batteries. The frequency with which you need to update the batteries depends on how frequently you use your remote. For average usage, replacing the batteries every six months or so is recommended. If you use your remote on a daily basis, it is wise to change the batteries once every three months.
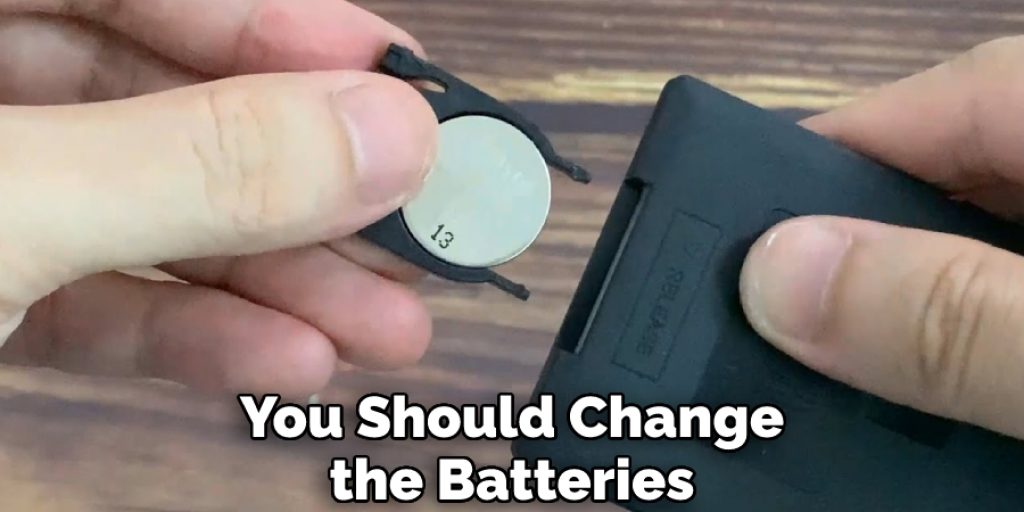
In order to open your LED light remote and replace the batteries, simply locate the small compartment in which the battery is stored. This should be marked clearly with an arrow or a small lid that can be popped open with a screwdriver.
Once you have opened the compartment, remove the old battery and insert a new one. Be sure to use only the batteries that your LED light remote manufacturer recommends. After replacing the battery, close the compartment and test the remote to ensure it works properly.
What Should You Do if Your Remote Isn’t Working With Your Led Lights?
If you’re having trouble getting your led light remote to work, you can take a few steps to diagnose and fix the problem. First, check the batteries. Make sure they’re inserted properly and that they haven’t gone dead. If the batteries are good and don’t work, try replacing them with new ones.
Next, check the LED light itself. Ensure it’s on, and the frequency is set correctly for your remote. You may need to refer to the manufacturer’s instructions for how to do this. You can also reset or reprogram your remote if necessary. Again, you’ll need to consult your manufacturer’s instructions on how to do this.
Finally, if none of these steps work and you’re still having trouble with your remote, it may be time to contact the manufacturer for help or consider replacing the remote altogether. Many LED light remotes come with a warranty, so you may be able to get a new one at no additional cost.
Conclusion
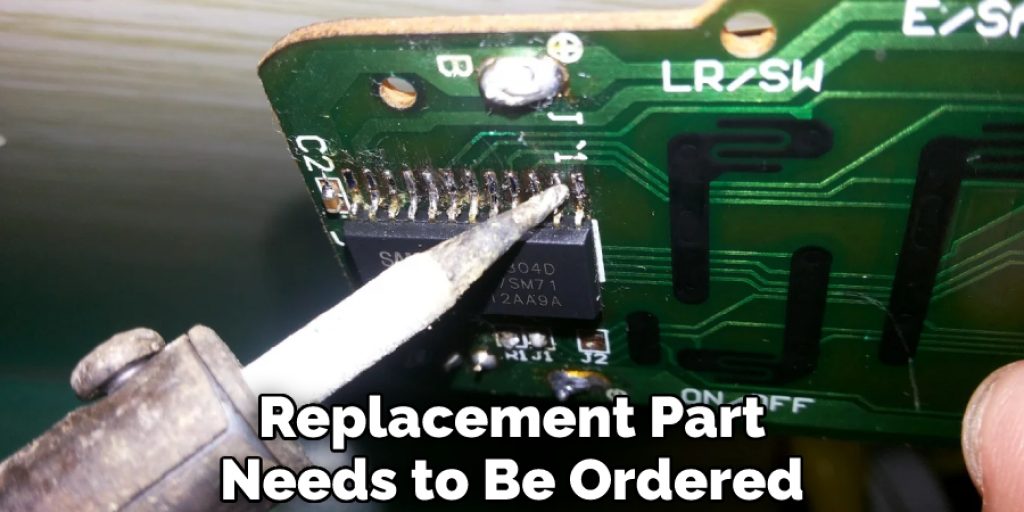
One of the main disadvantages of opening an led light remote is that it can be difficult to troubleshoot and diagnose. If something is wrong with the remote control or its components, it may be difficult to determine how to fix it. Additionally, if a replacement part needs to be ordered, this can take time and increase the cost. Additionally, some models may be more difficult to open than others. This can make it difficult to replace the batteries or other components that may need to be changed from time to time.
In conclusion, learning how to open a LED light remote is essential if you want to be able to control your lighting. Several methods are available for opening the remote depending on the type of light and remote you have. For most LED lights, using a small flathead screwdriver or prying gently with your fingers should do the trick. However, if your remote is more complicated or specialized, you will need to seek out additional instructions.
With the right knowledge and tools in hand, you can easily master how to open a LED light remote for any lighting system. I hope this article has been beneficial in learning how to open led light remote. Make Sure the precautionary measures are followed chronologically.


