
How to Paint a Cow Skull
Are you feeling inspired to tackle a new DIY project? With warm weather and longer days ahead, why not create something rustic and unique with your two hands? If you’re up for the challenge of bringing some southwestern charm into your home decor, painting a cow skull is an easy and fun way to add some southwest flair!
Whether this is your first time painting a cow skull, or you just want to brush up on old skills – we have all the knowledge, tips, tricks, and advice that will help make this process easier.
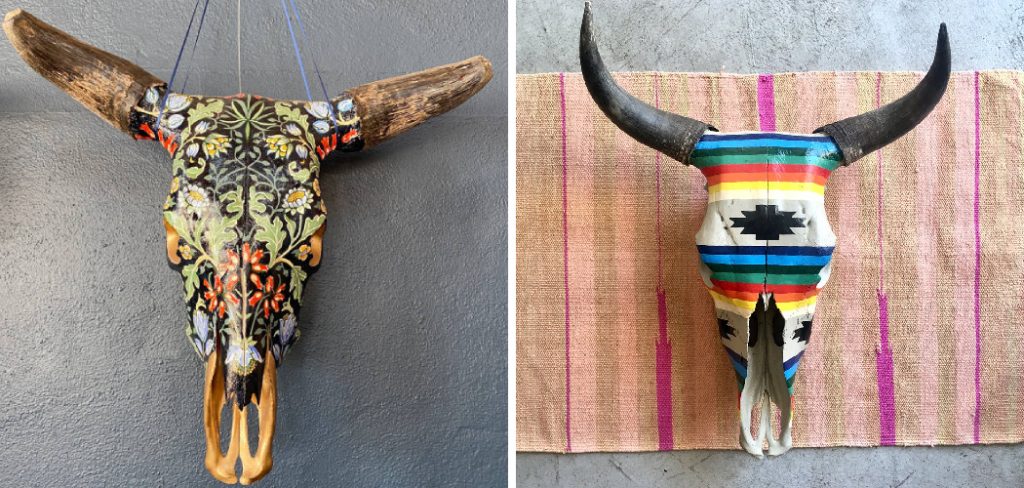
In this blog post, we’ll walk you through the basics of painting a cow skull and show you how to create a stunning masterpiece. Keep reading to learn more about how to paint a cow skull and get the best results!
What Will You Need?
The first step to creating a beautifully painted cow skull is gathering all the necessary supplies. We recommend having the following items on hand:
- Cow Skull (natural or bleached)
- Acrylic Paints & Brushes
- Waterproof Sealant
- Sandpaper (optional)
- Protective Gloves (optional)
Be sure to thoroughly read the instructions on the paint and sealant of your choice. Some brands require that you use a base coat or primer before painting, as well as an additional sealant for best results.
10 Easy Steps on How to Paint a Cow Skull
Step 1. Preparation:
Start by preparing your workspace. Lay down a drop cloth or old newspapers to prevent paint from getting on your work surface. If your skull has rough patches, use fine-grit sandpaper to smooth them out. Make sure the skull is clean and dry before you start painting.
Step 2. Base Coat:
Apply a base coat to the entire skull. The base coat will act as your “canvas” and should be either white or black, depending on what color scheme you are going for. Let it dry completely before moving onto step three.
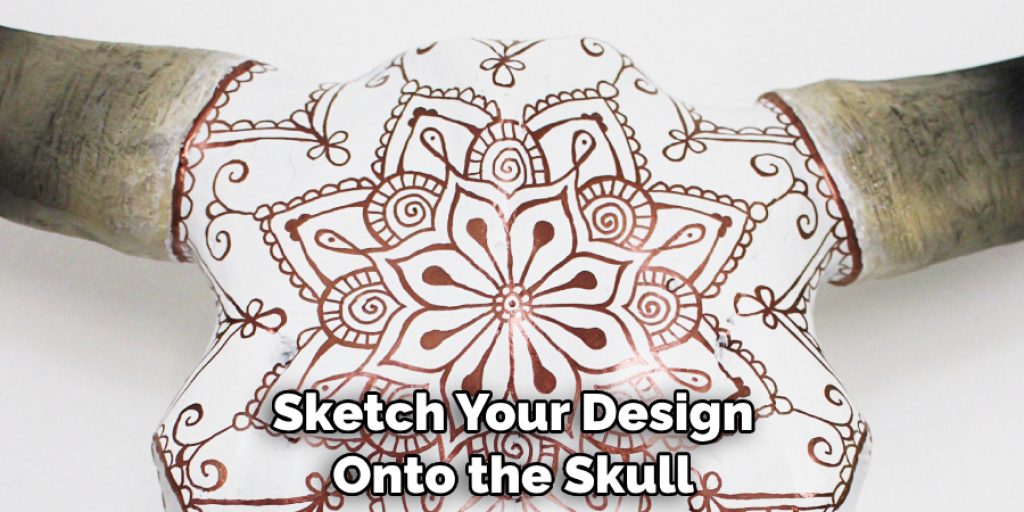
Step 3. Draft Your Design:
Lightly sketch your design onto the skull with a pencil or a piece of chalk. This could be anything from southwestern patterns to floral motifs or even an abstract design. If you need help with your drawing skills, consider using a stencil. Remember, this is your masterpiece, so feel free to get creative!
Step 4. Painting:
Now comes the fun part – painting! Using your sketched design as a guide, start applying your chosen colors of acrylic paint. Take your time, and start with lighter colors and gradually move to darker ones. This will make it easier to correct any mistakes. Allow each color to dry before applying the next to avoid unwanted blending.
Step 5. Add Details:
Once your base colors have dried, you can add details to your design. This could involve adding shadows, highlights, or texture. You could also use a fine brush or a toothpick for intricate details. Take your time with this step, as small details can add a lot to the overall appearance of your painted cow skull.
Step 6. Seal Your Art:
After the paint has completely dried, apply a waterproof sealant. This will protect your artwork from moisture and fading, ensuring that your painted cow skull will continue to look stunning for years. Follow the instructions on your chosen sealant for best results.
Step 7. Drying:
Let the sealant dry completely. Depending on the product used, this may take anywhere from a few hours to a day. Be patient, and make sure the sealant is fully dry before moving your cow skull. This will prevent smudging and ensure a professional finish.
Step 8. Checking & Touch-Ups:
Look over your final piece and ensure everything is up to your satisfaction. If you spot any areas that need touch-ups or additional detail, now is the time to make those adjustments. Remember, this is your creative piece, so take as much time as you need to make it something you’re proud of.
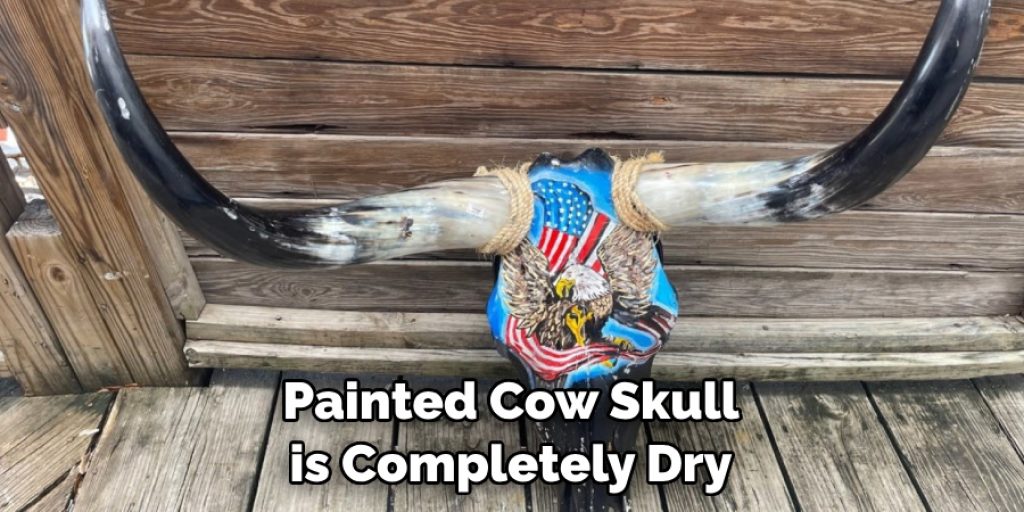
Step 9. Display:
Finally, once your painted cow skull is completely dry and you’re satisfied with your work, it’s time to display it! Choose a location that will highlight your new piece of art. Remember, the skull can be heavy, so ensure your chosen spot can support its weight.
Step 10. Enjoy Your Masterpiece:
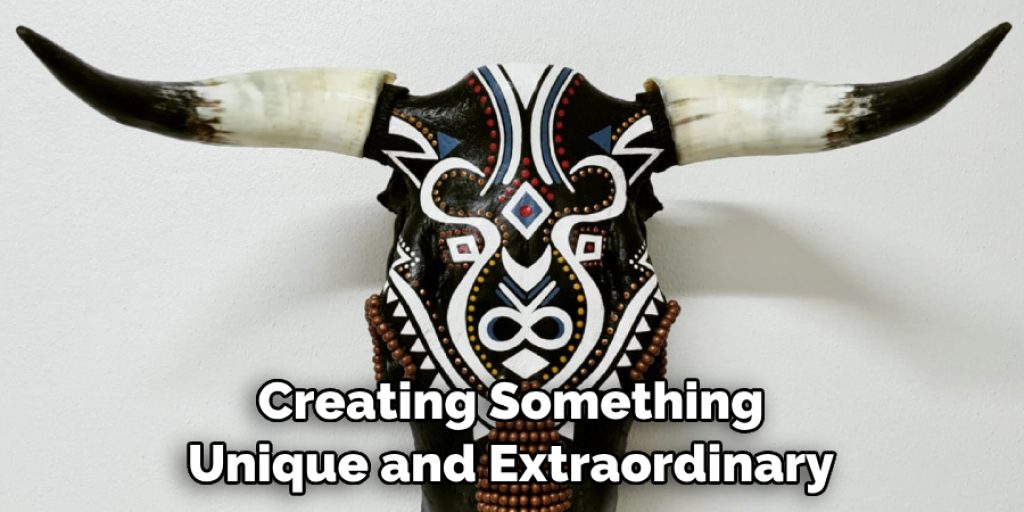
Congratulations! You’ve successfully painted a cow skull. Sit back and admire your hard work. This unique piece of art is sure to attract attention and spark conversations. Enjoy the satisfaction of having created something truly unique and personalized.
By following these steps, you can paint your cow skull and create something extraordinary.
5 Additional Tips and Tricks
- Select the Right Paint: For painting a cow skull, acrylic paint is highly recommended due to its versatility, durability, and wide color range. Other paints may not adhere as well to the bone.
- Clean the Skull: Ensure the skull is thoroughly cleaned before painting. Any residual dirt or grease can prevent the paint from adhering properly. Use a mild soap and warm water, scrubbing gently with a toothbrush.
- Primer is Key: Before applying any color, use a primer. This creates a smooth surface for the paint to adhere to, making the colors more vibrant.
- Thin Coats: Apply thin coats of paint, allowing each to dry before adding the next. This will give you more even coverage and help prevent dripping.
- Finish Off With Sealer: After the painting, seal it with a layer of clear acrylic varnish to protect your work from fading or chipping.
Finally, don’t be afraid to get creative! The possibilities are endless, from studying and gluing on pieces to creating intricate patterns. Have fun and show off your skill when you’re finished!
5 Things You Should Avoid
- Avoid Painting in Humid Conditions: Paint dries slower in humid conditions, making it more likely to crack or peel.
- Don’t Overload the Brush: More paint on your brush can cause streaks and smudges, creating an uneven finish.
- Keep Away from Direct Sunlight: The sun’s UV rays can damage painted surfaces and cause fading.
- Don’t Use Oil-Based Paint: Oil-based paint won’t adhere to the bone and will crack or peel off easily.
- Avoid Glossy Finish: A glossy finish isn’t ideal for painting a cow skull, as it can highlight any imperfections in the surface. Instead, opt for a matte finish for best results.
Now you know to create a true work of art! With patience and practice, you can turn an ordinary cow skull into something extraordinary. So get out there and show off your artistic skills!

What Kind of Paint Do You Use on Animal Skulls?
Animal bones are porous, so using the right paint type is important for the best results. Acrylic paint is preferred due to its versatility, durability, and wide color range. It is also easy to clean up with just soap and water. Oil-based paints should be avoided as they won’t adhere to the bone properly and will chip or peel off easily.
Additionally, consider the type of finish you desire. A glossy finish is not recommended for animal skull painting as it can highlight any imperfections in the surface. Instead, opt for an eggshell or matte finish.
Finally, remember to use a primer before adding any paint! This will create a smooth surface and help keep your colors vibrant.
Happy painting! You can take an ordinary cow skull and transform it into something extraordinary with a little effort.
What are the Disadvantages of Painting Animal Skulls?
There are a few drawbacks to painting animal skulls. One is that they take a lot of time and patience; painting an animal skull requires multiple coats, allowing each to dry before adding the next. Additionally, the paint may crack or peel off easily if not done correctly with the right paint and primer. Finally, the paint job may fade or chip over time without proper preservation techniques.
Additionally, painting an animal skull may take away from its natural beauty. If you appreciate the look of a bleached white skull, consideration should be given before painting it.
Despite these drawbacks, painting an animal skull can still be a rewarding experience! With patience and practice, you can create a beautiful work of art that will last for years. So go ahead and start creating something unique and extraordinary!
Conclusion
As you can see, painting a cow skull is a simple and fun process that can yield an amazing result. You’ll be so pleased with your finished product – it will feel like you own a piece of art! One thing to remember is to take your time and be sure to properly condition the skull before beginning your project. This is an important part of the preparation process, as it provides an excellent paint base and prevents damage or further cracking.
With careful planning and ideas, you can create some truly breathtaking pieces with this intriguing decoration. So why not surprise yourself and give a painted cow skull a try? You never know what artwork might come out of such an exciting adventure.
Hopefully, the article on how to paint a cow skull has been helpful. With the tips and tricks shared here, you should be well on your way to creating a unique work of art. Now get out there and start experimenting! Good luck!
Angela Ervin
Angela is the executive editor of DIY quickly. She began her career as an interior designer before applying her strategic and creative passion to lifestyle and home. She has close to 15 years of experience in creative writing and online content strategy for housekeeping, home decorations as well as other niche efforts. She loves her job and has the privilege of working with an extraordinary team. She lives with her husband, two sons, and daughter in Petersburg. When she's not busy working she spent time with her family.


