How to Paint Basement Ceiling
Do you want to refresh the look of your basement, but don’t know where to start? Painting the ceiling can be a great way to transform any room in no time! Not only will it give the space a new aesthetic, but also it’s an easy and affordable DIY project that anyone can tackle.
So don’t dread this task – just follow our step-by-step guide on how to paint basement ceilings efficiently, quickly, and with minimal fuss. From selecting a paint color scheme to creating a plan for tackling all corners and edges of the ceiling – we’ll provide all the advice needed for successful results! Plus: learn some common mistakes you should avoid while doing so. Keep reading if you’re ready for a hassle-free painting session!
Tools and Materials You Will Need to Paint Basement Ceiling
- Ladder or scaffolding
- Drop cloth or plastic sheeting
- Painter’s tape
- Paintbrushes (angled and straight)
- Paint roller with an extension pole
- Paint tray
- Primer (if needed)
- Ceiling paint
Step-by-step Guidelines on How to Paint Basement Ceiling
Step 1: Choosing the Right Paint Color
The first step of any painting project is selecting the paint color. This can be a daunting task, especially if you have never painted a ceiling before. It’s important to take into account the overall design and style of your basement when choosing a color. If your walls are light in color, consider painting the ceiling a shade or two lighter to create an illusion of height. If your walls are dark, a white ceiling can make the room feel more open and bright.
Step 2: Preparing the Space
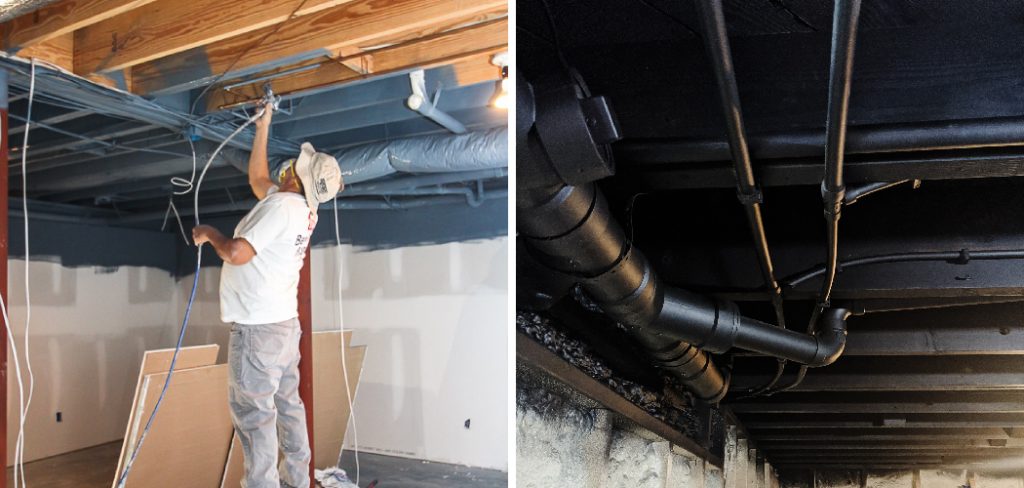
Before starting to paint, make sure to clear out all furniture or cover it with drop cloths or plastic sheeting to protect from potential splatter. You also want to remove any light fixtures or cover them with plastic bags. Use painter’s tape to protect any areas you don’t want paint on, such as trim and wall edges. Preparing the space beforehand will save you time and hassle in the long run.

Step 3: Prime the Ceiling (if needed)
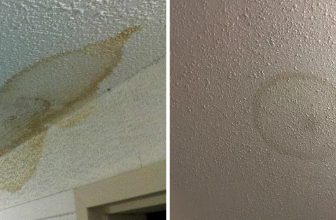
If your ceiling has stains or has never been painted before, it’s best to use a primer before painting. This will ensure that the paint adheres evenly and helps cover any discoloration. Priming is also recommended if you are painting a dark color over a lighter one to prevent bleed-through. If you are painting a white ceiling, you can skip this step.
Step 4: Cut in the Edges
Using an angled paintbrush and starting at one corner, carefully cut in the edges of the ceiling where it meets the walls. This will create a clean line and make painting with a roller much easier. While cutting in, make sure to keep the paintbrush at a 45-degree angle for even coverage.
Step 5: Paint with a Roller
Once the edges are cut in, it’s time to paint the rest of the ceiling with a roller. Attach an extension pole to the roller to reach high areas without having to constantly climb up and down a ladder. Start from one corner and work your way towards the opposite side, making sure to overlap each stroke for even coverage. Use a light touch and don’t press too hard to avoid creating roller marks.
Step 6: Let the Paint Dry
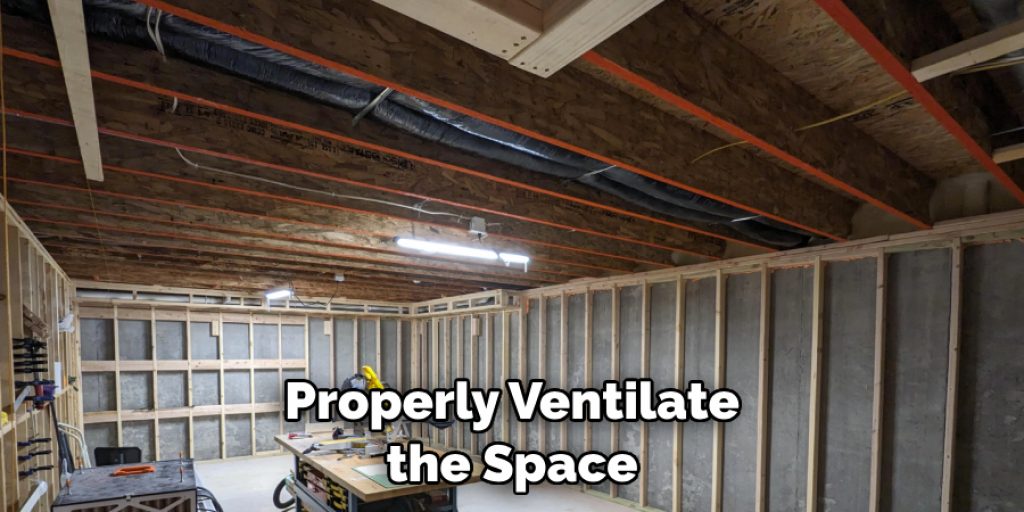
After painting one coat of paint, allow it to dry completely before applying a second coat. This will ensure that the color is evenly distributed and prevent any streaks or patches. The drying time will depend on the type of paint you are using, so make sure to check the instructions on the can. Make sure to ventilate the room while waiting for the paint to dry.
Step 7: Apply a Second Coat (if needed)
If you are satisfied with the coverage and color after one coat, you can skip this step. However, if you want a more opaque finish or have used a primer, applying a second coat is recommended. Repeat steps 4-6 for the second coat, making sure to overlap each stroke for even coverage. Use a bright light to check for any missed spots.
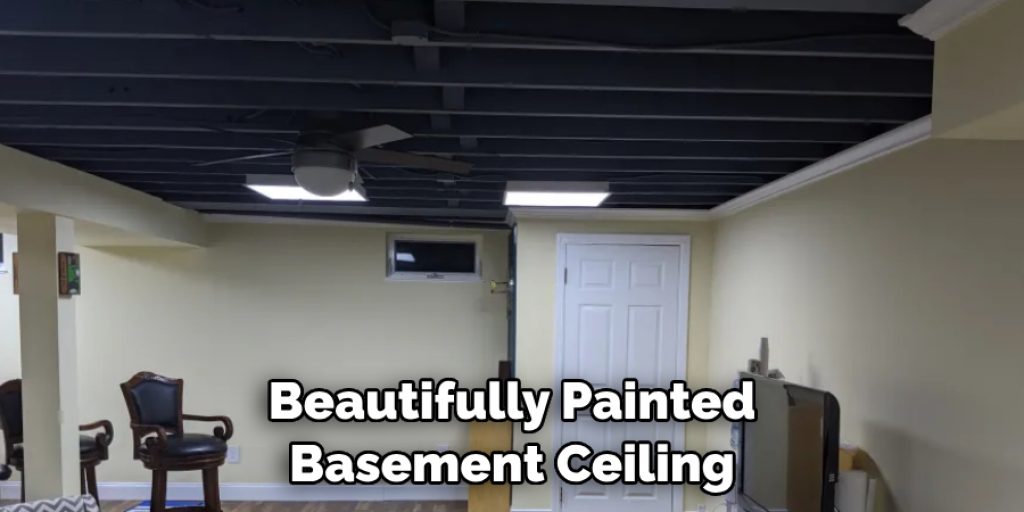
Following these steps will result in a beautifully painted basement ceiling that will transform the look and feel of your space and enhance the overall ambiance. Now that you know how to paint a basement ceiling, it’s time to roll up your sleeves and get started on this exciting DIY project! Remember to take breaks as needed and have fun with it – after all, it’s just paint. Happy painting!
Additional Tips and Tricks to Paint Basement Ceiling
1. Before painting your basement ceiling, it is important to use a stain-blocking primer to prevent any water stains or discoloration from showing through the paint. This will also ensure that the final paint color appears true and vibrant.
2. If you have a drop ceiling in your basement, it is recommended to paint the tiles before installation for a more uniform and professional look. It is also much easier to reach and paint the individual tiles rather than trying to paint them once they are installed on the ceiling.
3. For those who want to add some personality or depth to their basement ceiling, consider using stencils or creating a unique pattern with different paint colors. This can add an interesting touch to the space and make it feel less like a typical basement.
4. Don’t forget to properly prepare your ceiling before painting by cleaning off any dirt, dust, or cobwebs. It is also helpful to patch any holes or cracks in the ceiling and sand down any rough spots. This will ensure a smooth and professional-looking finish.
5. When painting your basement ceiling, it is important to use the right type of paint. Latex or water-based paints are often recommended for ceilings as they dry quickly and have low levels of fumes. It is also helpful to use paint with a flat or matte finish to avoid any glare from lighting fixtures.
6. It can be challenging to paint a basement ceiling if you have limited space or need to avoid getting paint on furniture and other items in the room. One solution is to use plastic drop cloths or tarps to cover and protect these areas. You can also use painter’s tape around the edges of the ceiling for a clean and precise finish.
7. Consider using a paint sprayer instead of traditional brushes or rollers for easier and faster application. This is especially helpful if you have a large basement ceiling to cover.
8. If your basement has low ceilings, consider using lighter colors to make the space feel more open and airy. Darker colors can make the ceiling appear lower and create a cramped feeling.
9. Don’t be afraid to experiment with different paint colors and finishes. You can even use metallic or shimmer paints for a unique and modern look.
10. Lastly, make sure to properly ventilate the space when painting your basement ceiling, especially if using oil-based paints. Open windows and use fans to help dissipate any fumes and keep the air circulating. This will also help the paint dry faster.
Following these tips and tricks can help make the process of painting your basement ceiling easier and more successful. Don’t be afraid to get creative and have fun with this project, as it can greatly enhance the overall look and feel of your basement space. Remember to take your time and properly prepare before painting to achieve the best results. Happy painting!
Common Mistakes to Avoid While Painting Basement Ceiling
1. One of the biggest mistakes that people make while painting basement ceilings is not taking enough time to prepare the surface. It’s important to clean and prime the ceiling before painting it, otherwise, the paint won’t adhere properly. Additionally, if there are any cracks or holes in the ceiling, they should be filled and sanded before painting to ensure a smooth finish.
2. Another mistake is not using proper tools for painting the basement ceiling. It can be tempting to use a regular paint roller, but this may not work well for ceilings as it can create drips and uneven coverage. Instead, invest in a paint edger or use a spray gun for better results.
3. Not considering the lighting in the basement is another common mistake. Since basements tend to have limited natural light, it’s important to choose a paint color that will brighten up the space and make it feel more open. Avoid dark colors as they can make the room feel smaller and more closed off.
4. Many people also make the mistake of not using enough paint. Since basement ceilings often have a rough surface, it may require more paint than expected to cover it completely. It’s always better to have extra paint on hand rather than running out in the middle of the project.
5. Lastly, not allowing enough drying time between coats is a common mistake that can ruin the final result. It’s important to follow the instructions on the paint can and give each coat enough time to dry completely before applying another one.
By avoiding these common mistakes, you can ensure a smooth and successful painting project for your basement ceiling. Remember to take the time to properly prepare the surface, use the right tools, consider lighting, have enough paint on hand, and allow enough drying time between coats. Happy painting!

Conclusion
All in all, knowing how to paint basement ceiling is a valuable skill that can greatly enhance the look and feel of your basement space. By following these tips and avoiding common mistakes, you can achieve professional-looking results that will make your basement truly stand out. Remember to have fun with this project and take breaks as needed. Happy painting!
Angela Ervin
Angela is the executive editor of DIY quickly. She began her career as an interior designer before applying her strategic and creative passion to lifestyle and home. She has close to 15 years of experience in creative writing and online content strategy for housekeeping, home decorations as well as other niche efforts. She loves her job and has the privilege of working with an extraordinary team. She lives with her husband, two sons, and daughter in Petersburg. When she's not busy working she spent time with her family.