
How to Paint Pool Noodles
Are you looking for a creative way to keep your kids entertained at home during the summer? Well, look no further! Painting pool noodles can be an easy and affordable project that will engage their imaginations and leave them with a fun-filled souvenir. Not only are they cost-effective crafts materials—available at any dollar store—but there are endless possibilities when decorating them.
Whether you want to turn them into silly animals, bright flowers, or even festive Christmas trees, you only need simple treatments and some paint.
From painting dimensional patterns to creating works of art with complimentary colors, designing these colorful objects has never been easier or more exciting. So don’t wait—grab some paintbrushes, gather the family around for an afternoon of artistic expression, and let the creativity flow as you learn how to paint pool noodles!
What Will You Need?
Before beginning, make sure you have the following supplies:
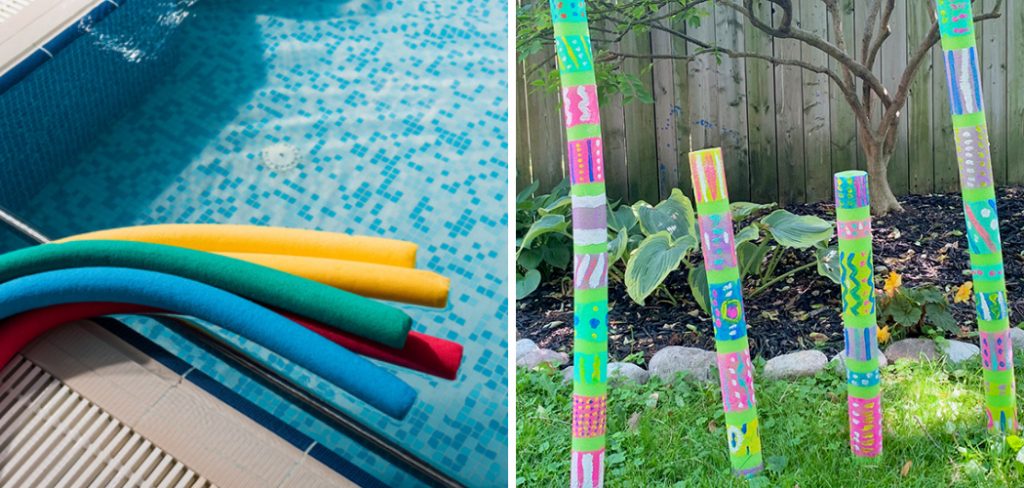
- Pool Noodles (any shape or length)
- Acrylic Paint in a variety of colors
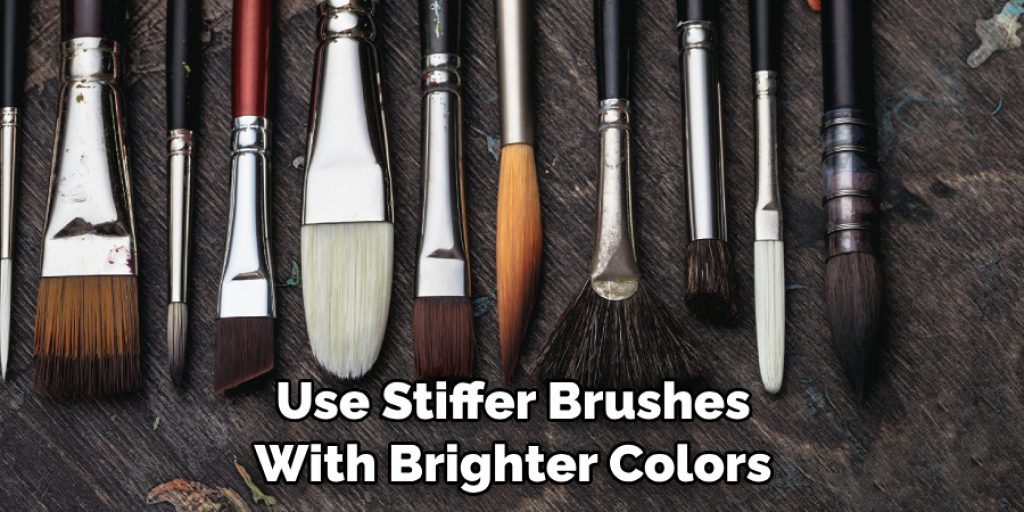
- Paintbrushes (stiff and soft)
- Newspaper/plastic sheeting to cover your workspace
- A cup of water
- Rubber bands for securing noodles
Once you have everything, it’s time to start the process!
10 Easy Steps on How to Paint Pool Noodles
Step 1: Preparing Your Noodle
First, you’ll want to find a good surface to work on and lay down some newspaper or plastic sheeting. This will ensure any paint messes or drips are contained and easily cleaned up afterward.
Once you’ve set up your workspace, you’ll need to secure the noodle to keep it from rolling around while painting. To do this, wrap a rubber band around the middle of the noodle several times and pull tight.
Step 2: Applying Primer and Paint
When applying primer or paint, use a soft brush to get into the crevices of the noodle. Start by coating the entire length of it in a layer of primer, and allow plenty of time for it to dry.
Once your primer is completely dry, you can begin painting! Use stiffer brushes with brighter colors around the outside edges of your noodles. This will make them stand out more when hung up.
Step 3: Finishing Touches
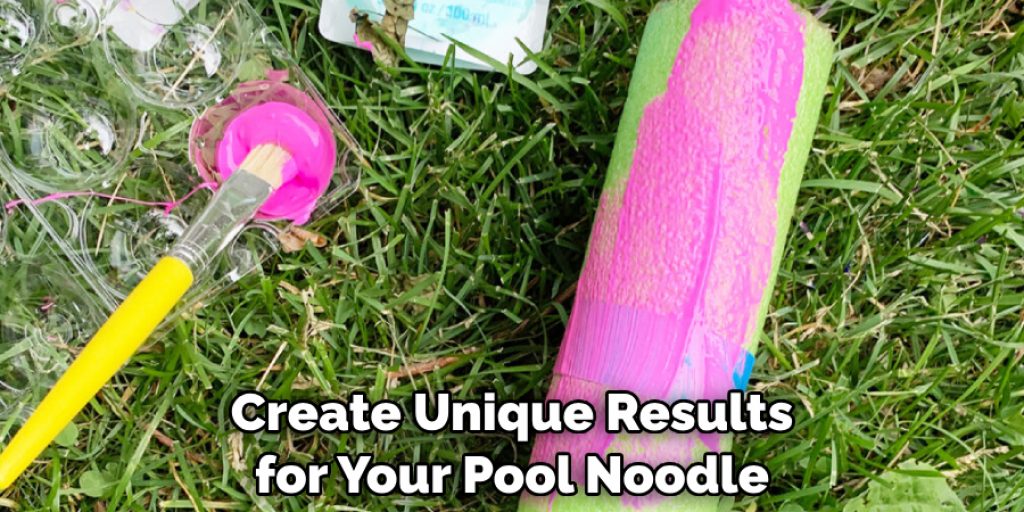
Once you have your desired color scheme, it’s time to add some finishing touches! If you want to take the design a step further, use fine-tipped brushes and metallic paints to create unique patterns or designs on the surface of your noodle. You can even add glitter for some extra sparkle!
Step 4: Clean Up
Once you’ve finished creating your masterpiece, it’s time for the clean-up process. Begin by wiping off any excess paint from your workspace with a damp cloth. Put away all of your supplies and allow plenty of time for your noodles to dry before hanging them up.
Step 5: Displaying Your Art
After allowing sufficient time for the paint to dry, it’s finally time to display your art! Pool noodles are lightweight and can be easily mounted on walls or hung from ceilings using simple adhesive hooks or string. You can also use them as part of a larger art project or simply play with them as colorful, personalized toys. Remember, the way to display your painted pool noodles is only limited by your creativity!
Step 6: Maintenance and Care
Maintaining your painted pool noodles is a necessary step to extend their life and keep them looking vibrant. To clean the noodles, gently wipe them down with a damp cloth and mild detergent. Avoid soaking them in water as it can make the paint flake off. For storage, find a dry and cool place indoors.
This will prevent any color fading from sunlight or damage from severe weather conditions. Most importantly, remember to handle your painted noodles to preserve your artwork carefully!
Step 7: Reusing or Recycling
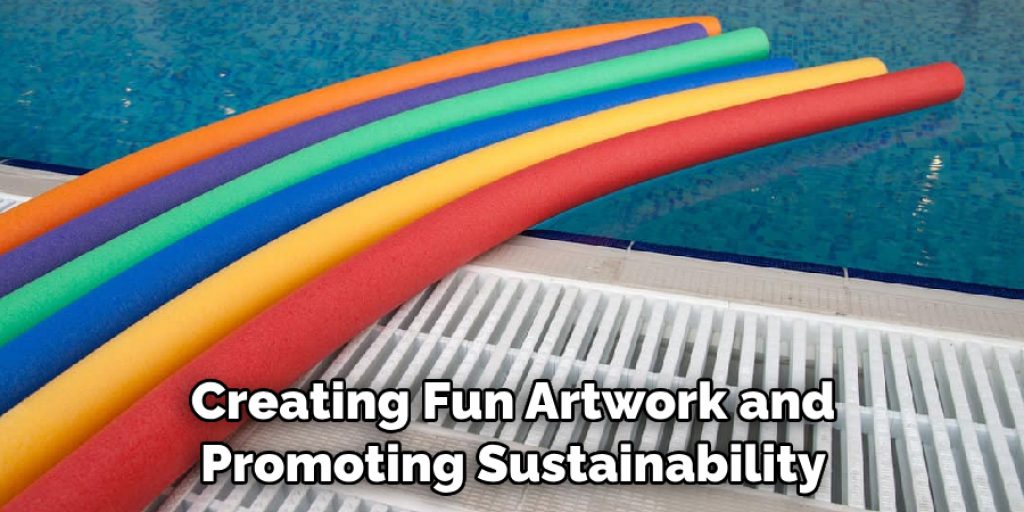
When your painted pool noodles have served their purpose or your design preference changes, consider reusing or recycling them. They can be repurposed into fun and functional items like door stoppers, trivets, or floating beverage containers for pool parties. Alternatively, donate them to local schools, daycares, or art programs.
If there’s no possibility of reusing, ensure they are disposed of responsibly. Before tossing them into the recycling bin, check with your local recycling facility to confirm if they accept foam-based materials. By being mindful of the environment, you’re creating fun artwork and promoting sustainability.
Step 8: Safety Precautions
While handling paint and other supplies, it’s essential to prioritize safety. Always ensure proper ventilation in your workspace to avoid inhaling paint fumes. When painting with kids, supervise them to prevent accidental ingestion or the paint getting into their eyes.
Gloves can protect your hands from paint stains, and aprons or old clothes should be worn to avoid ruining your regular attire. Lastly, keep your painting supplies out of reach of small children and pets when not in use. By following these safety precautions, you can enjoy a worry-free painting session.
Step 9: Exploring Further
After mastering the basic technique of painting pool noodles, consider exploring more intricate designs and creative uses for your painted noodles. Use them as elements in a themed party decor, add them to your holiday decorations, or even transform them into props for a school play. There’s no limit to what you can do with your vibrant, colorful pool noodles. Think outside the box and let your creativity shine!
Step 10: Sharing Your Creation
After all the hard work and creativity you’ve put into painting your pool noodles, it’s time to share your masterpiece with the world! Take pictures of your painted pool noodles and post them on social media platforms like Instagram, Pinterest, or Facebook.
Tag your posts with relevant hashtags such as #DIYArt, #PoolNoodleArt, or #CreativeCrafts to reach a wider audience and inspire others. You can also host a neighborhood display or a small art exhibit at your home to showcase your painted pool noodles. Sharing your creation adds to the fun and allows you to receive feedback and appreciation for your artwork.
Following these simple steps, you can create beautiful and unique art pieces with your pool noodles. All it takes is a bit of creativity, some color, and a little patience!
5 Additional Tips and Tricks
- If you want your paint job to be extra vibrant, consider spray paint instead of traditional brush-on paints.
- To avoid painting the outside of your pool noodle, use a large rubber band or an elastic cord to hold it in place while you are working.
- Remember that paint can often be toxic and create fumes, so ensure you work in a well-ventilated area.
- If you want to add extra sparkle to your project, consider adding glitter or other reflective materials to the paint.
- You can also use stencils and stamps with special designs or patterns to create unique results for your pool noodle painting projects.
With these simple tips and tricks, you can easily transform your pool noodles into fun works of art that can be enjoyed all summer! Have fun creating colorful and creative designs – the possibilities are endless. So grab a few noodles, some paints, and start crafting!
5 Things You Should Avoid
- Avoid using oil-based paints for painting pool noodles, as this can cause the paint to flake off.
- Don’t use too much pressure when brushing on paint – this could break or damage the noodle.
- To prevent a mess, take extra caution when using spray paint and wear protective eye gear and clothing.
- Make sure you use a sealer or finish after painting to ensure your design lasts.
- Don’t paint near any water sources or areas where children are likely to come in contact with the noodle, as this could be dangerous.
By following these tips and tricks, you can ensure your painting project is safe and successful!
What Spray Paint Doesn’t Melt Foam?
When spray painting pool noodles, many people wonder if the paint will cause the foam to melt or become distorted. The good news is that there are a variety of spray paints on the market today that specifically don’t affect foam.
These paints can be found in most art supply stores and craft stores, and they are designed to adhere to foam while not disintegrating or damaging it. When purchasing spray paint for your pool noodle project, read the labels carefully and choose a product designed specifically for use on foam surfaces.
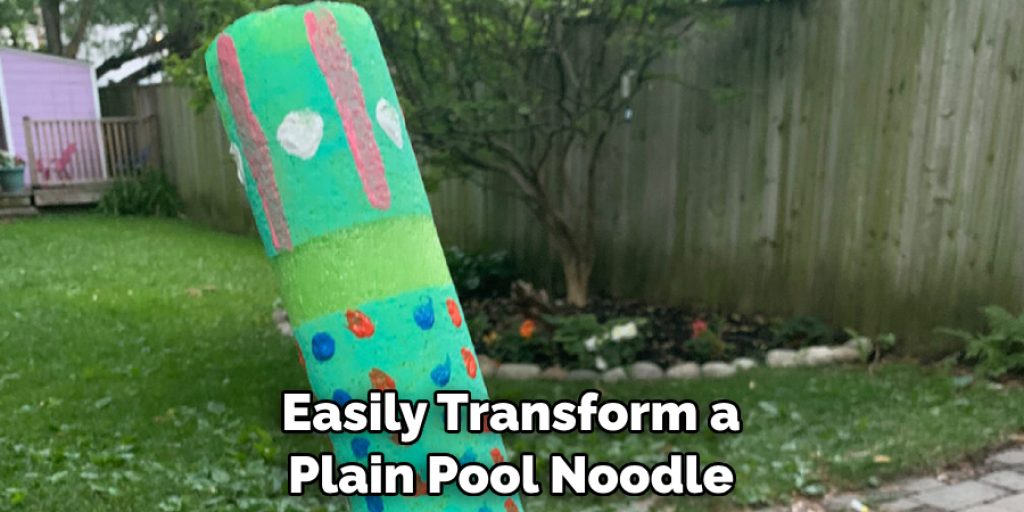
With the right supplies, care, and attention, you can easily transform a plain pool noodle into a work of art! With these tips and tricks, you can have a fun and successful pool noodle painting project. So get creative and start crafting!
Conclusion
With the right materials and a little bit of effort, you can now have beautiful pool noodles to add to your decorations or make an array of fun toys. From floral patterns and paintings to tie-dye looks and polka dots, so much creativity can be added to your pool noodle project. It is a great activity for summer get-togethers or school events. The possibilities are truly endless when it comes to painting with your pool noodles.
Not to mention, the cost-effectiveness makes it far more affordable than buying pre-made decorative items. So what are you waiting for? Pick up some paints and dive into your creative side today!
Hopefully, the article on how to paint pool noodles has provided enough information and guidance for your painting projects. Have fun, and remember to show off your work by tagging us on social media! We’d love to see what you create!
Angela Ervin
Angela is the executive editor of DIY quickly. She began her career as an interior designer before applying her strategic and creative passion to lifestyle and home. She has close to 15 years of experience in creative writing and online content strategy for housekeeping, home decorations as well as other niche efforts. She loves her job and has the privilege of working with an extraordinary team. She lives with her husband, two sons, and daughter in Petersburg. When she's not busy working she spent time with her family.


