
How to Paint Shiplap Cracks
Are you looking for a creative way to revamp the walls of your home? If so, we’ve got great news: painting shiplap cracks is an easy and affordable way to add charm and texture to any space. Whether you’re going for a rustic look or something more modern, this cost-effective technique can be tailored to fit any style.
In this blog post, we’ll be giving you step-by-step instructions on how to paint shiplap cracks without having to hire expensive professionals. With some simple supplies and an eye for detail, you can achieve beautiful results that will truly transform your home. Let’s get started!
Tools and Materials You Will Need to Paint Shiplap Cracks
- Paint (of your choice)
- Tape Measure
- Pencil or Chalk Line
- Sandpaper
- Putty Knife
- Primer and Caulk
Step-by-Step Guidelines on How to Paint Shiplap Cracks
Step 1: Prepare the Area
Before you begin, make sure to clean the area and remove any existing paint or dirt from the surface. You can use a damp cloth or vacuum to get rid of any debris to Do I Prepare Shiplap for Painting? ensure that the paint adheres properly. Once you’re done, let it dry completely before moving on to the next step.
Before you begin painting, it’s important to prepare your shiplap by
Step 2: Measure and Mark the Lines
Using your tape measure, draw a line from one corner of the wall to the other. Then take a pencil or chalk line and use it to mark a straight line down the entire length of the wall. This will serve as a guide for where you’ll be painting later on. Measuring and marking the lines beforehand will make the painting process much easier.

Step 3: Sand the Walls
Using medium-grit sandpaper (80 to 100 grit), lightly sand the walls along your marked lines. This will help create a smooth surface for the paint to adhere properly. Make sure to wipe away any dust with a damp cloth before you start painting. While sanding, be mindful to avoid sanding too far outside of the marked lines.
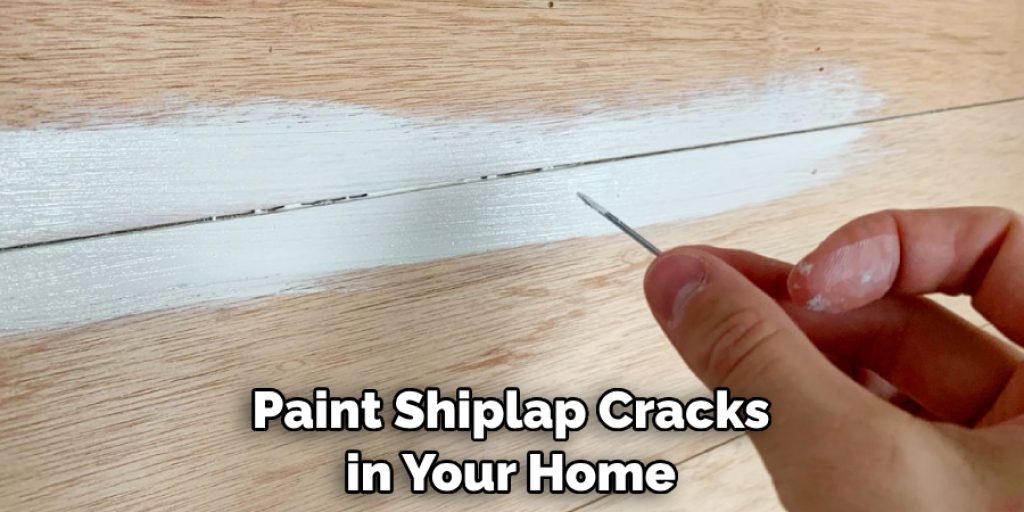
Step 4: Apply Primer and Caulk
Apply a thin layer of primer to the walls along your chalk line and use a putty knife to spread it evenly. Once you’re done with the primer, add caulk around the edges of each crack to clean it, sand any rough edges, and filling in seal them and protect the paint from peeling later on. Let the primer and caulk dry completely before moving on to the next step.
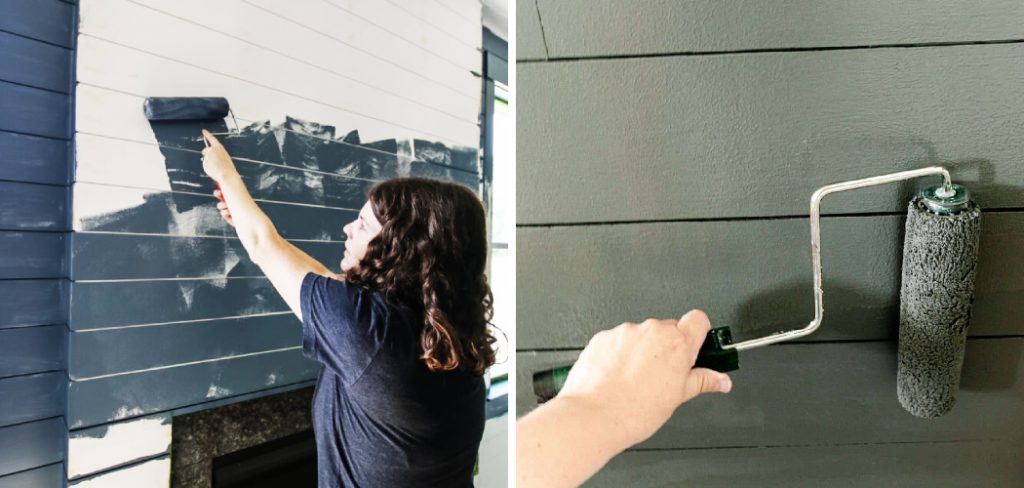
Step 5: Paint Your Shiplap Cracks!
Now that the area is prepped and ready, it’s time to start painting! Using a roller or brush, apply your chosen paint in thin coats along the marked lines. Allow each coat to dry completely before moving on to the next one. Once you’ve finished painting all of your shiplap cracks, give it one last look to make sure everything looks good.
Following these steps, you can paint shiplap cracks in your home and add a unique touch of style to any space. Whether you opt for a classic look or something more modern, this cost-effective technique is sure to elevate the look of your walls. Be sure to take your time and enjoy the process – with patience and attention to detail, beautiful results are guaranteed!
Additional Tips and Tricks to Paint Shiplap Cracks
- Choose the right paint for the job. Shiplap is often painted with a semi-gloss or satin finish, and it’s important to choose a paint that will adhere to the wood and prevent further cracking.
- Ensure your shiplap surface is clean before you start painting. If there are any dirt or debris, they’ll need to be removed before you can begin.
- For best results, use a high-quality brush to paint your shiplap cracks. This will ensure an even coat of paint that won’t crack or chip off easily.
- When painting the cracks in your shiplap, make sure to use long strokes and to keep the brush away from the edges of the crack. This will help to ensure an even and consistent finish that won’t show any brush strokes.
- Allow your paint to fully dry before adding another coat for maximum adhesion and a long-lasting finish.
- If you’re looking for a more decorative option, you can use a contrasting color to paint the cracks in your shiplap. This can be done with either a brush or a small roller for an added touch of interest.
- If you’re going for an aged look, use distress techniques such as sanding and staining the shiplap after it has been painted. This will create a unique finish that adds to the vintage aesthetic.
- Finally, when painting shiplap cracks in a room with high humidity levels, you should use anti-mildew paint to prevent additional issues.
By following these tips and tricks, you’ll be able to achieve a beautiful finish for your shiplap that will last for years to come! With the right paint and technique, you can easily create a beautiful shiplap feature wall that will bring character to any room.
Things You Should Consider to Paint Shiplap Cracks
- Prepare the wall surface for painting by cleaning and filling any cracks in the shiplap with a wood filler. It is important to fill all gaps evenly, as this creates a smoother finish after painting.
- Apply primer to the entire wall surface before you begin painting. This helps ensure that your paint will adhere properly and look its best once it’s finished.
- Use a paintbrush or roller to apply your chosen paint color to the wall, making sure to cover any cracks and edges with extra attention.
- If the shiplap has deep grooves, use a high-quality brush that is small enough to reach into them and fill in any missed spots of paint.
- Once the first coat of paint has dried, inspect the wall for any missed spots or uneven areas and repeat with a second coat as needed.
- Allow your newly painted shiplap to dry completely before hanging up any decorations or furniture in the room.
- To ensure the longevity of your shiplap painting job, consider applying an additional layer of sealant or varnish to the wall. This will help protect your paint from fading over time and dirt buildup.
- Finally, enjoy your freshly painted shiplap! With a bit of careful prep work and attention to detail, you can have a stunningly beautiful accent wall in no time at all.

Following these considerations and steps will help you achieve a professional-looking finish in your shiplap painting project. If you’re still feeling uncertain, consider consulting with a local paint store or professional painter for more information and advice. With care and patience, you can create beautiful wall accents that add both style and personality to any room in the home!
Frequently Asked Questions
What Type of Paint Should I Use to Paint My Shiplap?
If you’re painting your shiplap for the first time, you should use exterior-grade acrylic latex paint. This type of paint is the most versatile and durable in a variety of climates and conditions, making it the best choice for your shiplap.
How Many Coats Do I Need to Paint Shiplap?
Typically, two coats are enough to cover any cracks or gaps in your shiplap. Make sure to let the first coat dry completely before applying the second. This will ensure even coverage and a great-looking finish!
How Do I Paint Shiplap Without Getting Drips or Splotches?
When painting your shiplap, be sure to use a good-quality brush or roller. This will help you get even coverage and avoid any drips or splotches. Make sure to use long, smooth strokes that follow the grain of the wood for best results. Additionally, keep a damp cloth on hand to wipe away any excess paint and maintain a clean finish. ,
How Can I Protect My Shiplap After Painting?
Once your shiplap is painted, you should seal the surface with an exterior-grade polyurethane or varnish. This will help protect against UV rays and other environmental elements, as well as prevent fading and wear. Make sure to read the product label carefully before use to ensure proper application.
Conclusion
Giving your walls a finished and refreshed look by painting over the shiplap cracks is an easy fix that will make a notable difference in your home’s aesthetic. From making sure you clean the surfaces correctly to choosing the right tools to use multiple coats of paint, there are many steps involved in creating this charming style.
Now that you know how to paint shiplap cracks, the only thing standing between you and your complete transformation is putting in some good time and effort! Whether you plan to tackle this project solo or with help from friends and family, it will be worth it when you can enjoy the new look of your walls. So what are you waiting for—it’s time to get creative and start painting shiplap cracks!
Angela Ervin
Angela is the executive editor of DIY quickly. She began her career as an interior designer before applying her strategic and creative passion to lifestyle and home. She has close to 15 years of experience in creative writing and online content strategy for housekeeping, home decorations as well as other niche efforts. She loves her job and has the privilege of working with an extraordinary team. She lives with her husband, two sons, and daughter in Petersburg. When she's not busy working she spent time with her family.


