
How to Port a Sub Box With PVC
There are many reasons why you might want to port a sub box. Maybe you’re trying to save on space or want a different look for your car audio system. Whatever the reason, porting a sub-box is a relatively simple process that can be done with PVC pipe. In this article, we’ll show you how to port a sub box with pvc. Keep reading for all the details.
Many people think that porting a sub-box is complicated and requires special tools or knowledge. However, this isn’t the case. Porting a sub box can be done with nothing more than a few pieces of PVC pipe and some basic knowledge of carpentry. However, it is essential to note that porting a sub-box will decrease the overall air volume inside the box. Therefore, you will need to use a larger box or add more ports to achieve the same effect.
Can I Port My Sealed Sub Box?
If you have a sealed sub box and are looking to increase the bass output, you may be wondering if it is possible to port the box. Of course, the answer is yes, but there are a few things you need to consider before doing so.
Ported boxes typically have better bass response than sealed boxes, but they also require more power from the amplifier. If you are using a small amplifier, porting your box could cause the amp to overheat and shut down. It is also important to note that ported boxes are not as efficient as sealed boxes, so you must size the port(s) appropriately.
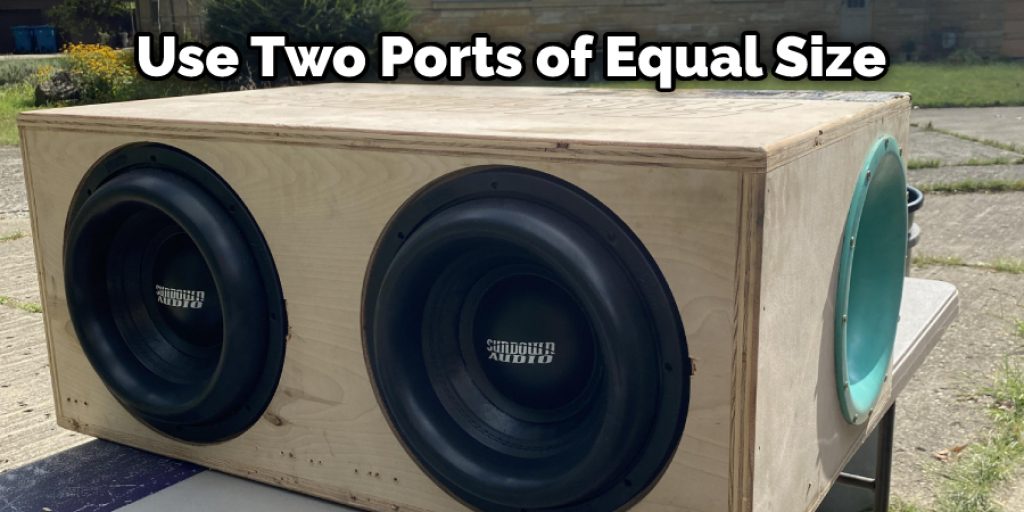
When porting a sealed box, it is best to use two ports of equal size. This will help to keep the box balanced and prevent unwanted resonance. The ports should be placed on opposite sides of the box, and you will need to calculate the size of the port(s) based on the volume of the box and the desired tuning frequency.
If you are not sure how to properly port your sealed sub-box, it is best to consult with a professional. They will be able to help you choose the correct size ports and ensure that your box is tuned correctly.
What You’ll Need
- Plywood
- Circular saw
- Jigsaw
- Drill
- 1 1/2 inch hole saw
- Ruler or measuring tape
- Pencil
- PVC pipe
- PVC cement
- Sandpaper (100 grit)
A Stepwise Guide on How to Port a Sub Box With Pvc
Step 1: Choosing the Right Size Pipe
The first step is to determine the size of the port. This will be based on the size of your subwoofer box. A good rule of thumb is that the port should be one-quarter to one-third the size of the box. For example, if your box is 16 inches wide, your port should be 4 to 5 inches in diameter.
Step 2: Determine the Length of the Port
Once you know the diameter of the port, you need to determine the length. This is based on the tuning frequency of your subwoofer. A good rule of thumb is that the port should be one-quarter to one-third the length of the box. For example, if your box is 16 inches wide, your port should be 4 to 5 inches in length.
Step 3: Cut the Hole for the Port
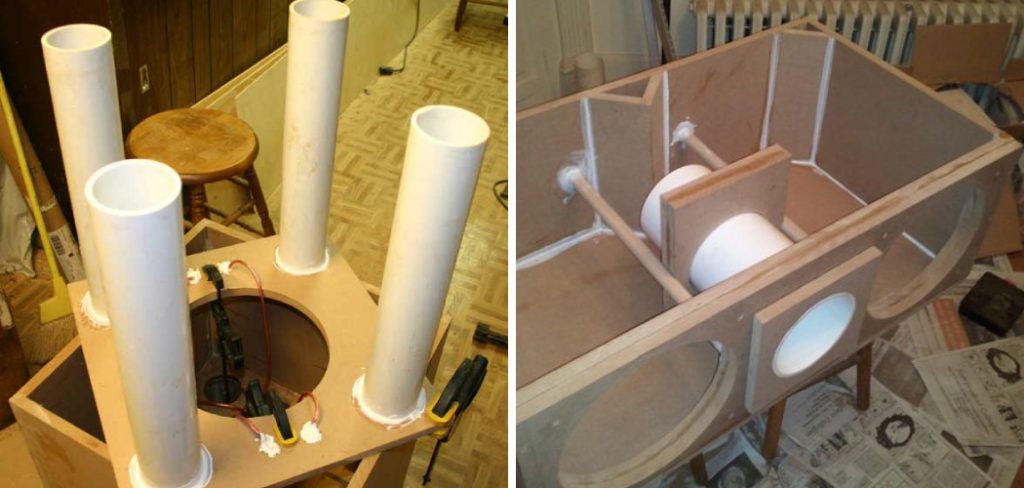
Use a ruler or measuring tape to mark the port’s location on the side of the box. Then, use a pencil to trace around the inside diameter of the port. Next, use a jigsaw to cut out the hole. If you’re not comfortable using a jigsaw, you can ask someone to cut the hole for you at your local hardware store.

Step 4: Cut the PVC Pipe to Length
Once the hole is cut out, it’s time to cut the PVC pipe to length. First, use a measuring tape and a pencil to mark the length of the pipe on the PVC. Then, use a hacksaw or a PVC cutter to cut the pipe to size.
Step 5: Dry Fit the Port
Before you glue the port in place, you should dry fit it to ensure that everything is lined up correctly. First, insert one end of the PVC pipe into the hole in the box and mark where it needs to be trimmed. Then, trim the pipe with a hacksaw and dry fit it again. Repeat this process until the port fits snugly in the hole.
Step 6: Glue the Port in Place
Once you’re happy with the fit of the port, it’s time to glue it in place. Apply a generous amount of PVC cement to the inside of the port and insert it into the hole in the box. Hold it in place for a few seconds to allow the glue to set.
Step 7: Seal the Port
Once the port is glued in place, you need to seal it. First, apply a generous amount of silicone caulk outside the port. Then, use your finger to smooth it out and make sure that there are no gaps.
Step 8: Let the Caulk Dry
Allow the caulk to dry for 24 hours before using the subwoofer box. This will give the caulk time to set and create a watertight seal.
Tips and Warnings
Tips:
- 1Make sure that the port is facing the correct way. The port should be facing away from the woofer so that the air can flow freely through it.
- If you’re using a round port, calculate the diameter correctly. The diameter of the port should be 1/8th of the size of the box (for example, if your box is 8″ wide, your port should be 1).
- Make sure the port is sealed correctly. If there are any gaps or leaks, air will escape, and your subwoofer will not perform well.
- Ports can be made out of different materials, such as wood, plastic, or metal. Choose a material that will work best for your application.
- You may need to experiment with different port sizes and shapes to get the best sound quality. Don’t be afraid to try different things!
Warnings:
- Make sure you wear safety goggles when working with power tools.
- Be careful when cutting holes in your box. It’s easy to damage the woofer if you’re not careful accidentally.
- If you’re not sure what you’re doing, it’s always best to consult a professional before beginning any project.
How Big Should a Port Be in a Sub Box?
The size of the port you use in your sub-box design depends on the tuning frequency you want to achieve and the volume of the enclosure. A lower tuning frequency will require a more critical port, while a higher tuning frequency will require a smaller port.
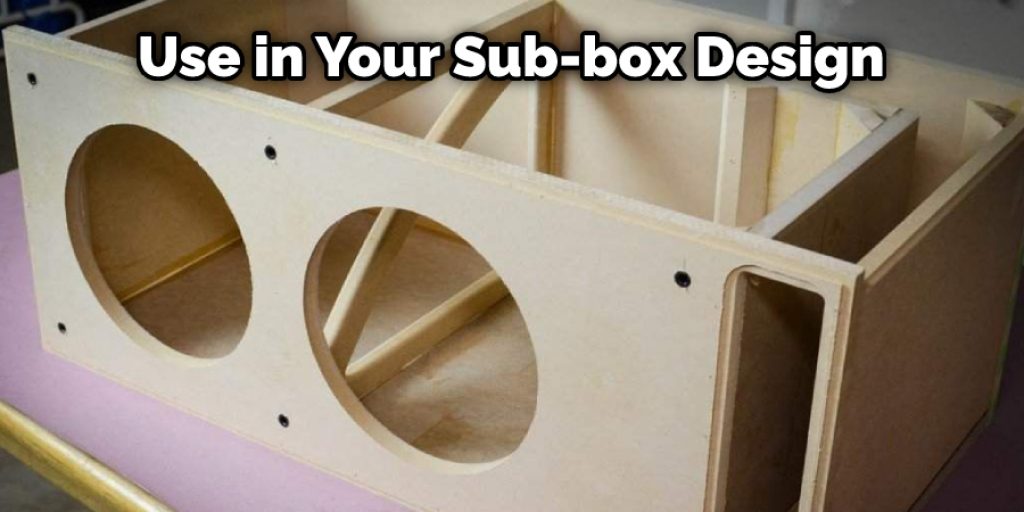
In general, it is best to choose a port size that is slightly larger than the minimum size required to achieve the desired tuning frequency. This will help to minimize air turbulence and reduce port noise. The volume of the enclosure also plays a role in determining port size.
A larger enclosure will require a more significant port to maintain optimal airflow. As a rule of thumb, each square inch of the port area should be able to move at least one cubic foot of air per minute. When choosing a port size for your sub-box, consider both the desired tuning frequency and the volume of the enclosure.
Ports can be made from various materials, but the most common material for DIY port construction is PVC. PVC is an inexpensive and easy-to-work-with material readily available at most hardware stores. When creating a port from PVC, be sure to use schedule 40 PVC or thicker. Thinner walled PVC pipes can collapse under the weight of the air moving through them and are not recommended for use in subwoofer ports.
What Hits Harder Sealed or Ported?
There are two main types of subwoofer boxes: sealed and ported. Each type has its strengths and weaknesses, so it’s essential to know which one is right for your situation.
Sealed boxes are the simplest to design and build, requiring the least amount of work. They’re also the most efficient, meaning they’ll use less power to produce the same amount of bass as a ported box.
Ported boxes have holes or ports that allow air to move freely in and out of the box. This helps to increase the subwoofer’s efficiency, but it also makes the box more difficult to design and build.
If you’re not sure which type of box is right for you, it’s a good idea to consult with an experienced car audio installer or subwoofer manufacturer. They’ll be able to help you choose the correct box for your car and your listening habits.
What Happens if a Port Is Too Small?
If a port is too small, the subwoofer will not be able to produce as much bass. The sound will be muffled, and you may even notice a drop in volume. The port also needs to be the right size for the subwoofer. If it is too big, the subwoofer will not be able to produce as much bass. The sound will be muffled, and you may even notice a drop in volume.
Ports that are too small can cause the subwoofer to overheat. This can damage the subwoofer and void the warranty.
It is best to consult with an expert before porting a sub-box with PVC. They can help you choose the right size and type of port for your subwoofer.

Conclusion
So, there you have it, how to port a sub box with pvc! Your very own guide to porting a sub box with PVC. If you follow these simple steps, you will be well on your way to enjoying the perfect sound quality in your car. Have fun, and experiment with different sizes and shapes of PVC pipes until you find the perfect set-up for your needs.


