How to Refill Clipper Lighter
Have you ever found yourself in the situation of needing to refill a clipper lighter and not knowing what steps to take? If so, then this post is for you!
Clipper lighters are an extremely popular item that can be used for many purposes, such as igniting fires or cigarettes, yet some may be unsure about how exactly to go about refilling them. Refilling your lighter is a great way to save money and ensure that your lighter spares no expense when it comes to lighting up any fire source with ease.
In this blog post, I’ll walk through step-by-step how to refill clipper lighter and offer tips on how to get make sure that it lasts longer than expected. So don’t wait – let’s explore the art of refilling your very own Clipper Lighter today!
What Will You Need?
Before we jump into the refilling process, let’s take a minute to go over what you’ll need in order to refill your clipper lighter. To successfully refill your Clipper Lighter, you will need the following:
- Butane Gas
- A Clipper Lighter
- A Refill Cap (optional)
- A Lighter Cleaner (optional)
Now that you have all the supplies needed, let’s dig in and see how to refill the clipper lighter.
10 Easy Steps on How to Refill Clipper Lighter
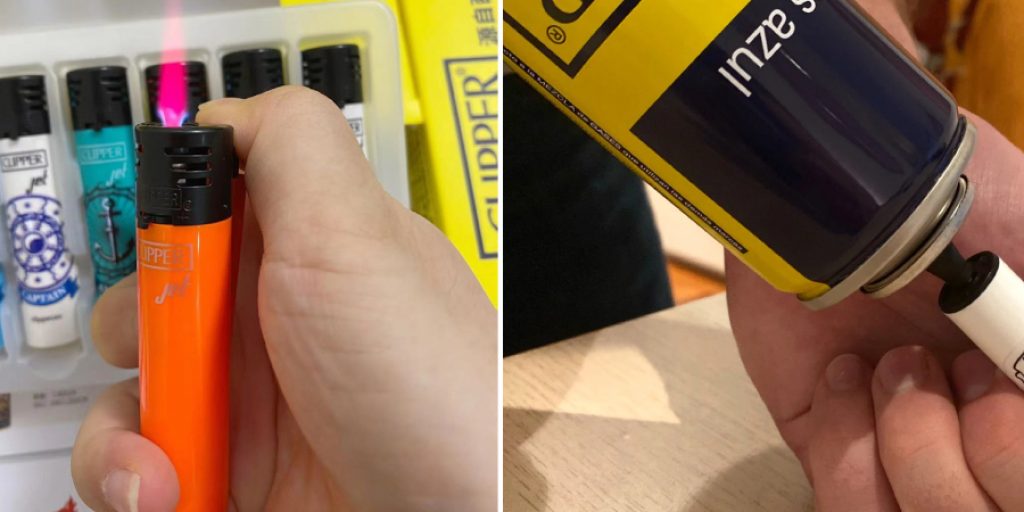
Step 1. Flip the Clipper Lighter:
Flip the clipper lighter over and remove the refill cap if there is one. If not, then simply take off the bottom of the lighter to reveal the empty fuel tank. Don’t discard the refill cap, as it can be very helpful in helping to avoid any messes.
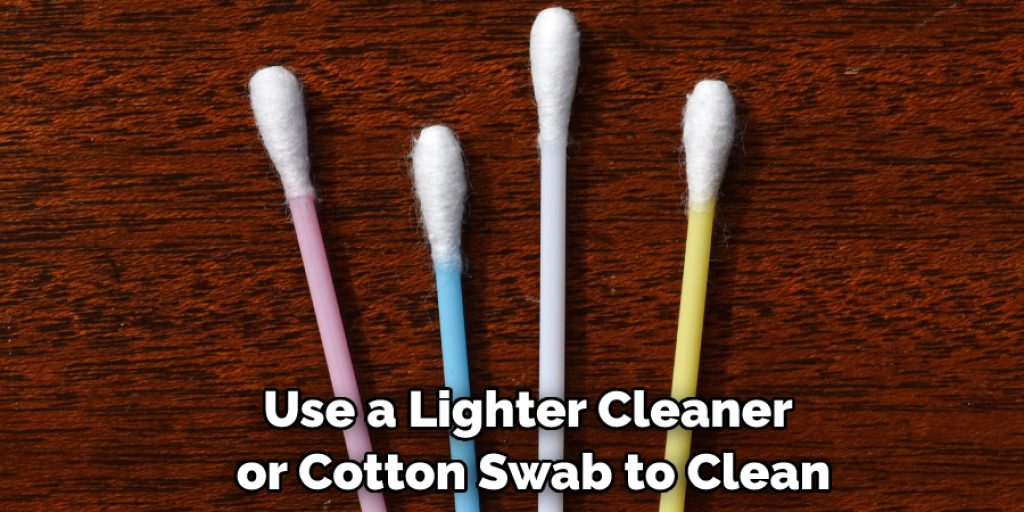
Step 2. Clean Out Excess Fuel:
Use a lighter cleaner or cotton swab to clean out any excess fuel from the tank. This will keep your lighter working properly and ensure that no old fuel remains. Additionally, be careful not to touch any of the flammable parts of the tank as this could result in an accident.
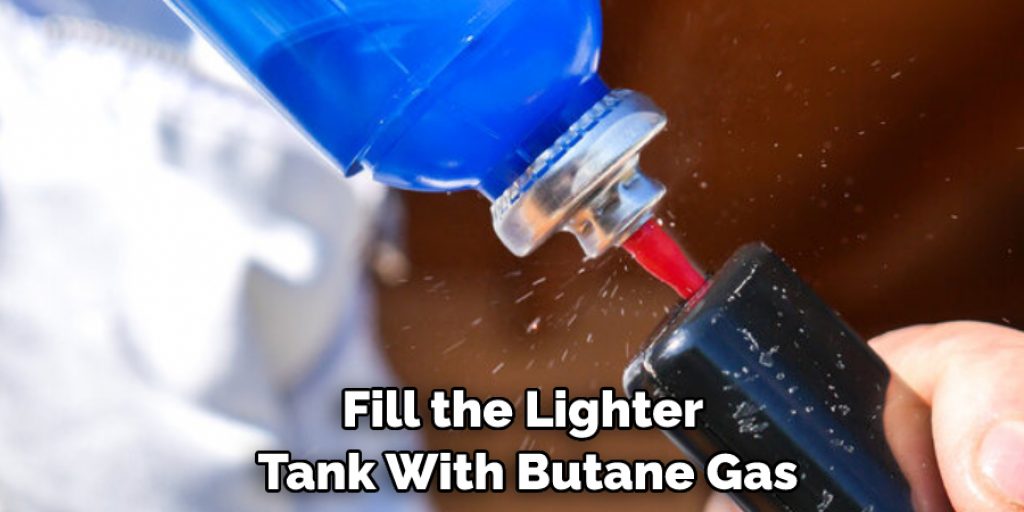
Step 3. Fill the Fuel Tank:
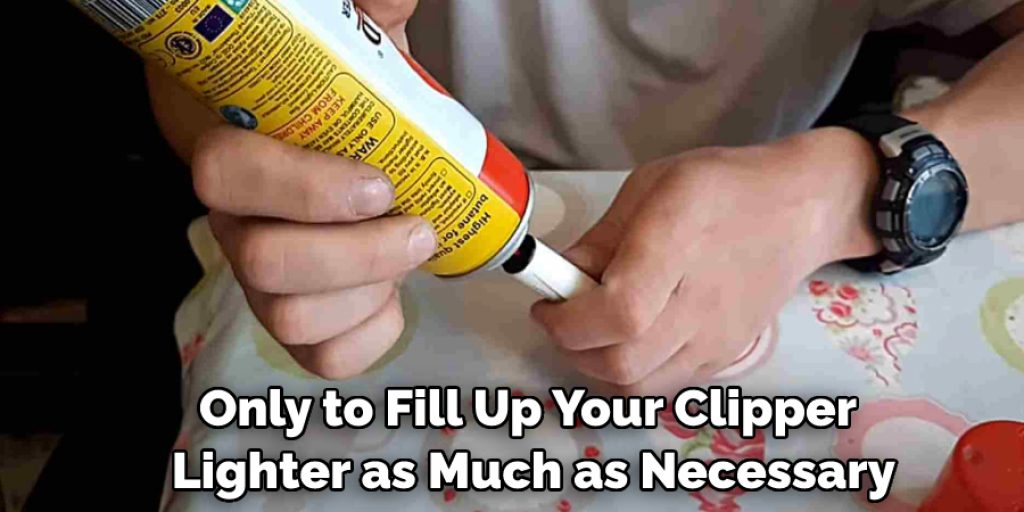
Fill the tank with butane gas, making sure not to overfill it. You should be able to hear a hissing sound from the lighter as you do this. Once done, replace the refill cap or bottom of your clipper lighter for protection.
Step 4. Test Your Lighter:
Once refilled, it’s time to test if your lighter is indeed ready to use! Press down on the flint wheel to see if it sparks – this means that you have successfully refilled your Clipper Lighter. If not, repeat steps 2-3 to see if you can get it to work.
Step 5. Apply Lighter Cleaner (Optional):
If you want ultimate protection for your clipper lighter, use a lighter cleaner and work it into the flint wheel, fuel tank, and any other parts of the lighter. This will help keep it clean and in perfect working condition for longer! Additionally, you can use the lighter cleaner to clean up any messes that may have occurred during refilling.
Step 6. Add Fuel as Needed:
Make sure that your clipper lighter is always filled with sufficient butane gas before use. Depending on your use, you can refill it approximately every 1-3 months. It will also be helpful to keep some extra butane gas on hand just in case you need to refill your lighter sooner than expected.
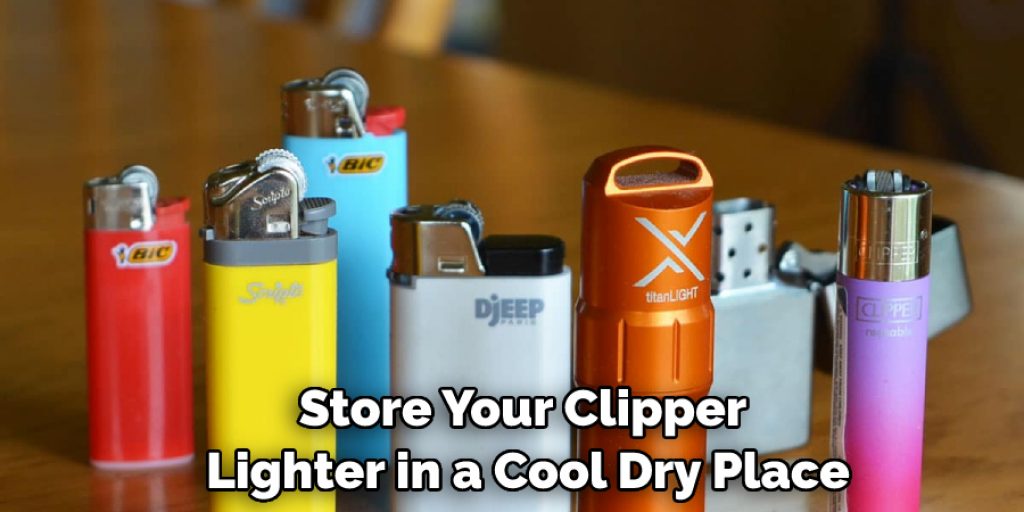
Step 7. Store Properly:
Store your clipper lighter in a cool, dry place away from children or pets to ensure its safety. Additionally, make sure that there aren’t any open flames nearby when storing your clipper lighter. This could potentially lead to an accident if not properly taken care of!
Step 8. Replace Parts When Needed:
If any parts of your clipper lighter seem to be worn out or malfunctioning, replace them as soon as possible. Don’t try to use your lighter with broken parts. This could lead to an unsafe environment for you and those around you.
Step 9. Ensure Safety Practices:
Be sure to follow all safety precautions when refilling your clipper lighter, including not overfilling it and making sure there aren’t open flames nearby. Additionally, keep the refill cap on at all times in order to avoid any messes or spills that may occur during the refueling process. Be careful not to touch any of the flammable parts of the lighter, as this could lead to an accident.
Step 10. Enjoy Your Refilled Clipper Lighter!
And there you have it – 10 easy steps on how to refill your clipper lighter! Now you can enjoy using your newly refilled and well-protected clipper lighter for much longer. So don’t wait – follow these steps today and get started on the path toward a more fuel-efficient lighter that will last you for many years to come!
By following these easy steps, you can now confidently and successfully refill your clipper lighter! Thanks for reading, and happy refilling!
5 Additional Tips and Tricks
1. Buy a Refillable Lighter: This is an ideal way to save money over time by not having to buy a new lighter every time it runs out of fuel. Refillable lighters are available in many varieties from leading brands like Clipper, Bic, and Ronson.
2. Adjust the Flame Size: Turn the adjustment wheel on your lighter to adjust the flame from low to high. Having too high of a flame can cause extensive damage to your lighter and may even result in fire hazards if used improperly.
3. Use Only Approved Fuel Sources: Be sure that you use only approved fuels when refilling your clipper lighter, such as butane gas or other approved flammable liquids. Do not try to fill up with any other type of fuel, as it can cause damage to the lighter and be a safety risk.
4. Refill Your Lighter Correctly: To refill your clipper lighter, turn it upside down and press the stem against a butane canister in order to release the gas into the reservoir tank on the lighter. Once done, wait for a few seconds before releasing the stem so that excess butane is not released.
5. Test and Maintain Regularly: To make sure your clipper lighter works properly after each refill, test it out by lighting up a flame and adjusting its size using the wheel at the bottom of the device. Also, clean out any dirt or debris that may have accumulated inside of the reservoir regularly for optimal performance.
By following these tips and tricks, you can make sure your clipper lighter is working properly and safely. With regular maintenance and refilling, you can keep your trusty clipper lighter running for many years to come!
6 Things You Should Avoid
1. Do Not Overfill: Make sure only to fill up your clipper lighter as much as necessary, or else it can create a fire hazard when used.
2. Do Not Leave Fuel in the Reservoir for Extended Periods: To prevent damage to the lighter and potential fire hazards, empty out unused fuel after each refill.
3. Do Not Adjust the Flame Size Excessively: This can damage your lighter and may even result in fire hazards if done improperly.
4. Do Not Use Any Other Fuel Type: Be sure only to use approved fuels such as butane gas or other flammable liquids specifically designed for this purpose when filling up your clipper lighter.
5. Do Not Leave Your Clipper Lighter Unattended: As with all forms of fire, always be aware of your surroundings and keep an eye on your clipper lighter while in use. By following these simple tips, you can make sure that you are using your clipper lighter safely and responsibly.
6. Do Not Ignite Flammable Materials: Avoid using your clipper lighter to light up things like paper, wood, or other flammable materials. Doing so can create a serious fire hazard and should be avoided.
By adhering to the above guidelines when refilling and using your Clipper lighter, you can ensure that it remains in good condition for a long time! Regular maintenance and refilling allow you to trust that your device will work reliably without any issues.
Conclusion
Refilling a clipper lighter can be a simple and beneficial exercise. A full lighter will last much longer and save you money in the long run. Plus, refilling your own lighter leaves you with the satisfaction of knowing that, while it may have taken some time, you did it all on your own! Before diving into the procedure of refilling a clipper lighter, make sure always to follow instructions and keep any relevant safety measures in mind when doing so.
Although it can take some practice to perfect this skill, especially for those who are less experienced with this type of craftsmanship, after trying a few times and getting used to the involved steps, soon refilling your lighter will become an easy task! Even if at first it might seem daunting, it’s hard not to feel proud of yourself once the job is completed.
Hopefully, the article on how to refill clipper lighter has been useful and informative. With the provided instructions, you can now refill your clipper lighter without any issues confidently!