How to Rehydrate Clay
Rehydrating clay is an essential technique for artists and potters who prefer working with air-dried or hardened clay. Whether your clay has become too dry due to prolonged exposure to air or you are looking to reclaim scraps from previous projects, the process of rehydration can restore the material to its original malleability and workable state.
Understanding the methods of rehydration not only maximizes the use of your clay but also enhances creativity by allowing for experimentation with texture and form. This guide on how to rehydrate clay will walk you through the various approaches to effectively rehydrate clay, ensuring that your artistic endeavors can continue without interruption.
Why Rehydrate Clay?
Air-dried or hardened clay can become unworkable and brittle, making it challenging to mold or shape into desired forms. Rehydrating clay not only restores its plasticity but also allows for the development of unique textures and patterns. Additionally, rehydrated clay is more pliable, which makes it easier to blend with other pieces of clay or add intricate details to your project.
It is important to note that rehydrating clay does not change its chemical composition, so it can only be used for non-food related projects. It is also crucial to follow the recommended guidelines and not leave any moisture in the clay, as this can lead to mold growth.
Needed Materials
- Dry Clay
- Water
- Plastic Bag or Container With a Lid
- Spray Bottle (Optional)
7 Simple Methods on How to Rehydrate Clay
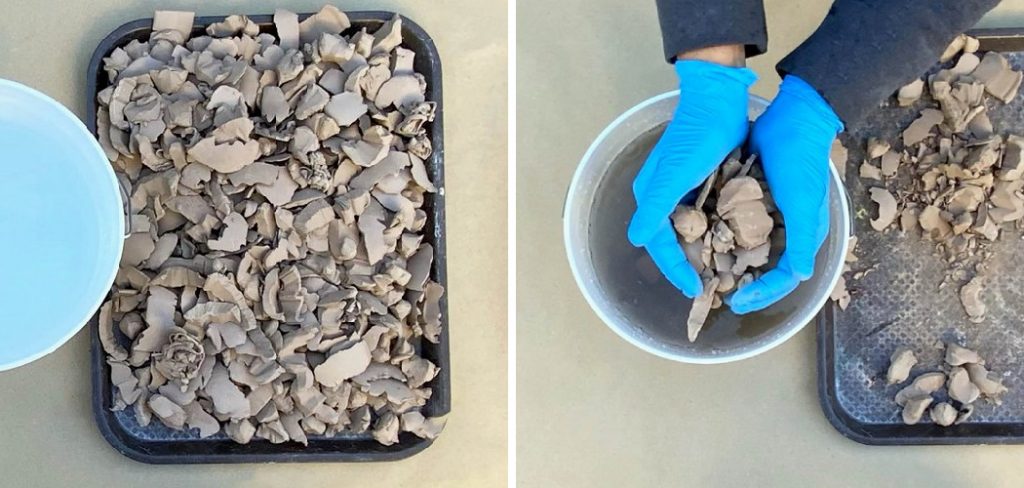
Method 1: Soaking Clay in Water
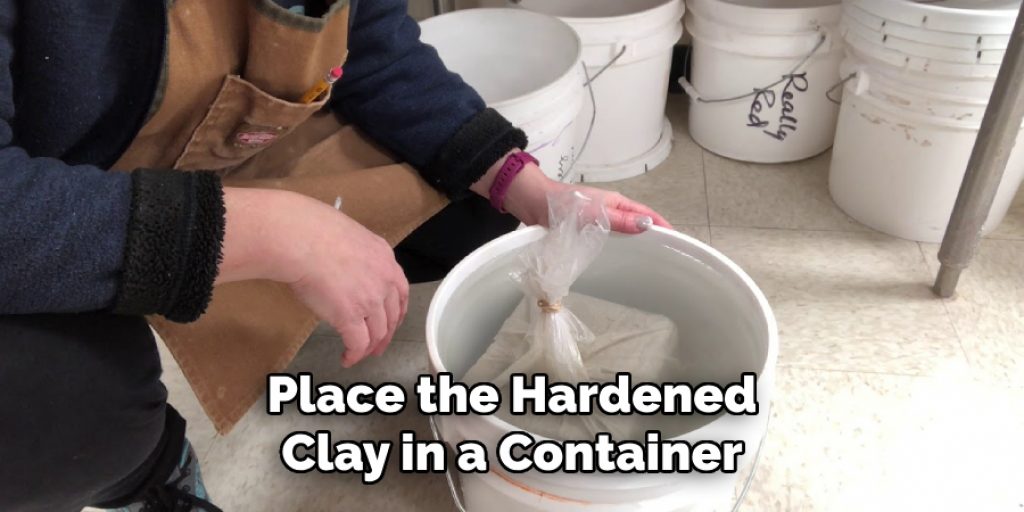
- Break the hardened clay into smaller pieces.
- Place the broken pieces in a container or plastic bag with enough room to add water and mix.
- Add water to the clay until it is fully submerged.
- Let the clay soak for about 30 minutes to an hour, depending on its dryness level.
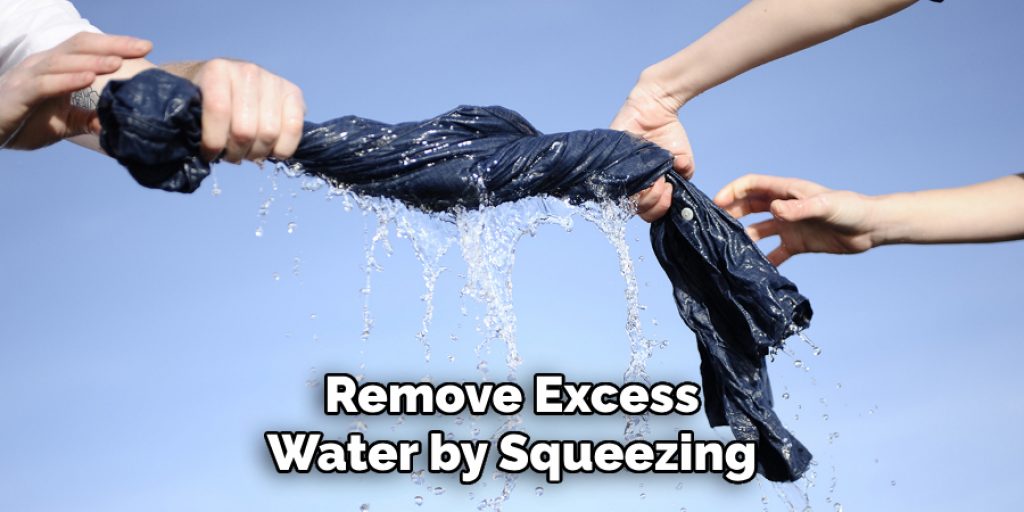
- After soaking, remove excess water by draining or squeezing the clay gently.
- Knead the clay by hand until it reaches a desired consistency.
This method is simple and effective for rehydrating large amounts of clay. However, it is important to keep an eye on the clay during the soaking time to prevent over-saturation.
Method 2: Spraying Clay With Water
- Place the hardened clay in a plastic bag or container with enough room for air circulation.
- Using a spray bottle, lightly mist the clay with water.
- Close the bag or container and let it sit for about 30 minutes to an hour.
- Check the moisture level of the clay and repeat the process if needed until desired consistency is reached.
This method allows for more control over how much water is added to the clay and can be useful when working with smaller pieces of clay.
Method 3: Covering Clay With Damp Cloth
- Place the hardened clay on a damp cloth.
- Cover the clay with the same damp cloth, ensuring that it is fully covered.
- Let the clay sit for about 30 minutes to an hour.
- Check the moisture level of the clay and repeat the process if needed until desired consistency is reached.
This method provides a more gradual rehydration process and can be useful for smaller pieces of clay or when working with delicate textures.
Method 4: Steaming Clay
- Place a steamer basket in a pot filled with water, making sure that the water does not touch the bottom of the basket.
- Place the hardened clay in a container or plastic bag and put it in the steamer basket.
- Cover the pot with a lid and let it steam for about 30 minutes to an hour.
- Check the moisture level of the clay and repeat the process if needed until desired consistency is reached.

Steaming can be a more time-consuming method but is effective for rehydrating larger pieces of clay as it allows for an even distribution of moisture throughout the clay.
Method 5: Using Wet Paper Towels
- Dampen several paper towels with water, ensuring that they are not dripping wet.
- Wrap the hardened clay with the damp paper towels, making sure that all sides are covered.
- Place the clay in a plastic bag or container and let it sit for about 30 minutes to an hour.
- Check the moisture level of the clay and repeat the process if needed until desired consistency is reached.
Using wet paper towels is a gentle method of rehydrating clay and can be useful for delicate textures or when working with small pieces of clay.
Method 6: Adding Water While Kneading
- Break the hardened clay into smaller pieces and place them on a clean, flat surface.
- Using a spray bottle, lightly mist the clay with water while kneading it by hand.
- Continue adding water and kneading until the desired consistency is reached.
This method requires more effort but allows for precise control over the amount of water added to the clay.
Method 7: Using a Clay Softener
- Follow the instructions on the chosen clay softener product.
- Apply the softener to the hardened clay and let it sit for the recommended amount of time.
- Knead the clay by hand until desired consistency is reached.
Clay softeners are specifically designed to restore dry or hardened clay, making this method an effective option for rehydrating large amounts of clay quickly.
Following any of these methods on how to rehydrate clay will effectively rehydrate dry or hardened clay, giving it a new life to be molded and shaped into unique creations. Experimenting with different techniques can also lead to discovering new textures and forms that can enhance your artistic projects. Remember to always follow recommended guidelines and properly store your clay after use to prevent it from drying out again.
Tips and Tricks
- Keep a spray bottle filled with water near your workspace when working with air-dried or hardened clay, as it can help prevent the clay from drying out.
- If you accidentally add too much water to your clay, you can let it air dry for a few hours or use a paper towel to absorb the excess moisture.
- Adding a few drops of glycerin or vinegar to your water when rehydrating clay can improve its pliability and reduce cracking when dried.
- When storing leftover hydrated clay, make sure to wrap it tightly in plastic wrap or place it in an airtight container with a lid to prevent it from drying out again.
- Don’t throw away completely dried out clay, as it can still be used for different techniques such as carving or crumbling for texture.
- Experiment with different methods and combinations to find what works best for you and your projects. Overall, the key to successfully rehydrating clay is patience and proper technique. With these tips and tricks, you can bring new life to your dry or hardened clay, creating endless possibilities for your artistic endeavors. Happy molding!
Frequently Asked Questions
Q: Can I Use These Methods on Polymer Clay?
A: No, these methods are specifically for air-dried or hardened clay. Polymer clay should not be rehydrated as it can change its properties and ruin the finished product.
Q: Is There a Limit to How Many Times I Can Rehydrate My Clay?
A: Continuously rehydrating clay is not recommended as it can affect its texture and make it more difficult to work with. It is best to use these methods sparingly and try to use up all the hydrated clay in one go.
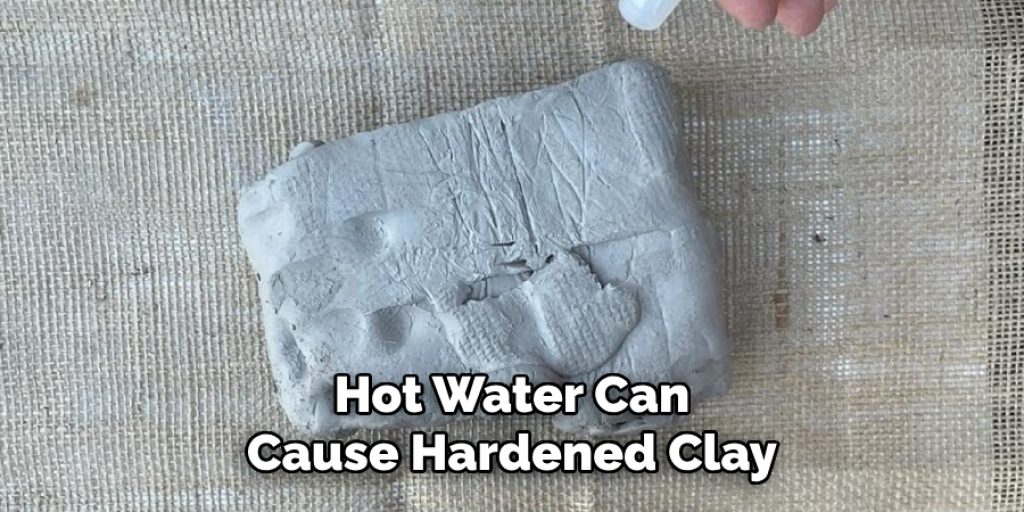
Q: Can I Use Hot Water Instead of Room Temperature Water?
A: It is not recommended, as hot water can cause air-dried or hardened clay to melt or become too soft. Room temperature water is safer and more effective for rehydrating clay. It is also important to use clean, non-chlorinated water to prevent any unwanted reactions with the clay.
Q: How Can I Tell If My Clay Is Hydrated Enough?
A: The best way to determine if your clay is hydrated enough is by touch and feel. It should be pliable and easy to mold without cracking or breaking. You can also do a pinch test – pinch a small piece of clay between your fingers; it should stick together without crumbling or cracking. It takes some practice to get the right consistency, so don’t be afraid to experiment until you find what works for you. It is also a good idea to test the clay on a small project before using it for larger or more detailed pieces.
Conclusion
Rehydrating clay is a vital skill for any artist or craft enthusiast, enabling them to breathe new life into hardened materials. By employing the methods on how to rehydrate clay outlined above, you can select the technique that best suits your project’s needs and the specific type of clay you are working with. Whether you prefer the simplicity of soaking or the precision of using a spray bottle, each method offers a unique approach to revitalizing your clay.
Always remember to store your hydrated clay properly to prolong its usability and maintain its desirable properties. With these tips and techniques, you can ensure that your creative endeavors remain uninterrupted, allowing your imagination to flourish.
Angela Ervin
Angela is the executive editor of DIY quickly. She began her career as an interior designer before applying her strategic and creative passion to lifestyle and home. She has close to 15 years of experience in creative writing and online content strategy for housekeeping, home decorations as well as other niche efforts. She loves her job and has the privilege of working with an extraordinary team. She lives with her husband, two sons, and daughter in Petersburg. When she's not busy working she spent time with her family.