
How to Remove a Kohler Bathroom Faucet
Removing a Kohler bathroom faucet is not as hard as it seems. It can be a relatively straightforward process with the proper tools and instructions. In this blog post, we will outline the steps necessary on how to remove a kohler bathroom faucet. We will also provide some tips on avoiding any potential damage during the removal process.
When you are ready to remove your Kohler bathroom faucet, you will need to take some essential tools and supplies with you. The process is not complicated, but you must take your time and follow the proper steps to avoid damage. So let’s get started!
What Is The Purpose of a Faucet Cartridge?
The purpose of your faucet cartridge is to control the flow of water out of your faucet. When you first turn on the hot or cold water, the ball-shaped cartridge’s lower half rotates due to pressure from the stem that comes up through it. Then, the rotating cartridge gradually opens more and more until the correct temperature (or flow) is achieved.
When the flow of water or temperature changes, you turn that cartridge with your hand. If there is no hot water coming out of the faucet at all, it may be due to a clog in the faucet cartridge. Likewise, if you have trouble shifting between hot and cold at the handle, this may be a clogged cartridge.
10 Ways on How to Remove a Kohler Bathroom Faucet
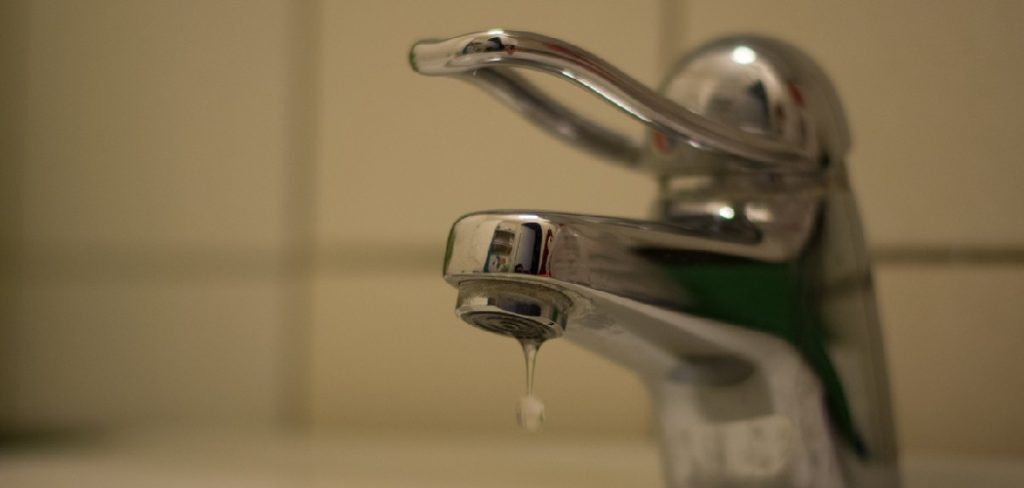
1. Check the Faucet Aerator
If you’re having trouble getting water from your Kohler bathroom faucet, take a look and see if the aerator is rotated to the side. If so, there’s probably a button on the top that you need to push down in order to get water from the fixture. To do this, simply place a flathead screwdriver on top of the button and push down until you’ve turned off the water.
2. Turn Off Water Supply
If your faucet does not have a rotating aerator, find the switch that turns off your water supply to that fixture. Then, make sure that there is no longer any water coming from the faucet by placing a bucket below it.
3. Remove handle
Using a screwdriver, take the handle off the faucet set by pushing down on one side of the cap and then pulling it off. Use a flathead screwdriver in order to do this. If you have a pull-down or pull-out Sprayer, continue with the next step.
4. Remove sprayer
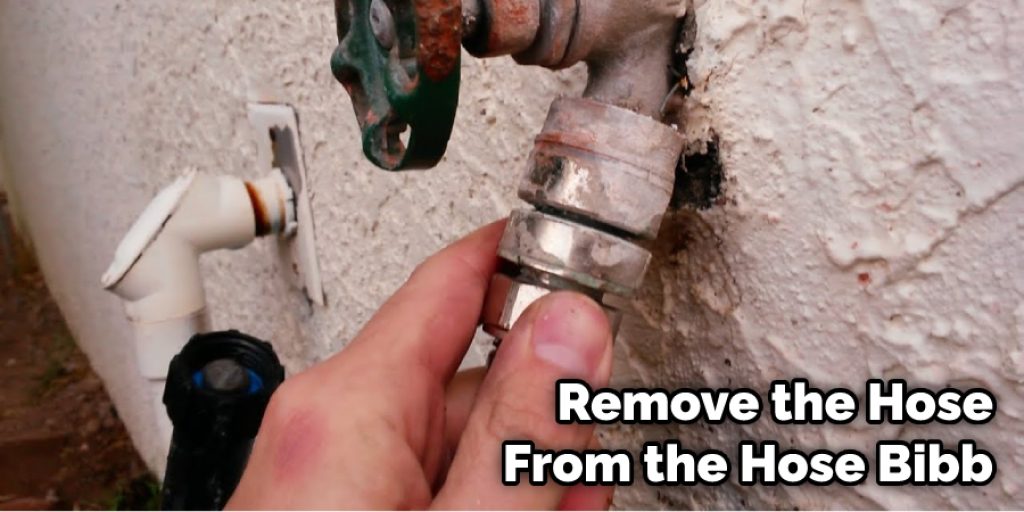
To remove the hose from the hose bibb, use a wrench to turn it counterclockwise. If you have an older fixture, you may need to use a pair of pliers in order to do this. You can then pull the Sprayer up through the faucet set.
5. Remove Rubber Washer
Underneath the cartridge, you will find a rubber washer. While some Kohler bathroom faucets have two, remove both using your fingers or a screwdriver. If you have an older model, there may be a second metal gasket that will need to be removed by firmly pulling it up.
6. Pull Out Cartridge
Once you have removed the rubber washers, use a screwdriver to pry out the cartridge. If it is difficult to do so, try adding WD-40 to the faucet set to break up any corrosion that may be present. You can then lift the cartridge and turn it counterclockwise until it can be removed.
7. Clean the Spout
To remove any remaining water, use a damp cloth to wipe down the spout. Some Kohler bathroom faucets have pop-up stoppers on them that you can pull up and turn counterclockwise to remove. You can then rinse it with water and set it aside.
8. Install New Cartridge
Take your new Kohler cartridge and place it the same way you have taken out the old one. Ensure that the rubber gasket is placed strategically underneath this before pushing down on the cartridge until it locks. You’ll know that you’ve done so correctly when water begins to come out of your faucet set.
9. Test Sink Faucet

Test your bathroom faucet by turning on the water supply to it. If your faucet is still leaking, then you may need to repeat this process until everything has been replaced correctly. You can then turn off the water supply and re-attach the handle to the set using a screwdriver.
10. Re-attach Sprayer
Attach your sprayer hose to the hose bibb securely. Then, test it out to make sure that everything is in working order by turning on the water supply and allowing it to flow freely from the spout and Sprayer.
Some Tips and Suggestions
Here are some tips and suggestions on how to remove a kohler bathroom faucet.
1. Isolate the hot and cold water lines to your sink before doing anything.
2. Wear safety goggles and gloves and protect your skin while removing the faucet from your sink.
3. Be sure that you have a bucket or small container on hand if any parts of the faucet fall into your sink.
4. Have paper and pencil at hand to take notes and remember what goes where (and in which order). This will help you if you need to re-install your new parts later.
5. Have the new faucet parts at hand before removing the old one.
6. Before removing any of your sink’s older, existing features (such as soap dispensers), ensure that you know how they are installed and what is hooked up to them. They can typically be re-installed on your new bathroom faucet like they were originally on your old one.
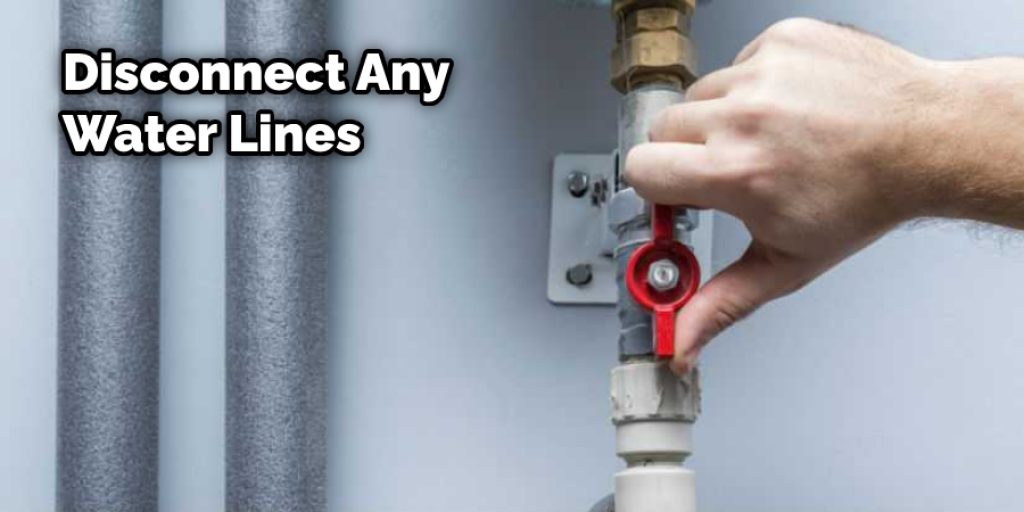
7. Before removing the faucet, disconnect any water lines to it and turn off the main water source leading into your home or property. If you are unsure about where the stop-valve for this is located, consult with a professional plumber or contractor before you begin.
How to Stop Kohler Faucets from Leaking?
Many Kohler faucets are leaking. They produce a thin stream of water as if they were already shut off, but the valve is fully open. This thin stream adds to a high cost over time and contributes to higher energy bills. In addition, Kohler faucet leaks can be annoying and make it difficult to wash your hands without drenching the front of you. You can replace Kohler faucets yourself.
Kohler valves may fail, but they are usually worn out and do not close completely when turned off. Replacing the cartridge often fixes this problem. However, it will require removing the handles, escutcheon plates, and packing nuts under each handle before determining the cause of Kohler faucet leaks is a faulty washer. If you have ever had to tighten the nut on your kitchen sink, then you know how to remove a kohler bathroom faucet.
How Does a Kohler Faucet Work?
A Kohler faucet is a brand of faucet. This is a basic description of how they work:
1) Water comes from your home’s water supply via the cold water line to the faucet.
2) After going through a filter, which keeps out sediments and other contaminants, it travels up into the faucet and the water lines of the sink and down your drain.
3) When the handle (or handles) is turned on or off, a valve behind it is opened or closed to let more or less water through.
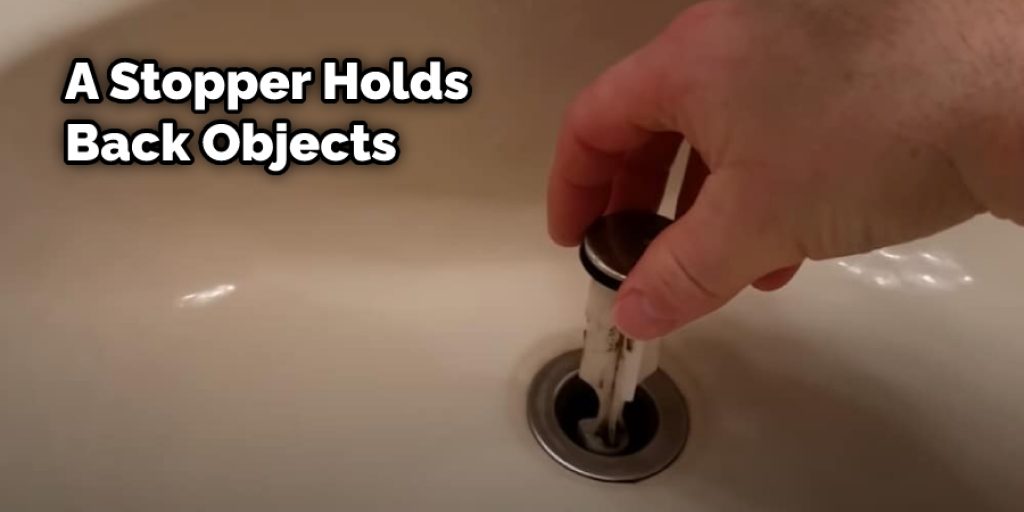
4) A stopper in the bottom of the sink holds back objects like combs and toothbrushes, and some water drains out of the sink while you’re washing your hands.
5) As the handle is turned on and off, the stopper opens and closes to let more or less water through.
6) When you turn off the faucet, a spring inside it pulls the stopper back into position so that no more water can be drained.
7) The water temperature is controlled by a mixing valve, which regulates how much hot and cold water should mix to get the right temperature.
Can You Repair a Kohler Two Handle Faucet?
To answer this question, we’ll first need to understand the nature of Kohler’s two-handle faucets. They can be identified by their distinctive “slipper” and “lever” handles. The lever is the traditional round handle mounted on top of the faucet. The slipper is a metal plate attached to the spout and which you push with your hand to turn the water on and off.
Conclusion
If you need to remove a Kohler bathroom faucet, follow the instructions mentioned in this blog post. The process should not take more than ten minutes and can be done with just your hands and pliers. First, turn off the water supply valve that is connected to the spout of the bathtub or showerhead. This will stop any flow from continuing into the pipes and make it difficult for you to disconnect them later on in this process.
Next, use an adjustable wrench (or channel lock pliers) to tighten down on one side of either nut found at the base of each handle attached to both sides of the faucet connection point. Keep pressure applied while rotating counterclockwise until loosened enough so that you can move the handle free of the connection point.
We hope this blog post on how to remove a kohler bathroom faucet has been helpful for you. If you have any questions or want to know more, then feel free to comment below!
Angela Ervin
Angela is the executive editor of DIY quickly. She began her career as an interior designer before applying her strategic and creative passion to lifestyle and home. She has close to 15 years of experience in creative writing and online content strategy for housekeeping, home decorations as well as other niche efforts. She loves her job and has the privilege of working with an extraordinary team. She lives with her husband, two sons, and daughter in Petersburg. When she's not busy working she spent time with her family.


