
How to Remove Textured Paint From Ceiling
Introduction:
Ceilings can be a pain to paint. They are often high and hard to reach, so you have to get on a ladder, which is unstable and always in the way. And then, when you’re done painting, there’s all that textured paint leftover that seems impossible to remove from your brush or roller. In this article, I will discuss how to remove textured paint from ceiling. So let us get into the core discussion.
A Detailed Stepwsie Guide on How to Remove Textured Paint From Ceiling:
By completing the following steps, you will be able to remove textured paint from your ceiling. These steps are essential as omitting any of them can result in a faulty end product.
- Clean the ceiling thoroughly with a solvent such as mineral spirits, naphtha, or even alcohol if available using a cotton cloth. This will allow for a good surface area adhesion later on by the primer that will be used. Allow time for it to dry before continuing onto step 2.
- Apply a coat of sandable primer, which allows for better adhesion and durability so as not to have issues during re-painting or to have to sand down an existing painted finish if this becomes necessary at some afterward. Be sure to let this dry before moving on to step 3.
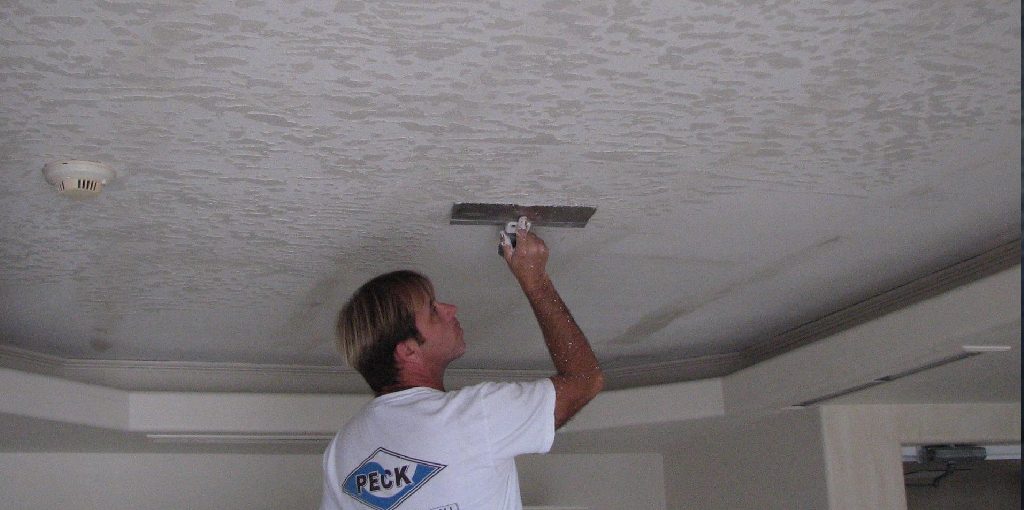
- Apply a layer of texture, removing joint compound with a 10-12″ drywall knife, and make sure to press down heavily and evenly all over the surface. This will help peel away the paint or other finish to allow for easy removal. Make sure that it is applied at least 1/8″ thick. Otherwise, there could be reoccurring issues with bubbling up during sanding if these steps were not done beforehand.
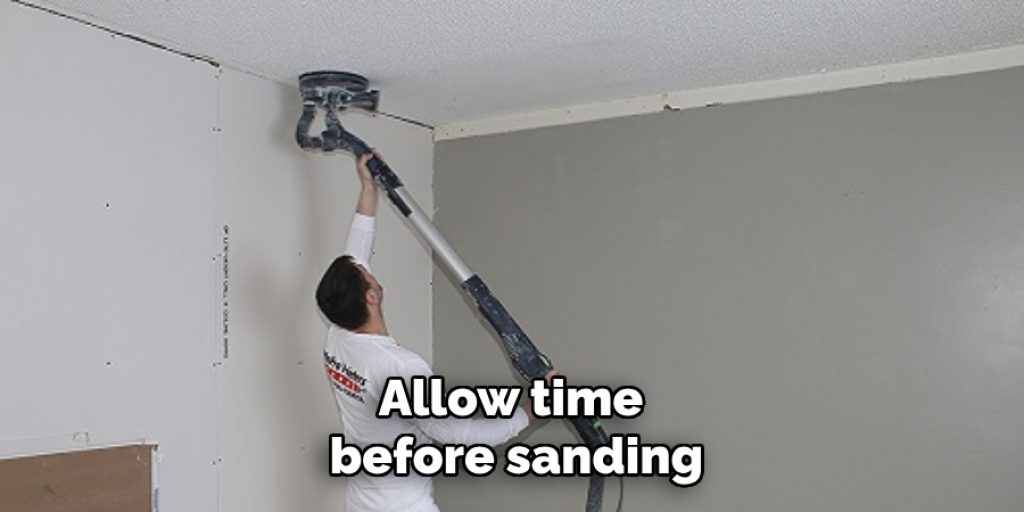
- Allow time before sanding according to the manufacturer’s instructions on the can, which usually ranges from 30 minutes to 4 hours depending on your primer used earlier in the task. The use of an oscillating sander makes this part easier while being careful around corners and edges. Make sure to sand in the direction of the grain on your ceiling.
- Vacuum up all the fine particles created from sanding before applying a second coat of primer. Allow it to dry according to the manufacturer’s instructions which usually is around an hour on average before moving on to step 6.
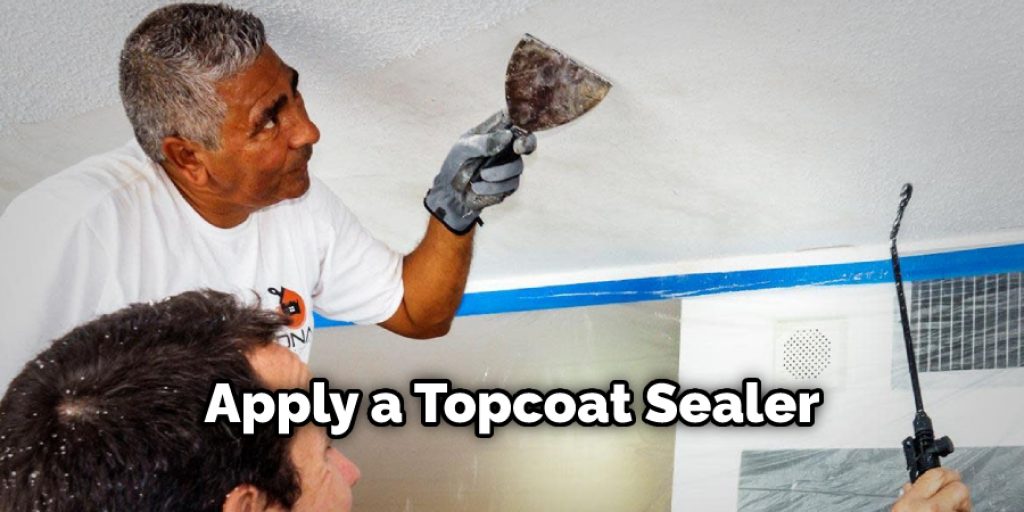
- Apply a topcoat sealer with a roller to allow it to dry completely, which depending on its thickness, it can take anywhere from 3-4 hours or so before applying texture back onto your ceiling.
Precautions While Removing Textured Paint From Ceiling:
Before removing the textured paint, you need to protect your hands and all other exposed body parts. Use heavy-duty rubber gloves, along with goggles and masks. Make sure not to use any tools on wet surfaces as it can damage them. Don’t forget to cover the room with plastic sheeting before beginning the work. You may also consider working in latex gloves to keep things clean. Remove all transparent plastics like visors or glasses away from the work area; these items can get damaged by splatters of sanding dust while sanding.
You can also check out to Remove Heavy Texture From Ceiling
During sanding, take necessary precautions to avoid inhaling ground paint particles because it is known for its high toxicity levels (from asthma patients). Finally, keep children out of the space where you will be working to avoid any accidental injuries.
Before you begin, perform a dry run of the areas that you will be working on. This way, you’ll know exactly where to start with all the sanding work. For example, to remove textured paint from the ceiling, attach an oscillating tool or sander with 80- or 120-grit sandpaper. Next, carefully move it over the surface in slow motions to ensure not to damage it further. Keep changing direction regularly while sanding. Alternatively, if you are using a handheld drywall sander, place it flat on the surface and grade off no more than 1/8″ per pass until smooth and even.
How to Paint a Ceiling Properly?
Step 1.
Prepare the Ceiling for Painting
Ensure that you have covered the floor with heavy plastic or similar covering to protect it from any paint drippings. Ensure no fans are blowing in the room, turn off your AC unit and remove any hot lights not to burn yourself. Ensure that all wall switches, light plates, and covers are removed before starting work on the ceiling. A face mask will also come in handy if you plan to be working for several hours on end with paint fumes.
Preparing For Painting
Step 2:
Priming Before painting your ceiling, you must first prime it using a good primer made explicitly for shelters. Use a brush or roller to ensure even coverage on all surfaces of the top.
Use a brush or roller to ensure even coverage on all surfaces of the ceiling.
Painting Ceiling –
Step 3:
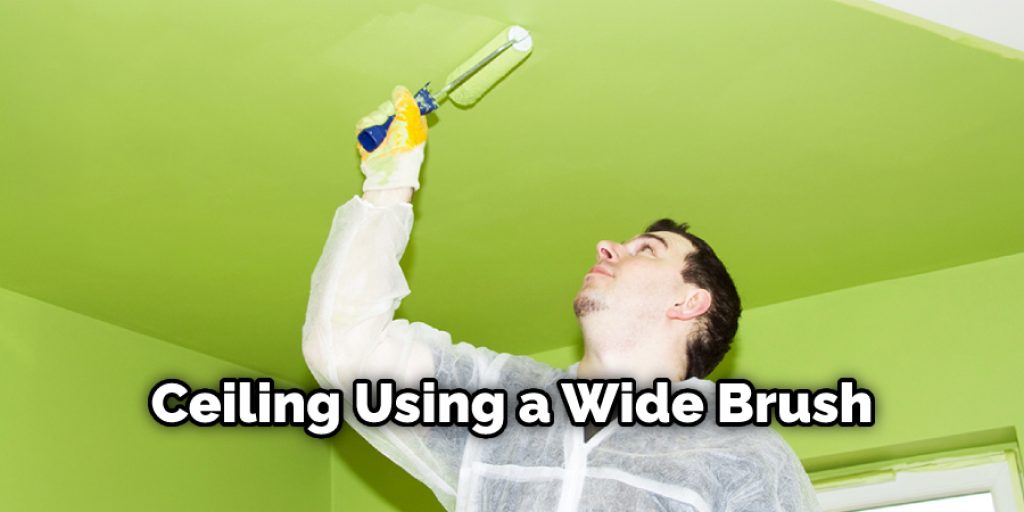
Paint the Ceiling Leave your primer to dry and apply two coats of paint using a broad brush for ceilings and allow each coat to dry completely before applying the second one. Be sure to leave adequate time between coats, at least 24 hours.
Paint Your Ceiling Using a Wide Brush for Ceilings
Step 4.
Clean Up Pour any excess paint in your can back into its container and dispose of it responsibly; never pour leftover paint into drains or sewers as it may seep out through grates into local waterways! Use old rags or paper towels to clean up all spills and wipe down all surfaces to remove any residue before throwing them away. Use mineral spirits to clean up brushes and rollers if needed.
Clean Up Excess Paint Poured Back into Can
Ceiling Painting Tips Wash your brush/roller covers in warm soapy water at the end of each day or when you need to stop working to avoid having dried paint harden over time. If you drop a roller cover on the floor, discard it as this may pick up dirt and give an uneven finish. It is usually a good idea to use a ladder if you are painting a ceiling yourself, as this will make your work easier and more accurate without too much strain on your part.
Ensure that all walls are covered with plastic from top to bottom before beginning work on the ceiling, and cover up all baseboards with masking tape. If you are sanding down your walls before painting them, rub the tops as well for an even finish. Ceiling Painting Tips, All in all, follow these simple steps when working on a roof and your room will look freshly painted and pretty in no time!
Conclusion:
I hope you have obtained all the necessary information on how to remove textured paint from ceiling. Also, ensure all the precautions are correct. Thank you and have a nice day!
Angela Ervin
Angela is the executive editor of DIY quickly. She began her career as an interior designer before applying her strategic and creative passion to lifestyle and home. She has close to 15 years of experience in creative writing and online content strategy for housekeeping, home decorations as well as other niche efforts. She loves her job and has the privilege of working with an extraordinary team. She lives with her husband, two sons, and daughter in Petersburg. When she's not busy working she spent time with her family.


