How to Seal Vinyl on Glass
How to Seal Vinyl on Glass is a quick and easy guide for anyone looking to improve the appearance of their home. Vinyl siding is a popular choice for many homeowners because it is durable and easy to maintain. However, when it comes to sealing vinyl on glass, there are a few things you need to know. First, choosing a high-quality sealant that will not damage the vinyl or the glass is important. Second, you need to make sure that the area is clean and free of debris before you begin applying the sealant.
Finally, you must follow the sealant’s directions carefully to ensure that it dries properly. Sealing your vinyl will help protect it from the elements and keep it looking new for longer. By following these simple steps, you can quickly and easily seal vinyl on glass, making your home look its best.
Step-by-Step Process for How to Seal Vinyl on Glass
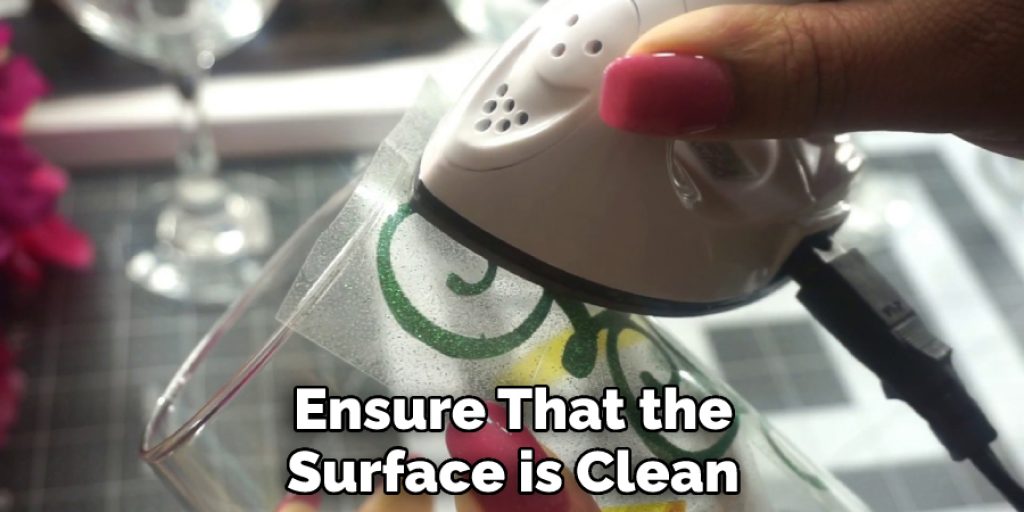
Step 1: Clean the Glass Surface
Use a clean cloth to remove any dirt, dust, or debris from the surface of the glass. If the glass is very dirty, you can use a mild soap and water solution to clean it. Using a measuring tape, measure the length and width of the vinyl. You will need to cut the vinyl to size so that it fits the glass surface.
Step 2: Cut the Vinyl
Cut the vinyl to the desired size using a sharp knife or scissors. Make sure to leave a little bit of extra vinyl around the edges so that you can tuck it under the glass. Use a glass cleaner and a lint-free cloth to clean the entire glass surface. Be sure to pay special attention to the area where you will be applying the vinyl, as this will ensure that the adhesive will adhere properly.
Step 3: Apply the Vinyl
Slowly peel the backing off of the vinyl. If the vinyl is sticky, you can use a piece of tape to help hold it in place. Once the vinyl is in place, use a squeegee or your fingers to smooth out any bubbles. Using a sharp knife or scissors, trim off any excess vinyl around the edges of the glass. Be careful not to cut into the glass itself.
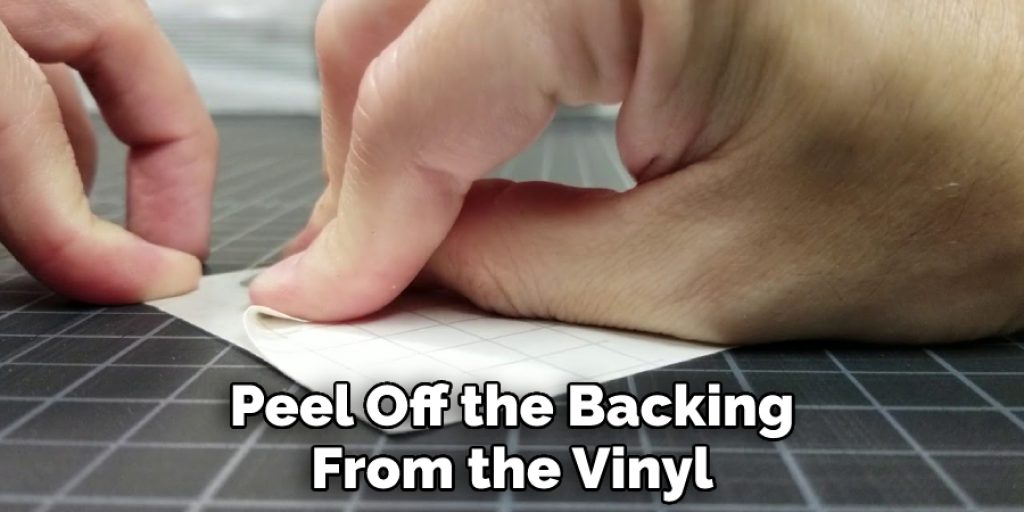
Step 4: Remove the Backing From the Vinyl
Peel off the backing from the vinyl. If the vinyl is sticky, you can use a piece of tape to help remove the backing. Position the vinyl on the glass where you want it. If you need to reposition the vinyl, be careful not to stretch it.
Carefully apply the vinyl to the glass surface. Make sure that there are no air bubbles trapped under the vinyl. If air bubbles exist, use a razor blade to release the bubble carefully and then press the vinyl down again.
Step 5: Trim the Excess Vinyl
Using a sharp knife or scissors, trim off any excess vinyl that is not stuck to the glass surface. Use a squeegee or credit card to remove any air bubbles from under the vinyl. Start at the center and work your way out. Use a razor blade or exacto knife to trim the excess vinyl from around the glass. Be careful not to cut into the vinyl on the glass.
Step 6: Clean the Glass Surface Again
Use a clean cloth to remove any dirt, dust, or debris from the surface of the glass. If the glass is very dirty, you can use a mild soap and water solution to clean it.
Step 7: Apply the Sealant
Apply a thin sealant layer to the vinyl using a paintbrush or sponge. Make sure that you cover the entire surface of the vinyl. Use a paintbrush or foam brush to apply the sealer around the edge of the glass. This will help keep the vinyl in place and prevent it from peeling. Let the sealant dry for 24 hours. Your newly sealed vinyl windows should now be protected from the elements and last many years.
Step 8: Check the Seal
After the sealant has dried, check to ensure that the vinyl is sealed properly. You can apply another sealant layer if there are any gaps or cracks in the seal. Let the sealant dry completely before using the vinyl. If you’re unsure how to seal vinyl properly, plenty of instructional videos and articles online can help. With a little time and effort, you can easily seal vinyl on glass and enjoy your new decoration for years to come.
Step 9: Remove the Tape
If you used tape to help apply the vinyl, you could now remove it. Gently peel the tape away from the glass, taking care not to pull up any of the vinyl. If you see that the vinyl is starting to come up with the tape, stop and carefully reapply the vinyl before continuing.
Step 10: Enjoy Your New Glass Surface
You can now use and enjoy your new glass surface. Now that you know how to seal vinyl on glass, you can enjoy your new decoration for years to come. With a little bit of effort, you can easily add a personal touch to any room in your home. Make sure to clean it regularly to keep it looking its best.

Safety Tips for How to Seal Vinyl on Glass
- If the vinyl you use is not self-adhesive, apply a thin layer of adhesive to the glass before applying the vinyl, and use a sharp utility knife or scissors to cut the vinyl to size.
- Carefully peel away the backing paper from the vinyl, being careful not to damage or distort the vinyl.
- Position the vinyl on the glass, and then use a squeegee or your fingers to smooth it out, working from the center towards the edges.
- Trim away any excess vinyl with a sharp knife or scissors and apply a thin layer of sealant over the vinyl using a brush or roller.
- Allow the sealant to dry thoroughly before using or cleaning the glass.
- If you use glass in a frame, ensure the sealant is compatible with the frame material and finish.
- Regularly check the condition of the vinyl and sealant, and reapply as needed to keep the vinyl looking its best.
- When cleaning the glass, use only mild cleaners and avoid any harsh chemicals or abrasives.
How Do You Ensure That Your Vinyl Seal Lasts on Glass?
It is important to ensure that the surface is clean before applying the vinyl seal. Any dirt or grime on the surface will reduce the effectiveness of the seal. Once the surface is clean, you can apply the vinyl sealant. Make sure to follow the instructions on the product label carefully. After application, allow the sealant to cure for the recommended time before using the glass.
Is Vinyl on Glass Dishwasher Safe?
Vinyl graphics are a popular way to decorate glass surfaces, but they can be difficult to keep in place. If you’re looking for a way to seal your vinyl graphics so that they are dishwasher safe, there are a few things you can do.
One option is to use a clear sealant such as a mod podge or clear contact paper. Simply apply a thin sealant layer to the vinyl graphic and allow it to dry. This will create a barrier protecting the vinyl from water and other elements. Another option is to use heat transfer vinyl (HTV). HTV is a vinyl type with a heat-activated adhesive on the back. To use HTV, simply cut the vinyl into the desired shape, peel off the backing, and apply it to the glass surface. Then, use a hair dryer or heat press to activate the adhesive and seal the vinyl in place.
HTV is a great option for dishwasher-safe vinyl graphics because it creates a permanent bond that will withstand repeated washings. If you’re looking for a temporary solution, you can also use double-sided tape or removable adhesive strips. Simply apply the tape or strips to the back of the vinyl graphic and press it into place on the glass surface. These methods are not as durable as using a sealant or HTV, but they will work in a pinch.
When applying vinyl graphics to glass, be sure to clean the surface first and allow the vinyl plenty of time to dry before using the dishwasher. This will help ensure that your vinyl graphic stays put and doesn’t get damaged in the wash.
Does Circuit Vinyl Come Off When Washed?
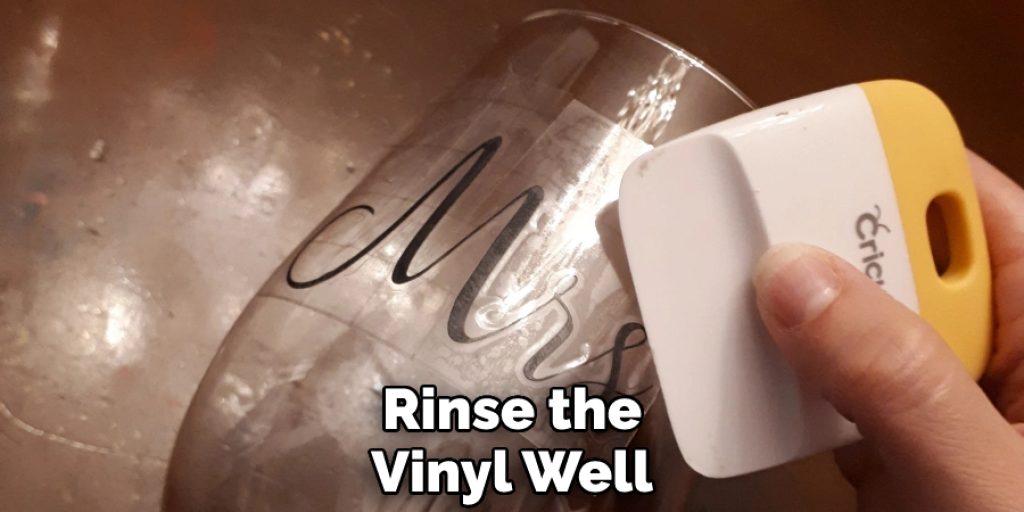
If you wonder if circuit vinyl comes off when washed, the answer is no. However, you will want to seal it before washing to help prolong its lifespan. You can do this by spraying a sealant on both sides of the vinyl and letting it dry. You can also buy a product specifically for sealing circuit vinyl. To wash your circuit vinyl, start by dusting it off with a soft cloth. If there is any dirt or grime build-up, you can gently scrub it with a mild soap and water solution.
Rinse the vinyl well and let it air dry. Once it is dry, you can apply a new sealant layer if desired. When not in use, be sure to store your circuit vinyl in a cool, dry place. If possible, keep it in an airtight container to prevent dust and dirt from getting on it. Once sealed, you can wash your circuit vinyl as normal. If you take care of it properly, circuit vinyl can last for years.
Conclusion
By sealing the vinyl, you are ensuring that it will last many years. There are several products on the market that you can use to seal your vinyl, but we recommend using a product that is specifically designed for this purpose. You can find these products at your local hardware store or online. Follow the instructions on the product carefully, and be sure to test it in an inconspicuous area before applying it to your vinyl.
In conclusion, sealing your vinyl on glass is a great way to prolong the life of your investment. By taking the time to properly clean and seal the vinyl, you can ensure that it will last for many years to come. We hope this article has been beneficial in learning how to seal vinyl on glass. Make sure the precautionary measures are followed chronologically.