
How to Shrink a Knitted Hat
There are many different ways to shrink a hat. Some methods work better with certain types of yarns than others. The most common form is washing the hat in hot water and drying it on high heat, which can damage some yarns. For instance, wool is susceptible to wetting and should never be washed or soaked before felting; you’ll ruin your project!
A quicker way to shrink a hat is by putting it in the dryer with an old tennis ball or two for about ten minutes. Of course, you’ll want to check on it periodically not to overheat the hat, but after ten minutes, most hats will have shrunk enough for smaller heads. If you want to know more on how to shrink a knitted hat, then read this blog post.

13 Ways on How to Shrink a Knitted Hat:
Here are some step-by-step guides on how to shrink a knitted hat.
1. Use Hot Water
Fill a pot with enough water to cover the hat and heat it on high. When steam rises from the pot, remove it and submerge the hat in hot water for one minute. Pull out the hat, wring the water out of it as best as possible, and let it cool.
2. Use a Pot
Like the method used for shrinking sweaters, submerge the hat in hot water. Ensure all of the lace and embellishments are clipped off the hat before you put it underwater, or they will likely be ruined.
Before taking your hat off of the towel, place it on a table or another flat surface and let it dry for a few minutes. You’ll end up with an ugly, floppy hat that resembles a weird bowl rather than the lovely headwear you started with.
3. Use an Iron
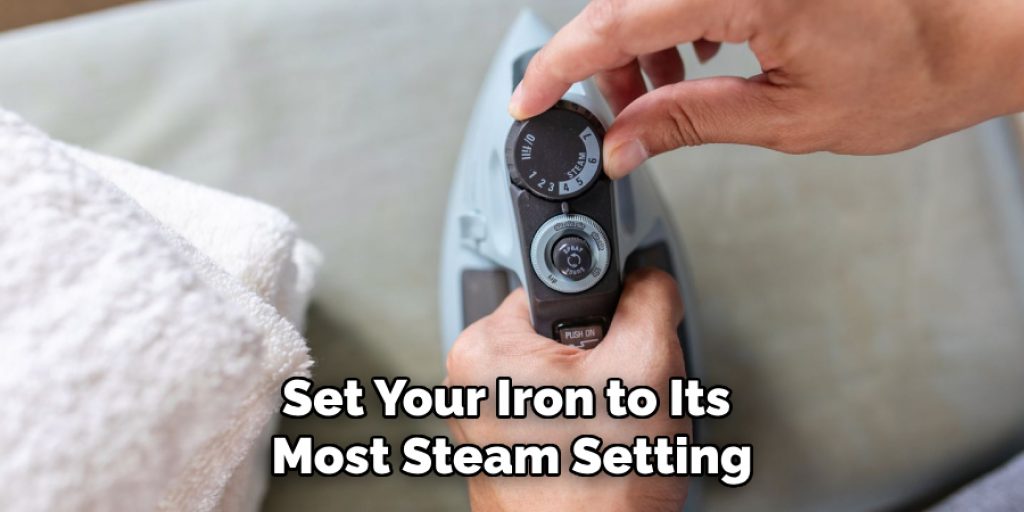
Place your wet hat on top of a towel and then cover it with another one. Set your iron to its most steam setting, and press it firmly on the towel around the hat. Steam will permeate through the fabric and begin to shrink your hat immediately. Continue this process until you have achieved a snug fit.
4. Use a Blow Dryer
Many people read that one of the easiest ways to shrink hats is with a blow dryer, but they don’t realize that it can seriously damage your hat if you aren’t extremely careful. Only use this method if you are confident in what you are doing.
Let the air blow around the hat naturally for several minutes, or try using your hand to help direct it (with your fingers spread out). Keep increasing the blow dryer’s heat until you feel the hat start to shrink.
5. Get It Wet and Throw it in the Washing Machine
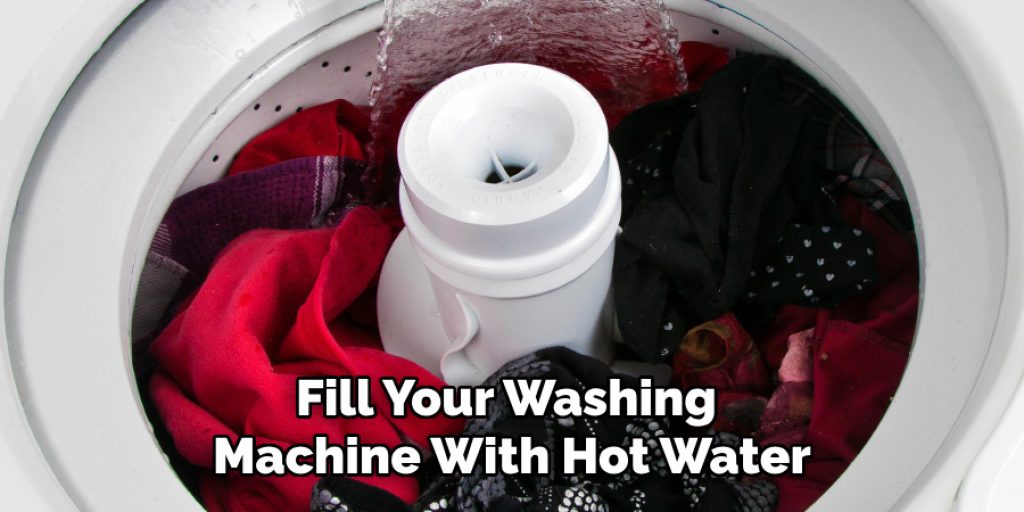
There are several ways to do this, but they all work in essentially the same way. Fill your washing machine with hot water and throw your hats inside. Let them soak for half an hour, and then put the setting on the spin. This will wring out most of the water from your hat. Repeat this process until you have achieved your desired fit.
6. Put It in a Dryer
Once again, this method is very similar to shrinking sweaters. Fill a dryer with a hot washer full of towels and set it for ten minutes. When the cycle is finished, remove your hat and lay it flat on a towel to air dry.
Keep repeating this process until you achieve the correct size hat. Make sure that before you do this method of shrinking a cap, all embellishments have been removed from the fabric as the heat will likely ruin them in the dryer.
7. Steam It
This method will leave your hat steam-pressed or curled, so be sure only to use it if you want this desired effect. Fill a pot with enough water to cover the hat and bring it to a boil on mid-high heat.
Once boiling, place the hat on a wire rack and lower it into the pot so that all the stitching and embellishments on your hat are away from the boiling water. Keep the hat in this position for about five minutes or until you see steam rising from it. Once this happens, pull it out of the pot and lay it flat on a towel to dry.
8. Use Damp Towels
Start by wetting your hat and then placing it on a hard surface. Cover it with a dry towel, and then place another wet towel over the top of that one. Smooth out any wrinkled areas as best as possible, and set your iron to medium heat without steam.
Press your iron firmly for about 3-5 minutes, or until you start to see steam rising from the towel. Then, remove your iron and continue this process until you feel that the hat is no longer shrinking.
9. Sew It
This method takes a little bit of patience, but it will help your hat fit better if you don’t want to go through several washes or shrink-wrap methods beforehand. Start by measuring a strip of your old towel that is twice as wide as you enjoy the circumference of your hat to be.

Sew this strip around the brim and about half an inch from where it meets. Now, wrap the material tightly around the inside of your hat until you have reached the opposite end, then sew that side down securely.
10. Use a Shower Curtain Ring
This method is very similar to the previous one, although it will give your hat an even snugger fit that is more suitable for sports or working out. First, measure your towel strip and sew all of the edges except one.
Run this strip through a shower curtain ring, and then run the strip through the gap you left open. Now, pull on the ends of the strip to tighten it around your head until you feel that you have achieved a comfortable fit.
11. Sew a Button On Your Hat
This method is also effective if you don’t want to sew another ring on your hat. Buy two buttons slightly smaller than your hat’s circumference, and sew one at either end on top of the brim. Now you can thread a strap or band through them to create an adjustable hat band that will help you achieve a secure fit every time it is worn.
12. Double Knot and Cut Off Excess
This is a very simple method, and it will give your hat a snug fit without any sewing at all. Simply make a double knot in the back of your hat and cut off the excess strings. Now you have an adjustable hat band that can easily be made shorter or longer by simply retying the knot at either end.
13. Use a Flat-Felled Seam
A flat-felled seam is a type of stitch that will help your hat keep its shape and prevent it from stretching out over time. To do this, first, measure the circumference of your head just above your eyes. Now, take a piece of scrap fabric and cut it to sew a straight line from the seam just flat to the edge of your hat brim. Make sure that you don’t sew it closed all the way around and leave about half an inch open at either end.
Once this is done, flip one side of the hat inside and flatten it where you sewed it closed; make sure that this seam is flat and even. Now, fold one of the fabric’s ends inside itself so it can be sewn closed, and then repeat this process with the opposite side of your hat. Once finished, try on your hat to see if it fits you correctly.
You Can Check It Out To Cable Knit Without a Cable Needle
Tips to Maintain Your Knitted Hat:

Suppose you have to go through the above section, then you know how to shrink a knitted hat. Here we will give you some tips to maintain your knitted hat.
1. You can wash your hat in the gentle cycle. Please don’t use bleach or fabric softener; don’t put it in a dryer!
2. Remove excess water by rolling it up in a towel and pressing to remove most water. Place on a flat surface covered with towels, reshape to its original shape while still damp, and air dry thoroughly.
3. When the hat is dry, place it bottom side up on a flat surface covered with towels or padding like cardboard or a book. Next, place an upturned bowl (upside down) over the front of the hat and press lightly. This will maintain your nice round crown for more extended periods.
4. Try not to handle the yarn too much as it may become fuzzy. If you need to take or play with your hat, use your pointer finger and thumb only, giving the yarn a slight downward tug rather than twisting it around your fingers.
5. Remember that the yarn is being stretched to its limits during the knitting process. Since cables are solid, it’s better not to pull at one section of the hat for very long as it will cause an unsightly bag or puckering effect on your finished work.
Conclusion:
In summary, there are a few different ways to size down your hat by knitting it in the round. The most popular methods include using smaller needles and yarn with fewer stitches per inch, changing needle sizes, and decreasing the number of matches by one.
If you’re unsure which method will work best for you, we recommend testing out each technique on some scrap yarn first! You can also ask someone at your local craft store how they would go about shrinking their hats before making any decisions. We hope this blog post on how to shrink a knitted hat has been helpful. Let us know your thoughts in the comment section below!
Nancy Behan
Nancy is an embroidery artist, fashion blogger and a full time editor at DIY quickly. Nancy edits the fashion section on DIY quickly, focusing on the embroidery and cross stitch articles, alongside with fabric and other costume design elements. She graduated from the University of Michigan with a Bachelor of Arts in Art History. She loves to work on her own projects, read books and watch romantic movies in her spare time.


