How to Smooth Textured Ceiling
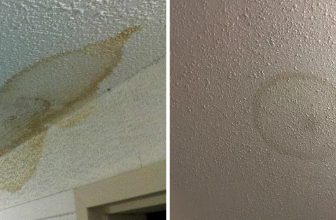
There are several reasons why you may want to learn to smooth textured ceiling. The most common reason is that it can significantly improve the appearance of your home or any other building with a textured ceiling. Textured ceilings, also known as popcorn ceilings, were popular in the 1950s and 1960s but have now become outdated and unappealing to many people.
The main advantage of knowing how to smooth a textured ceiling is that you can improve the overall look and feel of a room. Textured ceilings are often used in homes due to their cost-effectiveness, but they can be difficult to clean and maintain. By learning how to smooth out these ceilings, you can create a more modern and polished look for your space. In this blog post, You will learn in detail how to smooth textured ceiling.
Step-by-step Instructions for How to Smooth Textured Ceiling
Step 1: Inspect the Ceiling
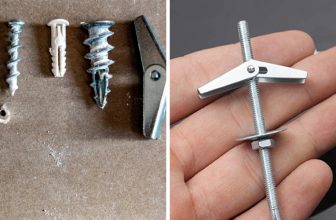
Before you begin smoothing a textured ceiling, it’s important to inspect its condition. Check for any cracks, water damage, or uneven areas that may need repair before starting the process. To smooth a textured ceiling, you will need supplies such as drop cloths, safety goggles, dust mask, canvas tarp, paint roller with a long handle, paint tray, joint compound, and a drywall knife. Make sure to have all the necessary supplies before starting the process.
Step 2: Prepare the Room
Cover the floor with drop cloths and move any furniture out of the room. Use canvas tarps to cover larger pieces that cannot be moved. This will protect your belongings from any dust or debris that may fall during the process.
Wearing safety goggles and a dust mask is important to protect your eyes and lungs from any particles that may be released during the smoothing process. It’s also a good idea to wear old clothes that you don’t mind getting dirty.

Step 3: Clean the Ceiling
Start by vacuuming or wiping the ceiling to remove any dust or debris. This will ensure that the joint compound adheres properly and results in a smooth finish. Follow the instructions on the joint compound packaging to mix it with water until it is a thick, creamy consistency. This mixture will be used to fill in the textured surface.
Step 4: Prime the Ceiling
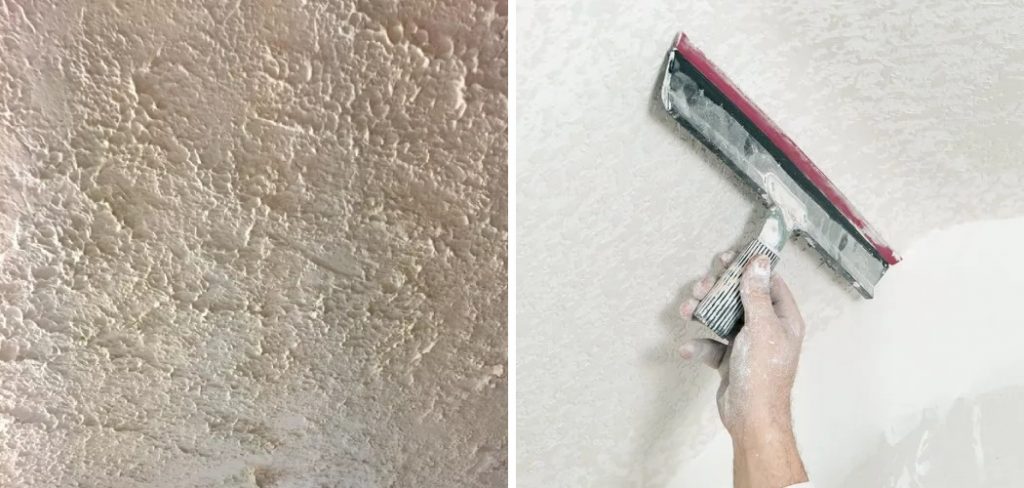
Using a paint roller, prime the ceiling with a coat of primer. This will help the joint compound adhere better and prevent any stains from bleeding through. Using a drywall knife, apply the joint compound to the ceiling in thin layers. Start from one side of the room and work your way across, smoothing out any bumps or uneven areas as you go.
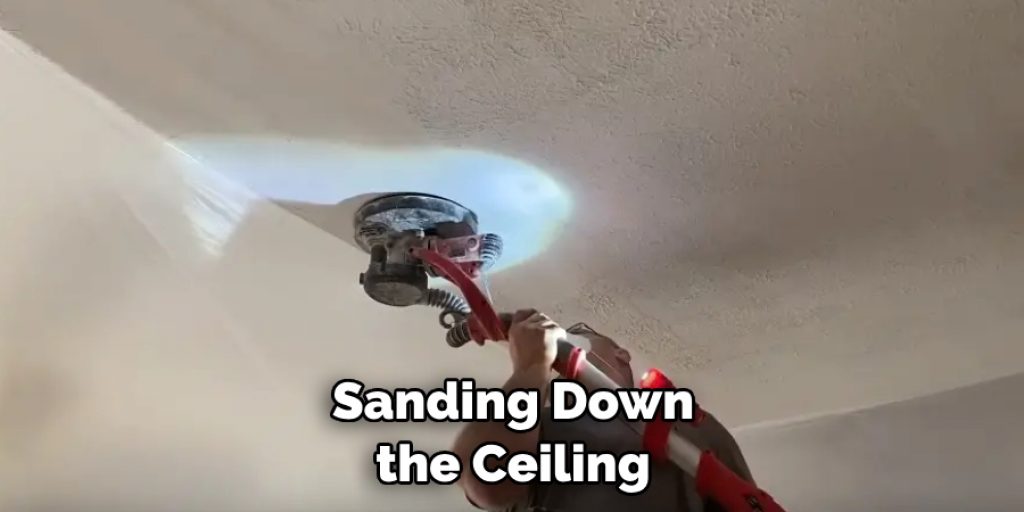
Step 5: Sand the Ceiling
Once the joint compound has dried, use a sanding block or drywall sander to smooth out any imperfections. Make sure to wear a dust mask while sanding to protect yourself from inhaling any particles. Depending on the texture of your ceiling, you may need to repeat the process of applying joint compound and sanding until you have achieved a smooth surface.
Step 6: Paint the Ceiling
Once the ceiling is smoothed out, prime it again with a coat of primer and then paint it in your desired color. Use a high-quality paint to ensure a smooth finish. After the paint has dried, remove any drop cloths and tarps from the room. Vacuum or sweep the floor to remove any dust or debris.
Precautions for How to Smooth Textured Ceiling
- When working with ladders to reach the ceiling, make sure they are on stable ground and secure against the wall.
- Wear protective gear such as gloves, goggles, and a mask to prevent any injuries or inhalation of dust particles.
- Before beginning work, cover all furniture and floors in the room with plastic sheets or drop cloths to protect them from dust and debris.
- If using any tools or products, make sure to read and follow the instructions carefully.
- Consider turning off the power in the room before beginning work on the ceiling.
- If working with drywall compound or joint compound, wear a respirator mask to protect against dust inhalation.
- When sanding down the ceiling, use a vacuum equipped with a HEPA filter to trap all the dust particles.
These precautions are important to ensure your safety and wellbeing while completing the task of smoothing a textured ceiling. By following these tips, you can minimize potential hazards and create a safe working environment for yourself.
Can You Smooth a Textured Ceiling Without Hiring a Professional?
Many homes have textured ceilings, also known as popcorn or stucco ceilings. While these ceilings were once popular for their acoustic properties and ability to hide imperfections, they are now considered outdated and unattractive by many homeowners. As a result, many people look for ways to smooth out the texture on their ceilings in order to achieve a more modern look.
In the past, the only way to smooth a textured ceiling was to hire a professional contractor who would apply layers of joint compound and sand it down until it was completely smooth. However, this process can be messy, time-consuming, and expensive.
Fortunately, there are now alternative methods that homeowners can use to achieve a smooth ceiling without having to hire a professional. Let’s take a look at some of the best methods for smoothing a textured ceiling.
What Are Some Common Mistakes People Make When Attempting to Smooth a Textured Ceiling?
When it comes to home renovations, one of the most daunting tasks can be smoothing out a textured ceiling. Whether you’re looking to modernize your space or just tired of dealing with dust-trapping popcorn ceilings, this can seem like an overwhelming project.
However, before jumping in headfirst, it’s important to know some common mistakes that people make when attempting to smooth a textured ceiling. By avoiding these errors, you can save yourself time, money, and a lot of frustration.
One of the biggest mistakes people make is not properly preparing the surface before beginning to smooth out the texture. It’s important to thoroughly clean the ceiling and remove any loose debris or paint before starting. If you skip this step, your smoothing efforts may be hindered by bits of debris, and the results will be less than desirable.

Another mistake is using the wrong tools or materials. It’s important to do your research and find out exactly what you’ll need for your specific project. For instance, some textured ceilings may require a special primer or paint to achieve a smooth finish.
Are There Different Techniques for Smoothing Different Types of Texture?
Yes, there are different techniques for smoothing different types of texture on ceilings. The technique you use will depend on the type of texture and the desired end result. Some common types of textured ceilings include popcorn, stucco, skip trowel, and knockdown. Each of these textures requires a specific method for smoothing.
For example, if you have a popcorn ceiling, you will need to scrape off the texture with a scraper or drywall knife. This can be a messy and time-consuming process, but it is necessary for achieving a smooth surface.
On the other hand, if you have a stucco ceiling, you may need to use joint compound or spackle to fill in any gaps or cracks before sanding it down to create a smooth finish. For skip trowel and knockdown textures, you may need to use a joint compound or drywall mud to fill in any holes or uneven areas before sanding it down and applying a new layer of texture.
Are There Any Health Risks Associated With Smoothing a Textured Ceiling?
As with any home improvement project, safety should always be a top priority. It is important to note that smoothing a textured ceiling can expose you to various hazards such as dust and debris. Before starting the project, it is advisable to wear protective gear such as goggles, gloves, and a face mask to prevent any potential health risks.
For example, popcorn or stucco textures may require more aggressive methods such as sanding or scraping, while a textured plaster ceiling may require more delicate techniques like skim coating.
It is important to research and understand the type of texture on your ceiling before attempting to smooth it. This will not only ensure that you use the correct technique, but it will also help you prepare for any potential challenges or complications. Regardless of the type of texture on your ceiling, there are a few basic steps that can be followed to smooth it out.
These include thoroughly cleaning the surface, filling in any cracks or holes with spackle or joint compound, sanding down rough areas, and applying a primer before painting.

Conclusion
In conclusion, having a textured ceiling in your home may have been trendy at some point, but the time has come to say goodbye. Removing and smoothing out a textured ceiling is not only beneficial for aesthetics, but it can also improve the overall value of your home.
We explored various methods on smoother textured ceiling such as scraping, skim coating, and covering with drywall. While each method has its advantages and disadvantages, it ultimately depends on the condition of your ceiling and personal preference. It’s important to note that smoothing out a textured ceiling is not an easy task and may require professional help.
However, with some patience and determination, this can be a rewarding DIY project. I hope this article has been beneficial for learning how to smooth textured ceiling. Make Sure the precautionary measures are followed chronologically.
Angela Ervin
Angela is the executive editor of DIY quickly. She began her career as an interior designer before applying her strategic and creative passion to lifestyle and home. She has close to 15 years of experience in creative writing and online content strategy for housekeeping, home decorations as well as other niche efforts. She loves her job and has the privilege of working with an extraordinary team. She lives with her husband, two sons, and daughter in Petersburg. When she's not busy working she spent time with her family.