
How to Solder Around a Stone
Crafting comes in various ways with various items. If you love crafting, you may have heard about stone soldering. The stones in jewelry are soldered to make them into different shapes and use them for fitting is various types of jewelry. If you want to learn how to solder around a stone, then keep reading ahead as we are about to tell you the basic way you can do it. But before you can start with the project, we should warn you there is some danger in doing so and you need to be careful. Also, soldering a stone can end up ruining it, so you better keep these facts in mind.
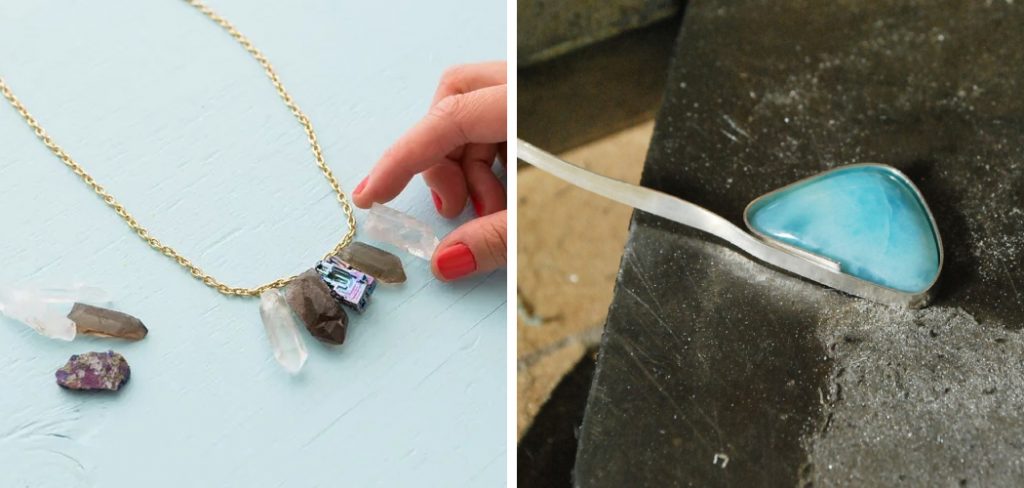
DIY: How to Solder Around a Stone
You should already know that you will need some equipment before putting your hand on a crafting project. To learn how to solder around a stone, you need the following items with you-
• The stone
• Desk vice
• Solder wire
• Leather scraps
Steps to Follow
Step 1
The first step is to find all the equipment you need. You can’t start the project without all the materials, and it won’t go smoothly if you try to collect them halfway through. So make sure you have everything you need, and that it’s all working, before you start the project.
Step 2
In order to correctly solder two pieces of metal together, you must first wrap the metal you are going to use around the stone. Make sure that the pieces fit snugly and are secured before proceeding. Next, overlap the two pieces of metal that will form the joint of the soldering. This will ensure a strong connection between the two pieces.
Step 3
In order to solder around a stone, you need to first secure the stone and the metal wrap around the disk in a vice. This will make it easier to solder the project later on. If you are new to this, you should practice using these instruments with something else before attempting the main project.
Step 4
You need to plug in the soldering iron a few minutes before you start using it. Let it heat up for at least three minutes.
Step 5
Take out the wire from the spool and extend it by three inches, at least. Take the wire to the soldering iron and get the soldering melt onto the tip. You need to have a proper idea of how much of these you will be needing. Now, before you start making the sockets, you need to make sure that your copper wire is available in good condition. In case it isn’t, you might have a hard time completing the project, as it will be difficult to adhere to the surface and cut through the wire.
Step 6
Take the solder around the one you want to work with and roll it in place. You need to make sure that you do enough to join the joint securely. Let it sit for 30 seconds.
Step 7
Run the soldering iron over the joint to smooth everything correctly, and you will be done.

Final Thoughts
That was all for how to solder around a stone. Hopefully, our tips will help you to get your soldering stone to perfection without facing any problem. Or, at least you can practice enough to learn.
You may read also – How to Solder Rings Together
Elizabeth Davis
Elizabeth is a creative writer and digital editor based in the United States. She has a passion for the arts and crafts, which she developed from a young age. Elizabeth has always loved experimenting with new mediums and sharing her work with others. When she started blogging, she knew that DIYquickly would be the perfect platform to share her tutorials and tips. She's been writing for the blog from the beginning, and her readers love her helpful advice and easy-to-follow instructions. When she's not writing or editing, Elizabeth enjoys spending time with her family and friends.


