How to Use an Oil Burner Pipe
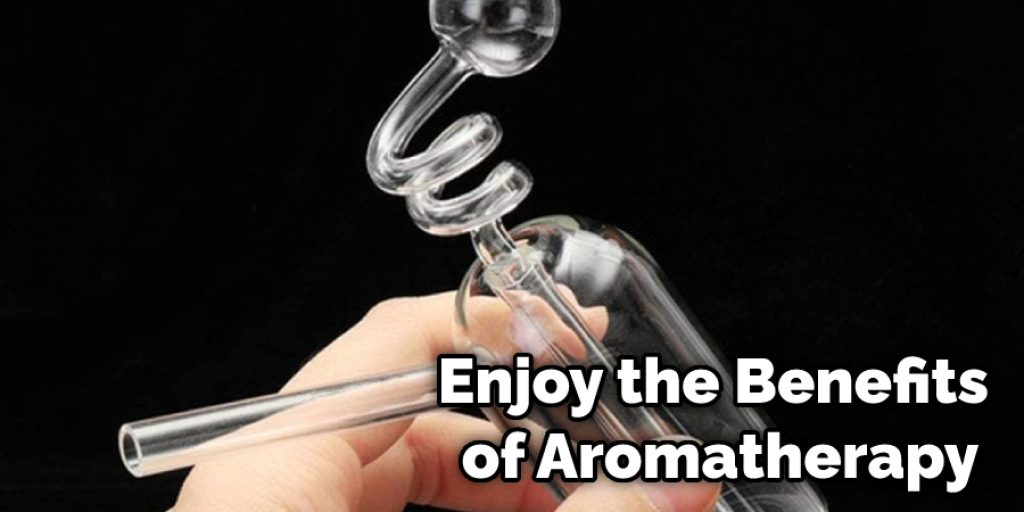
Oil burners are a great way to heat your home and provide fragrance simultaneously. By using an oil burner pipe, you can increase the efficiency of your oil burner and get the most out of your aromatherapy experience.
However, many people don’t know how to use them properly. In this blog post, we will discuss how to use an oil burner pipe and some of the benefits of using one. We will also provide tips for choosing the right essential oils for your needs. Keep reading to learn more!
What is an Oil Burner Pipe?
An oil burner pipe is a device used to heat up essential oils or wax melts in order to release their fragrance into the air. It usually consists of a bowl, where you place your essential oils or wax melts, and a heating element underneath the bowl.
The heating element can be powered by electricity, tea light candles, or even a small flame. As the heat rises, it melts the oils or wax and releases their aroma into your home. It is similar to using a scented candle but with the added benefit of being able to customize your own fragrance.
Why Use an Oil Burner Pipe?
There are several benefits to using an oil burner pipe. The most obvious one is that it allows you to create your own unique fragrance blends by mixing different essential oils together. This can be a fun and creative way to enhance your home environment.
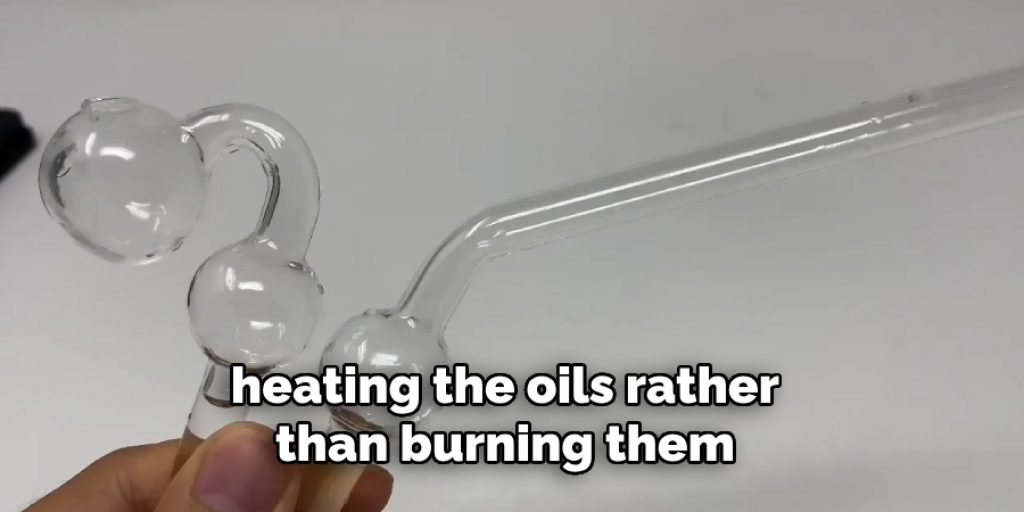
In addition, heating the oils rather than burning them, as with candles, preserves more of their therapeutic properties. This makes oil burner pipes a popular choice for aromatherapy purposes.
Moreover, using an oil burner pipe is also a more cost-effective option in the long run. Unlike scented candles that need to be replaced after each use, essential oils and wax melts can last much longer when heated in an oil burner pipe.
8 Benefits of Using Oil Burner Pipe:
1. It is easily available
2. It gives a smokeless heat
3. It can be used in bathrooms, kitchens, cars, and even wardrobes
4. A little bit of oil goes a long way
5. You can use it to produce aromatic fragrances in your room
6. Oil burners are eco-friendly products that do not produce harmful emissions
7. You can also purchase them in different colors for a decorative effect
8. Oil burners are inexpensive to buy, making them an affordable option compared to other heating options.
Needed Materials:
Before using an oil burner pipe, you will need to gather some materials. These include:
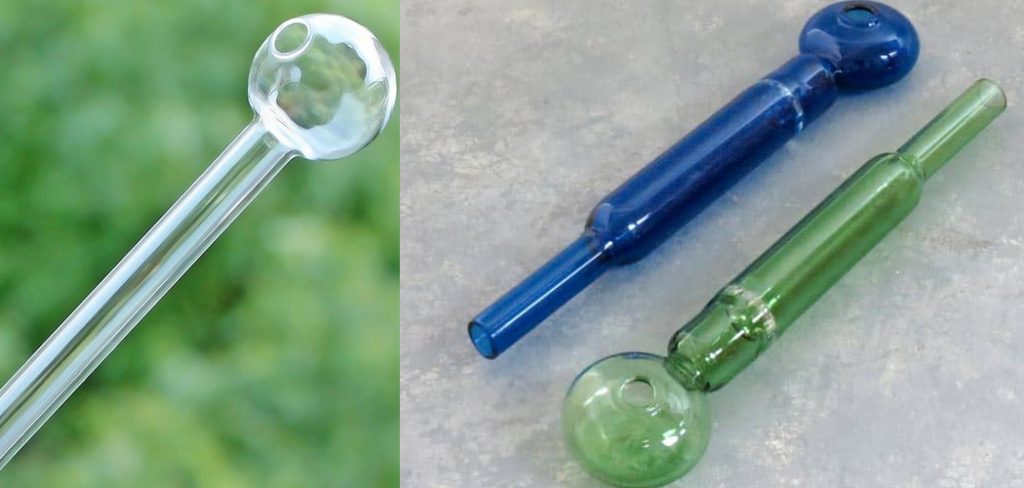
An Oil Burner Pipe:
This is the most essential item on the list. You can purchase an oil burner pipe from a local store or online.
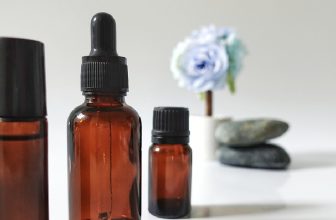
Essential Oils or Wax Melts:
These are the fragrances that you will be using with your oil burner pipe. They come in a variety of scents, so choose ones that suit your preference and mood. Some popular essential oils include lavender, eucalyptus, and peppermint.
Lighter or Matches:
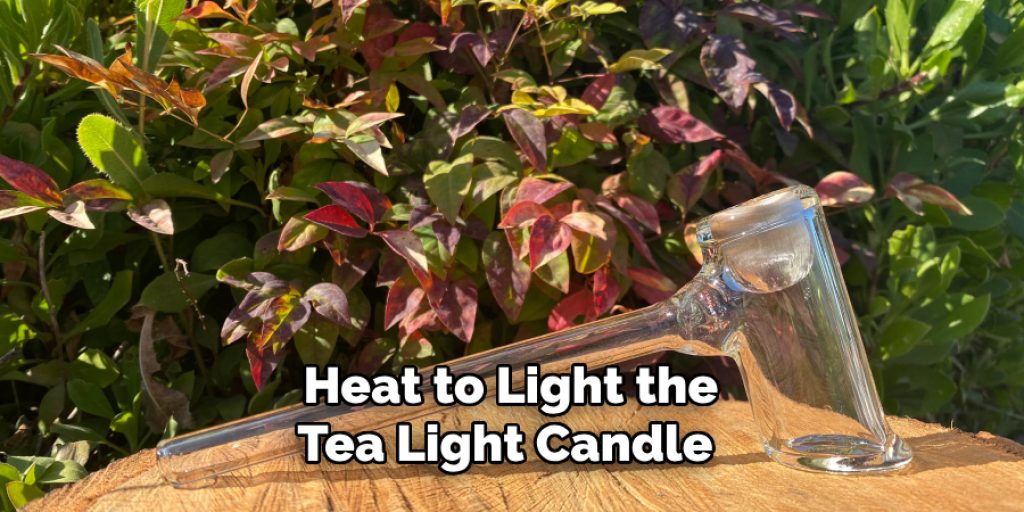
You will need a source of heat to light the tea light candle or heating element in your oil burner pipe.
Now that you have everything you need let’s dive into how to use your oil burner pipe effectively!
Instructions: How to Use an Oil Burner Pipe
Step 1: Pick Your Oil Burner
Select one of many oil burners available on the market. Oil Burner Pipes are an excellent choice for vaporizing and smoking oils and concentrates, and they can be found in a variety of unique styles and colors. Be sure to choose the one that fits your needs and aesthetic preferences. You can also have multiple oil burners to switch up scents or use them in different rooms.
If you’re using an oil burner pipe with a tea light candle, make sure to place it on a heatproof surface and away from any flammable objects. You don’t want any accidents while enjoying your aromatic experience!
Step 2: Locate the Wick-hole
Many oil burners have a hole in the bottom of the pipe. This is where you will pour your oils or concentrate on being vaporized. Make sure to line up the hole with the heating element underneath. Otherwise, the heat will not reach your oils or wax melts. It’s also important to not overfill the bowl. A few drops of oil or a small wax melt is enough to release a powerful scent. You can always add more if needed. You don’t want to waste any excess oil or have it spill over.
But be careful not to get any oils or wax on the heating element, as this can cause a fire hazard. You can also use a small amount of water in the bowl to create a barrier between the heating element and your oils, just in case.

Step 3: Pour Your Oil
Pour your oils and concentrates into the oil burner pipe’s wick-hole. Some glass pipes may require you to apply more force than normal to pour your oil/concentrate evenly, but this is normal if it does not happen easily. If you’re using wax melts, simply place one in the bowl. This method works the same way as using essential oils, but it also adds a decorative touch to your oil burner pipe.
You can also mix and match different oils or wax melts to create your own custom fragrance. This is where the fun of using an oil burner pipe comes in! But be sure to use oils or wax melts that are safe for use with oil burner pipes. Not all scented products are meant to be heated, so make sure to read the labels.
Step 4: Heat the Oil Burner Pipe
Once you have filled the pipe with oil or concentrate, turn on your butane torch, heat up the outside of your oil burner pipe lightly for about 5 seconds, and then blow out the flame. The flame should not touch the inside of the glass during heating.
You can also use a tea light candle placed underneath the bowl as a heat source. Just make sure to keep an eye on it and never leave it unattended. It’s always better to be safe than sorry. But if you want a safer alternative, you can also purchase an electric or battery-powered heat source for your oil burner pipe.

Step 5: Light the Wick
Light the wick once your oil burner pipe is filled with oils/concentrates. Lighting the tip of the wick will allow your burner to heat up faster, which means getting vaporizing or smoking more quickly. It may be difficult to get a flame to stay on the wick when you are first starting, so try turning your torch up higher.
But be careful not to overheat your oil burner pipe. You don’t want the glass to crack or shatter. You can also regulate the heat by moving the flame closer or further away from the bowl. It may take a few tries to find the perfect balance.
Step 6: Inhale Slowly and Steadily
Inhale slowly and steadily from the oil burner pipe until you have reached your desired high. If you do not inhale long enough, it will be hard for vaporizing/smoking to occur. This may happen if you inhale at a fast pace or rush things and do not allow vaporizing/smoking time to occur before you finish inhaling.
It’s also important to not inhale too quickly or take in more than you can handle. The effects of oils and concentrates can be powerful, so start with small amounts and gradually increase as needed. You can always take more if you want, but you can’t “un-inhale” what you’ve already taken in.
Step 7: Exhale and Repeat (Optional)
After inhaling, remove the flame from your oil burner pipe and exhale slowly. You can also repeat steps 5-6 if you want more vapor/smoke. But be mindful of how much you’ve already inhaled to avoid overdoing it. You can always come back to your oil burner pipe for another session.
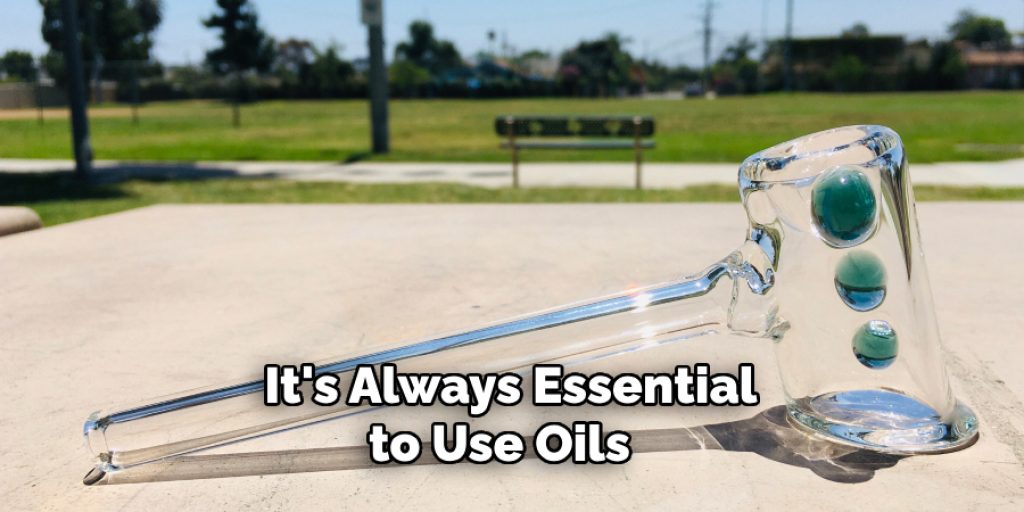
But remember, it’s always essential to use oils and concentrates responsibly and in moderation. Too much inhalation can be harmful to your health. It’s also important to clean your oil burner pipe after each use to maintain its effectiveness and avoid any build-up of oils or wax.
Step 8: Clean Your Oil Burner Pipe
Once youre done using your oil burner pipe, make sure to clean it for future use. You can do this by pouring out any remaining oils or concentrates, wiping down the bowl with a damp cloth, and letting it air dry. This will prevent buildup and ensure that your next scent experience is just as enjoyable!
With these simple steps on how to use an oil burner pipe, you can now effectively use your oil burner pipe to enjoy the benefits and aromas of essential oils, eucalyptus, and peppermint. Remember to always be careful when using open flames and heating devices, and enjoy your personalized aromatic experience!
Some Helpful Tips and Advice:
- Make sure to use a small dish or metal container that can fit inside the burner pipe.
- Be extremely careful when lighting the oil, as it can easily light up your stove top if spilled.
- Don’t place yourself directly above the flame, and make sure that you read all instructions and cautions before using the burner.
- Oil burners work best when used to heat a room, and cannot be used for cooking purposes, just safety measures!
- Be sure that you follow all product instructions and warnings as stated by the manufacturer of the oil burner pipe (most likely, they will need to be cleaned regularly, and they should not be used if the burner is boiling)
- Most oil burners come with a lid or top, so please use them! This will help prevent any accidents from happening and increase the life of your pipe.
- Do not place your face above the stove top or directly above where you are burning the oil. This can lead to accidents and possible burns.
- Never leave your oil burner pipe unattended while in use. Always make sure to turn off the heat source when you are finished using it.
- Keep your oil burner pipe out of reach of children and pets. The oils and concentrates can be harmful if ingested, so it’s important to keep them away from curious little hands or paws.
- Experiment with different oils and wax melts to find your favorite scents and combinations of fragrances.
- Don’t be afraid to try different methods and techniques for heating your oil burner pipe. Some people prefer using a tea light candle, while others prefer an electric heat source. Find what works best for you.
- Don’t forget to also clean your oil burner pipe regularly to maintain its efficiency and avoid any potential health hazards.

How Long Do Oil Burners Last?
Oil burners are long-lasting. The average oil burner should last at least 2 to 3 years before it has consumed all of its fuel. Eventually, most oil burners begin to produce a gurgling sound when they are lit or will stop producing heat altogether. When you find that your oil burner is no longer working as it should, then it’s time for a replacement. Before removing the old oil burner from your fireplace, you’ll need to buy a replacement.
Since the point of an oil burner is to channel heat from its opening up into the chimney flue, it makes sense that buying a new one would be as simple as purchasing a tube-shaped device made for this exact purpose. However, if you don’t know what to look for when buying a new oil burner, it can be hard to tell the difference between what products are made for the job and which ones are regular pieces of hardware posing as an oil burner.
Are Oil Burners Easy to Maintain?
Oil burners are incredibly easy to maintain. Every oil burner comes with a small metal rod that will stop the flow of oil and prevent any further use until it is removed again when inserted into the top of the oil burner. Using an oil burner is as simple as inserting and removing the metal rod.
To receive the benefits of an oil burner, it needs to be lit and left to burn for a few minutes so that the smell can waft around your room and settle on your clothing. Once you have done this, leave it for half an hour or so you have done before going into the room where you have lit the burner pipe.
Frequently Asked Questions:
Q: Can I Use Any Type of Oil in an Oil Burner Pipe?
A: While you can technically use any type of oil, it is recommended to use essential oils specifically made for aromatherapy and safe for inhalation. Other types of oils may not produce the desired scent or could be harmful if inhaled. You can also use concentrated oils or waxes made for smoking in an oil burner pipe.
Q: How Does an Oil Burner Pipe Work?
A: An oil burner pipe works by heating up the oils or concentrates using a wick and heat source, such as a butane torch. The hot air from the flame vaporizes the oils, creating a fragrant scent or producing smoke for inhalation. The piping and design of the oil burner also help to control the heat and airflow. You can adjust the intensity of the heat and inhalation by controlling the flame and your breathing.
Q: Is It Safe to Use an Oil Burner Pipe Indoors?
A: It is generally safe to use an oil burner pipe indoors, but you should always follow the manufacturer’s instructions and take necessary precautionary measures. Make sure to use a stable surface and avoid leaving the burner unattended while lit. Also, be mindful of any potential flammable materials nearby. Ultimately, safety is the user’s responsibility when using an oil burner pipe indoors.
Q: How Do I Clean My Oil Burner Pipe?
A: To clean your oil burner pipe, you can use rubbing alcohol or specialized cleaning solutions made for smoking pipes. Simply soak the pipe in the solution and scrub any leftover residue gently with a pipe cleaner. Rinse thoroughly with water and dry before using again. It is recommended that your oil burner pipe be cleaned after every use to maintain its functionality and longevity.
Conclusion:
Oil burner pipes are a great way to get the most out of your essential oils. Using an oil burner pipe, you can enjoy the benefits of aromatherapy while also enjoying the therapeutic effects of heat. In this blog post, we have discussed how to use an oil burner pipe so that you can start reaping the rewards yourself.
The first step is to choose the right essential oil for your needs. There are many different essential oils available, and each one has its unique properties. Choose an oil that matches your desired outcome. For example, consider using lavender oil if you want to relax and de-stress. We hope this blog post has been helpful. If you have any questions or want to know more, then feel free to comment below!