
How to Wax Canvas With Beeswax
Waxed canvas is ideal for different types of outfits like jackets, backpacks, coats, and much more. It not only extends the lifespan of these items but also enables them with an elegant look. Above all, waxed canvas makes them completely waterproof, and that’s the main reason for its popularity. Although the waterproof feature will not allow you to submerge your bag completely underwater but it will at least save them from the raindrops. Anyway, let’s come to the point do you know how to wax canvas with beeswax? If not, then you maybe you have come here searching for its process. Luckily, you have landed in the correct place because I am going to show you how exactly to use wax canvases. So, leave all your tasks for a couple of minutes and concentrate on the article.

There are several ways of making wax canvases, but I am going to use the beeswax for this purpose. Beeswax is naturally produced by bees and great to be used on the fabrics. Its beneficial components are way more essential for this purpose. You can simply buy them from your nearest shop or from different online stores. Okay, we have talked much, now without any delay, let’s dive in!
Things You Will Need
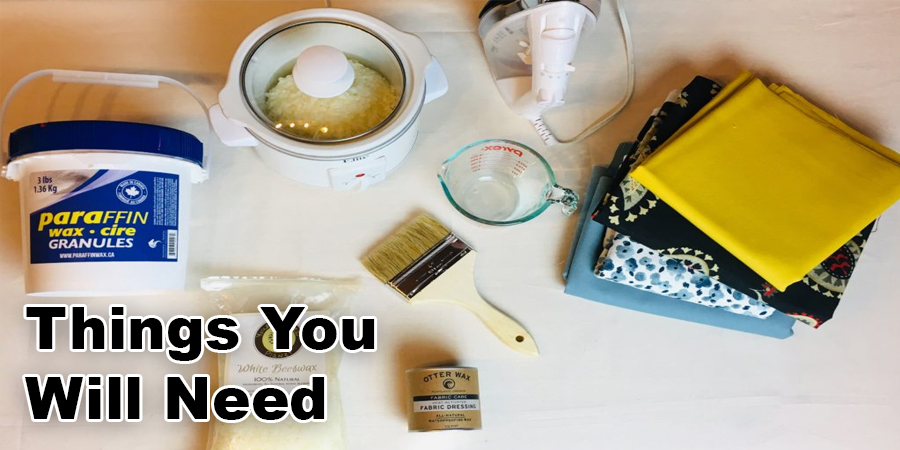
1. A work surface covered with two layers of cardboard (the cardboard is for protecting the surface of the wood table from the heat of the iron)
2. An old work towel
3. The canvas that you are going to wax
4. A mini crockpot
5. A measuring cup
6. Beeswax Pellets
7. Paraffin
8. Iron (no stem, just heat)
9. A paintbrush
How to Wax Canvas With Beeswax
Step 1:
First, turn on the crockpot and set it to high. Then, add a combination of beeswax and paraffin wax. The ratio should be four ounces of beeswax pellets for every eight ounces of paraffin wax. Let it melt for about 45 minutes.
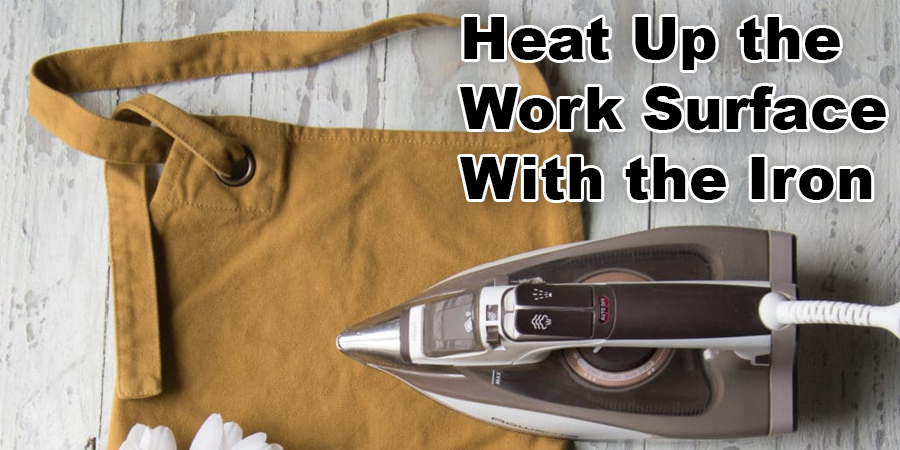
Step 2:
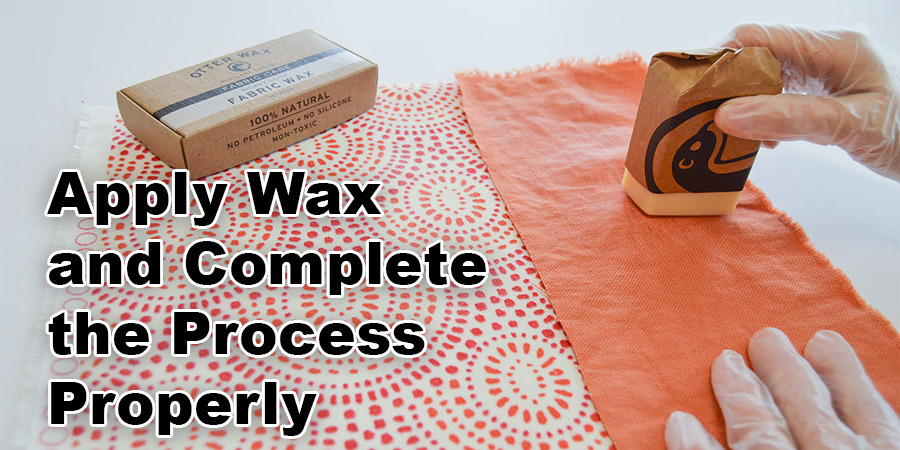
Set the iron on high heat and heat up the work surface with the iron. It will allow the wax to be set on the canvas properly. Now take the brush and pour it into the crockpot where you have melted the waxes. Then start applying the waxes to the fabric. In my case, I have one yard of canvas which is folded over on top of itself. Now, the reason for this is I am painting the top layer of the canvas because the wax is dripping through the top layer to the others.
It saves the wax from getting wasted and going into the towel and the cardboard. Another benefit of this process is that when you flip the canvas from the backside for applying wax, you will need a little amount of wax there because you already have the wax there. The wax that’s permeated the top layer will go onto the back layer.
You may see some points becoming darker than others. It is because the waxes are building up there. But you won’t have to worry about that because it will get fixed before the process ends.
Step 3:
Once you have completed applying the waxes on the top layer, you must again use the iron on that surface. So, again put the iron on high heat and just iron the area properly as I have mentioned above, no stem, and don’t let the iron sit in one place. If you somehow imprint the iron plate into the canvas, it will become hard to get out.
Step 4:
To make a waxed canvas, put some wax on one side of the canvas and spread it around. Then flip the canvas over and do the same thing on the other side. Once both sides are covered in wax, use an iron to even it out. You may need to add more wax to areas that don’t have enough.
Conclusion
Hopefully, the above process will be helpful for you, and you won’t have to ask anyone the waxing process again. If you are still confused, let me know through the comment section below.
You May Read Also. How to Wax Thread without Beeswax
Elizabeth Davis
Elizabeth is a creative writer and digital editor based in the United States. She has a passion for the arts and crafts, which she developed from a young age. Elizabeth has always loved experimenting with new mediums and sharing her work with others. When she started blogging, she knew that DIYquickly would be the perfect platform to share her tutorials and tips. She's been writing for the blog from the beginning, and her readers love her helpful advice and easy-to-follow instructions. When she's not writing or editing, Elizabeth enjoys spending time with her family and friends.


