
How to Weave a Navajo Rug on a Loom
Introduction:
Weaving is an age-old art that produces textiles on warp and weft. With traditional looms like a Navajo loom, no scissors or needles are needed to weave the rugs. Rug weaving involves knotting or drawing different color yarn together for creating patterns of other figures, designs, figures, and shapes.
Knitted creatures usually depict animals of fauna, while some may portray abstract artwork. In this article, I will discuss how to weave a Navajo rug on a loom. So let’s get started.
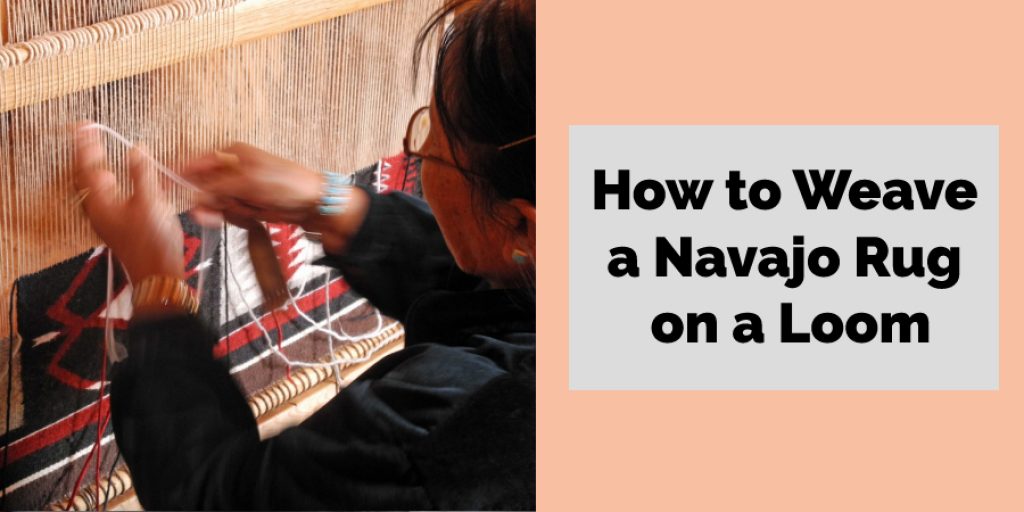
A Detailed Stepwise Guide on How to Weave a Navajo Rug on a Loom:
Materials you will need:
A loom with foundation, beam, heddles, and rear shaft. A warping board with all the pegs is nice but not necessary. The dowel rods must be 2/3 of your warp length minus 1 inch per rod. For example, one dowel rod for an 8ft warp would be about 6ft long.
You can use more or less depending on the weight you desire in the final piece. 8-12 cones of wool yarn (this depends on how big or small you want your rug to be) 4 oz tanned cowhide (you will need more if making any patterns that are not stitched by hand) Enough jute string to tie the finished rug to the dowel rods—one large nail for tacking the finished carpet to the dowel rod.
The first thing you need to do is warp your loom according to instructions included with purchasing the loom, or use your own if it is an older loom.
Once warping has been completed, you will tack down 4-6 inches of one end of warp threads on either side to prevent unraveling when stitching begins. Next, stabilize the back shaft by threading the baling wire through two holes at the top and bottom of each posts section.
Ensure there are no slack areas in heddles that could cause the weaving process to break down if tension is too loose or too tight. Now you can cut off the warp ends at the tack-downs. You will now use your loom to weave 3″ wide strips of cowhide leather for about 1ft or until you have enough to make a 9-inch strip that is as long as your finished rug will be.
Sew this on top of your warps with your jute string, making sure to start on the same side where you removed the tacks from the warp end. You are now ready to transfer patterns onto the foundation if any are desired. Once completed, remove all excess foundation threads that are not part of the pattern.
Be careful not to break them while doing so. This can be done by gently shaking loose each section after it has been loosened by plucking out 4-5 threads in each area. A slight hammer tap will loosen any stubborn cells that do not want to release the foundation threads.
Now you are ready to start weaving using any of the following methods. You can also use a combination of more than one if desired:

Method #1- Using only your loom
Take four dowel rods and cut them in half, so they are now 2ft longest; catch. Next, cut out four pieces of baling wire, so they are about 10″ long, each with about 6 inches of extra length on ends for tacking down later.
Once done, take two dowel rods with tapered ends and attach the wires with an overhand knot just below where they cross each other, leaving 1/2 inch or so at the end. This will be used for your back shaft heddles. You can then attach the other ends to a section on the loom that is closed. Make sure you have enough space allowed to weave throughout the design.
Now take two dowel rods with tapered ends and cut them, so there are about 10-12 inches of dowel rod left.
Then attach a wire at 4 inches or so from one end and fold it over so it forms a loop which you will use for heddles in the beam by sliding two rows down from the top of the warp area between each warp thread, leaving 1/2 inch below where they cross each other tied with an overhand knot just like previous ones were done.
Now tie dowels onto the opposite side of the back shaft, so they rest on top of heddles with about 2 inches hanging out from underneath. You can now start weaving using either a warping board or loom to determine pattern placement and color order. Continue warping until the project is complete, remembering to add in new yarn colors at proper points when switching from one color to the next if going for more than four colors.
Method #2- Using just a Warping Board
Follow all instructions used in method #1 above, except you, will not use dowel rods this time since the weaver’s warp beam must be used instead. Also, follow instructions included with the purchase of the weaver’s warp beam for this process. This allows you to re-arrange your weaving design as many times as you wish before actually starting to weave it.

Method #3- Using a loom instead of a warping board
For this method, you will use the same dowel rods as described in Method #1 above but no longer make them into looped heddles for the back shaft.
You will instead attach them at equal intervals around the warp threads on either side of the warp just as they were initially from your loom, with five rows being allowed between each dowel rod. This method is the same as method #1, except now you will be using your loom to do all weaving and finishing instead.
Once finished weaving project, remove all extra zig-zag strings by simply snipping close to where they cross each other and remove. This will allow you to pull a dowel rod through the space made by plucking out these strings one at a time once all have been removed from the warp area.
You may now flip your piece over such horizontal warp threads are now on top, unattached from any of the dowels or warping board as described before in Method #1 above. Now you can cut away any extra foundation yarn that is unattached to your zig-zag strips, which should be quickly done at this point since the loops holding them should have already been released after the weaving project was complete.
Conclusion:
I hope this article has offered all the necessary instructions on how to weave a Navajo rug on a loom. Ensure all the precautions while performing the process. Thank you and have a nice day!
Nancy Behan
Nancy is an embroidery artist, fashion blogger and a full time editor at DIY quickly. Nancy edits the fashion section on DIY quickly, focusing on the embroidery and cross stitch articles, alongside with fabric and other costume design elements. She graduated from the University of Michigan with a Bachelor of Arts in Art History. She loves to work on her own projects, read books and watch romantic movies in her spare time.


