How to Adjust Automatic Choke on Honda Lawn Mower
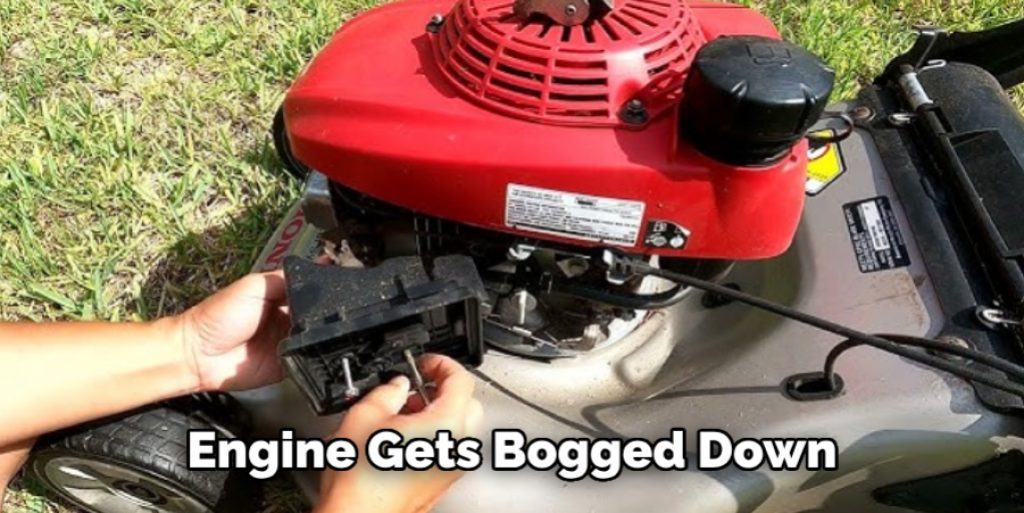
If your Honda lawn mower is not starting, then it might be time to adjust the choke. Choke adjustment can also help when cutting tall or wet grass and the engine gets bogged down. There are a few different ways to adjust a choke on a Honda lawn mower, depending on what type of model you have.
If there is no manual for your specific model available online, try looking at another similar-style Honda machine’s instructions to find out how to adjust automatic choke on honda lawn mower. This article will cover some general guidelines for adjusting any automatic choke on a Honda lawnmower.
What is a Choke?
A choke is a valve that controls the amount of air entering the engine’s fuel system. When starting a cold engine, the choke restricts the airflow to create a richer fuel-air mixture, making it easier to start the engine. Once the engine warms up, the choke should be opened to allow more air into the system for efficient combustion.
You will typically find the choke lever or knob near the carburetor. It is usually labeled with “Choke” or “Start”. Some models may have an automatic choke, which adjusts itself based on engine temperature.
Why Adjust the Choke?
There are a few reasons why you may need to adjust the choke on your Honda lawn mower. The most common is when starting a cold engine. If the choke is not working correctly, it can cause difficulty in starting the engine. Another reason is if the engine gets bogged down while mowing thick or wet grass. In this case, adjusting the choke can help to provide a richer fuel-air mixture and prevent the engine from stalling.
You may also need to adjust the choke if you notice the engine is running too rich or too lean. A rich fuel mixture can cause black smoke and foul your spark plugs, while a lean mixture can cause engine overheating and damage.
5 Common Issues Found on Automatic Choke:
1. Auto choke stuck closed: This is the most common problem which results from a bad automatic choke thermostat. The air/fuel mixture at the start-up is too rich and causes black smoke, sputtering, and eventually stalls.
2. Auto choke stuck open: If this is the case, you will have no power when the automatic choke is in operation because it won’t create enough of an air/fuel mixture to maintain a proper idle speed.
3. Choke Cable not returning after choking out: This could also result from a bad automatic choke thermostat. In addition, the air/fuel mixture at the start-up is too lean and will cause the engine to stall.
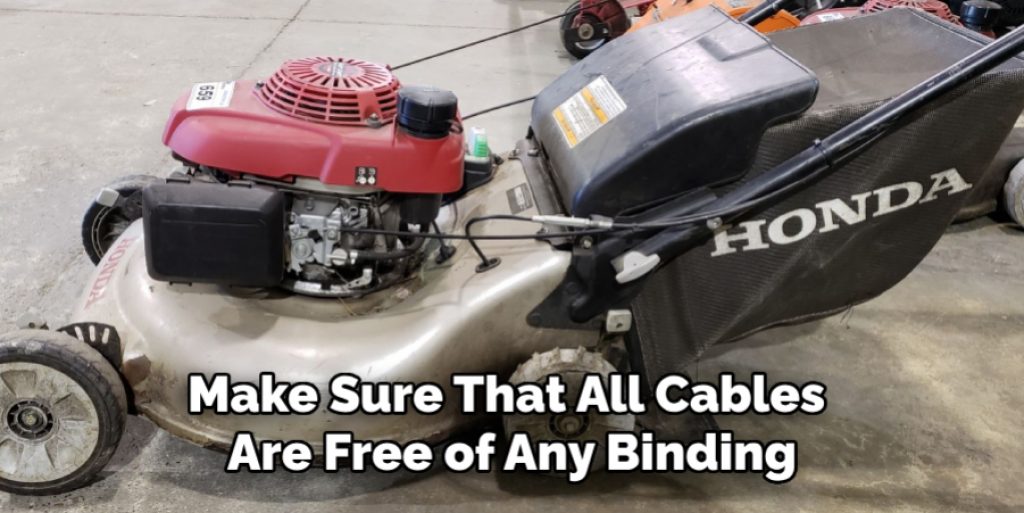
4. Choke Cable Binding or Stuck on Carburetor Body: Make sure that all cables are free of any binding, which would prevent them from operating freely through their full range of operation.
5. Idle speed set too low for auto choke: Set the idle speed high enough for the automatic choke to maintain idle. The best way to determine this is to set the speed at its highest point and then engage the auto choke with a call for full power. If it stalls, then raise the idle speed slightly until it no longer stalls.
7 Symptoms to Know if Your Automatic Choke Needs Adjustment:
1. The engine is hard to start; it takes many pulls of the starter cord or several tries to get it started.
2. After starting, the engine may run roughly for a few seconds before it smoothes out.
3. On older models, you might notice that the choke lever remains in, or partially in, the choke position.
4. The engine runs rough and stumbles during acceleration, especially when it’s hot and at full throttle.
5. When the engine is running at a steady speed, you notice that the choke indicator on the side of the carburetor housing is not flush with its housing or barely protruding from it (indicating an open choke).
6. When the engine is running at a steady speed, you notice that the automatic choke lever (if there is one) does not return to its original position (or does not return at all) when you release it.
7. The pull cord feels loose or sloppy and fails to rewind well after each pull.
Steps to Follow: How to Adjust Automatic Choke on Honda Lawn Mower
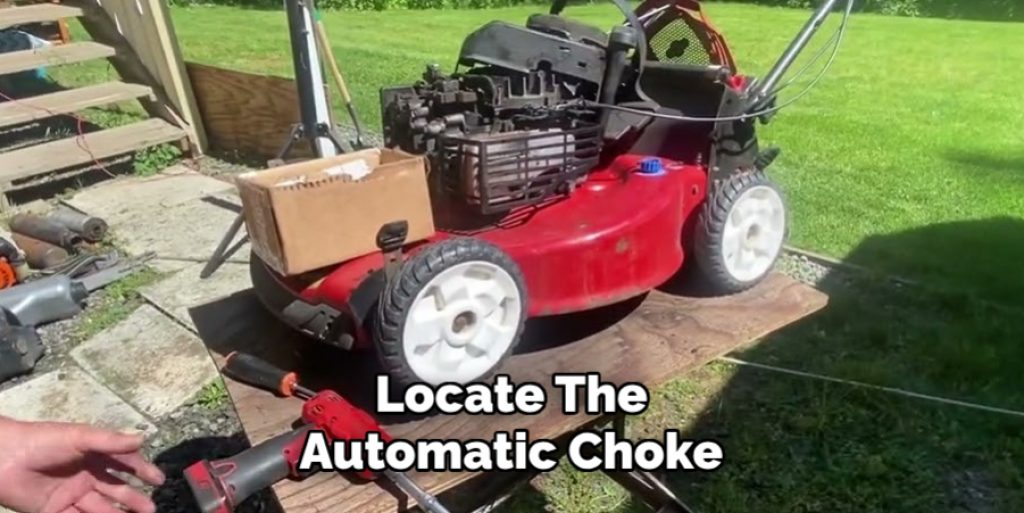
Step 1: Locate the Automatic Choke
The automatic choke is located on the side of the carburetor. It is directly below the throttle control, a small lever under the knob at the top of the mower handle. The automatic choke is connected to the throttle wire that comes from the control lever on the handle. You will need to remove the air filter cover and air filter to access the automatic choke.
Step 2: Disengage the Automatic Choke
Slide the automatic choke lever towards the back of the mower so that it no longer touches the carburetor. The engine should immediately idle faster and start running. If not, then the automatic choke may be stuck in the open position. It would be best if you replaced it with a new one. The automatic choke should be fully disengaged when the throttle is closed and engaged when the throttle is opened.
Step 3: Turn on a water source
Attach a hose to your spigot or an outside faucet. Please turn on the water source and allow it to run for one minute. Ensure the area is clear of people, pets, and flammable objects (i.e., gasoline cans and propane tanks). If you have a Honda GCV160 (5.5HP) engine, the procedure is similar to that of Honda GCV190 (6HP). Also, for both engines, turn on the water source and allow it to run for one minute.
Step 4: Put on safety equipment
Put on safety glasses to protect your eyes from possible debris. Put an old towel down in front of the mower so that any potential debris or water will land on it and not fly up into your face. The towel might get wet, but you should not. You should wear long pants and shoes to protect your legs from any water that might come out of the mower.
Step 5: Shut off the water source
Turn the water source off and disconnect the hose from your faucet or spigot. Allow the area to dry out. It might be best to wait a few minutes. Some engines have an automatic choke, which is connected directly to the throttle cable from the carburetor control lever on the handle. The automatic choke lever is directly under the throttle cable on the engine. Also, some Honda engines have both a throttle and an automatic choke lever. The automatic choke lever is connected directly to the throttle cable from the carburetor control lever on the handle.
Step 6: Locate the choke housing
The choke housing will have a lid that opens by rotating it counterclockwise, away from you. It may be a little difficult to remove because a hose underneath has a hose clamp around it. The choke housing may be attached with two bolts instead of a hose clamp. Remove the lid and set it aside. Make sure you do not lose the paper gasket. It will likely stick to either the housing or the lid.
Step 7: Engage the choke mechanism
Slide the automatic choke lever towards the carburetor so that it is touching again. The mower should idle faster and start running again with water dripping from either side of the engine. If no water comes out, the automatic choke mechanism may be dirty. Clean it and verify that the choke mechanism moves freely. Then repeat Step 3.

Step 8: Remove the Lid to the Choke Housing
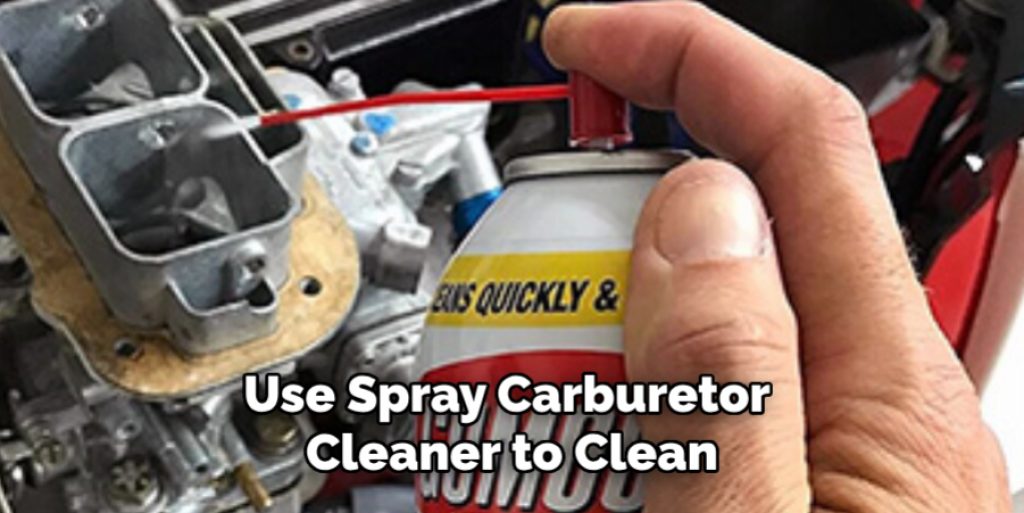
Remove the lid to the choke housing and set it aside. There will be a wire mesh screen inside if you have a foam filter or a hole with a small screw inside if you have a paper filter. Remove the wire mesh screen or screw and set it aside. It will be directly in front of the choke plate. You may need to spray the choke plate with carburetor cleaner to make sure it is clean.
Step 9: Clean the Automatic Choke Mechanism
Use spray carburetor cleaner to clean off the automatic choke mechanism by spraying it through the hole where the wire mesh screen was or where you unscrewed the piece that was blocking your view of whatever was behind it. If you have a small wire brush or an old toothbrush, it may be better to use that instead of a rag. You want to make sure you clean all the residue off of the automatic choke and it is free of any debris.
Step 10: Remove the Lid From the Choke Housing
Rotate the lid counterclockwise so that it is sitting perpendicular to the carburetor and facing you. The automatic choke mechanism will be inside the choke housing under this lid. You may need to pry the lid open if it is stuck shut. Be careful not to break the lid as you pry it open. You may be able to use a flathead screwdriver or similar tool.
Step 11: Reset the Automatic Choke
Turn the lid so that it sits parallel to the carburetor, facing away from you again. The threaded piece on top of this lid should be pointing toward your body, not toward the carburetor. You can determine this by how deep the screwdriver needs to go into the hole to tighten.
Turn the lid counterclockwise until it is snug. Next, test the automatic choke to see if a drop of water comes out of either side of the carburetor. If no water comes out, turn the lid back and forth a few times until water trickles from one side before stopping completely.
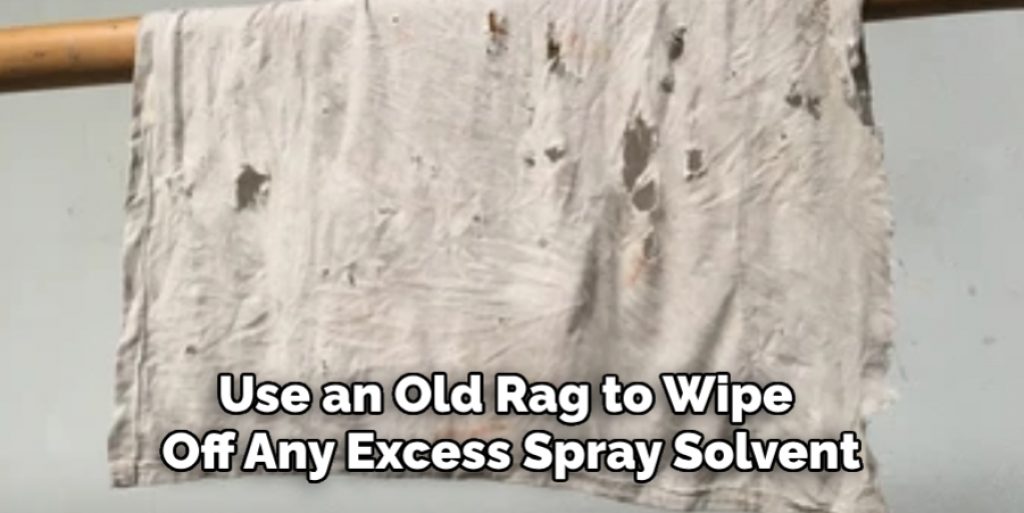
Step 12: Clean Off Excess Spray Solvent
Use an old rag to wipe off any excess spray solvent on the inside walls of the automatic choke housing. Let it dry out before placing the lid back on and screwing it shut again with the wire mesh screen or piece of sheet metal inside. Be careful not to get spray cleaner in your eyes or on your hands.
Step 13: Replace the Lid on the Choke Housing
Slide the original wire mesh screen or sheet metal piece back into its spot so that it blocks your view of whatever is under this lid. Put the lid back on by rotating it clockwise towards you to sit perpendicular to the carburetor facing you. The threaded piece on top of this lid should be pointing away from you, not toward the carburetor. Turn it clockwise until it is snug.
Step 14: Reconnect the Hose to Your Faucet or Spigot
Turn the water source back on and reconnect the hose to your faucet or spigot. Test the mower by pressing on the handle and allowing it to start. It should no longer stall and should idle faster than before. If you still smell gas while idling, turn off the water source and disconnect your hose once more.
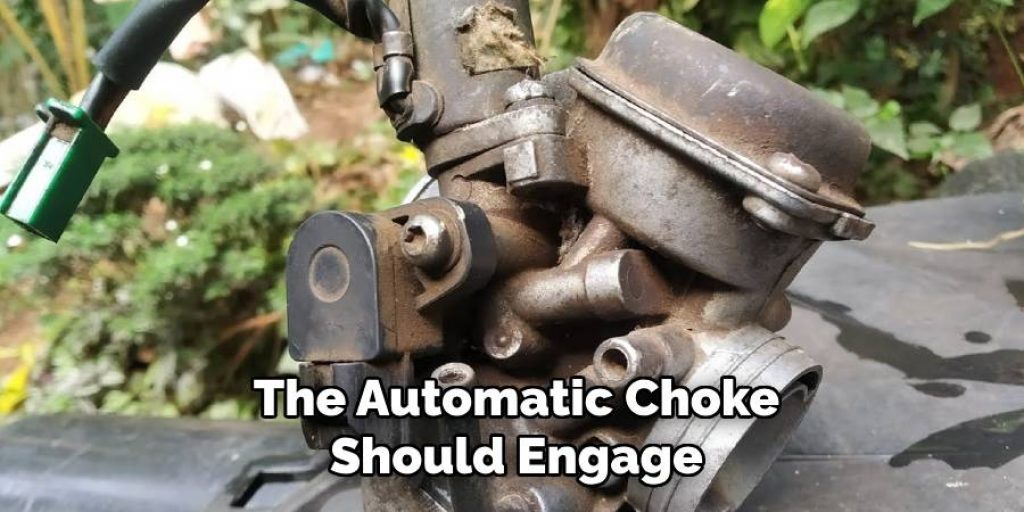
Step 15: Test the Choke Mechanism
Remove the wire mesh screen or screw you took out of your automatic choke housing because it should no longer be needed. Turn on the water source and allow water to run through your lawnmower for at least 10 seconds. Please turn off the water, put your lawn mower back on its wheels, and start it up. The Automatic Choke Should Engage, and your lawnmower will restart right away with no issues.
Step 16: Reassemble the Lawnmower
Once you have completed all of these steps, reassemble your lawnmower by replacing the side cover and reconnecting the spark plug wire. Next, put gas in your gas tank so that you can start up your lawnmower without having to restart it with water.
If you no longer have the automatic choke housing, look in your owner’s manual to see how to adjust your automatic choke manually. Manual adjustment instructions are different for each lawnmower model, so make sure you consult your manual if this is the case.
Tips to Prevent Issues on Automatic Choke in Lawn Mower:
- Clean or replace the air filter immediately after start-up to prevent dust build-up and reduce the strain on your lawnmower engine.
- Excess fuel will clog and damage the automatic choke system if it is not drained completely from old oil.
- Gasoline with 10% ethanol has been known to damage the rubber gasket within the automatic choke.
- Use fresh fuel to prolong engine life and reduce carbon build-up on pistons, valves, and other parts.
- Don’t push down too hard when cutting; doing so can cause excess strain on your lawnmower’s motor components and increase the likelihood of damage over time.
- Keep your lawnmower clean and free of debris to prevent dust, dirt, or water from getting into the automatic choke housing.
- Regularly inspect and maintain your lawnmower’s automatic choke mechanism by following the manufacturer’s recommended maintenance schedule.
- If you notice any issues with your lawnmower’s automatic choke, consult your owner’s manual or take it to a professional for proper repairs.
- Avoid using your lawnmower in wet or damp conditions, as this can cause water to make its way into the automatic choke housing and clog the system.
- When storing your lawnmower for an extended period of time, drain all fuel from the tank and run the engine until it stops to prevent build-up and potential damage to the automatic choke.
- If you are using an older lawnmower model, consider upgrading to a newer one with a more efficient and reliable automatic choke system.
By following these tips on how to adjust automatic choke on honda lawn mower, you can prevent issues with your lawnmower’s automatic choke and ensure its longevity and optimal performance. Remember to always read the owner’s manual and follow proper maintenance procedures to keep your lawnmower running smoothly. Happy mowing!

Frequently Asked Questions:
Q: What Should I Do if My Lawnmower’s Automatic Choke is Not Engaging?
A: First, check to make sure that there is enough fuel and the air filter is clean. If these are not the issue, consult your owner’s manual for instructions on how to manually adjust the choke or take it to a professional for repair. You may also need to replace the automatic choke housing if it is damaged or clogged with debris.
Q: Can I Adjust the Automatic Choke on My Lawnmower?
A: Yes, most lawnmowers have an adjustable automatic choke that can be adjusted using a screwdriver or other tool. Consult your owner’s manual for specific instructions on how to adjust the choke for your model. The manual may also recommend a specific choke adjustment for different weather conditions. It is important to follow these guidelines for optimal performance.
Q: Do I Need to Clean the Automatic Choke on My Lawnmower Regularly?
A: Yes, it is recommended to clean or replace the air filter and drain the old fuel from the tank regularly to prevent dust and debris build-up in the automatic choke housing. This will ensure proper functioning of the choke and prevent potential damage to your lawnmower’s engine. Remember to also follow the manufacturer’s recommended maintenance schedule for your lawnmower.
Q: Can I Use Any Type of Gasoline in My Lawnmower?
A: It is best to use fresh gasoline with a low ethanol content (less than 10%) to prevent damage to the automatic choke and other engine components. Consult your owner’s manual for the recommended type of gasoline for your specific lawnmower model. If you are unsure, it is always best to err on the side of caution and use fresh, clean fuel.
Q: Is it Normal for My Lawnmower to Idle Faster After Adjusting the Automatic Choke?
A: Yes, this is normal and expected. Adjusting the automatic choke allows more air to enter the engine, causing it to idle faster. This is necessary for the proper functioning of your lawnmower’s engine. If you notice any abnormal behaviors or smells coming from your lawnmower while idling, consult a professional for further inspection. It is important to regularly maintain and adjust your automatic choke for optimal performance. Always remember to follow proper safety precautions when working on your lawnmower.
Conclusion:
This article has provided you with the information you need on how to adjust automatic choke on honda lawn mower. You can now go out and enjoy a beautiful summer day knowing that your gas-powered engine will start when it needs to, every time. If this is all too much for you or if something seems off in our guide, please consult an expert at your nearest hardware store before operating the machine again.